How to Remove Mountain Bike Rear Wheel in 8 Easy Steps
Removing the rear wheel of your mountain bike can seem tricky, especially if you’re new to bike maintenance. Many riders struggle with it, feeling frustrated or worried about damaging their bike. But don’t worry—you’re not alone, and with a few simple steps, you can do it easily and confidently.
To remove your mountain bike’s rear wheel, start by preparing your bike and tools, including a quick-release lever or axle wrench. Loosen and take out the skewer or thru-axle carefully.
Detach the brake system, whether disc or rim brakes, to avoid damage. Gently lift the wheel out, ensuring the cassette or freehub is free if needed.
After inspecting the wheel and frame, reinstall the wheel securely. Finish with final checks for smooth operation. Keep going to uncover more easy tips!
Key Takeaways
- Gather your tools, stabilize the bike, and shift to the smallest sprocket. This makes removing the wheel much easier.
- Loosen the quick-release lever or thru-axle while keeping the wheel supported. Be gentle to avoid dropping or damaging it.
- Depending on your brake type, detach the brake system components. For rim brakes, disconnect the brake arms; for disc brakes, remove the rotor if needed.
- Carefully remove the rear wheel, making sure it stays aligned and doesn’t get damaged. Take your time to avoid any mishaps.
- When reinstalling, put the wheel back in place, tighten all fasteners securely, and double-check everything.
- Finally, do a quick test ride to make sure everything is set up correctly and working smoothly.
Prepare Your Bike and Tools for Rear Wheel Removal
Before you start removing the rear wheel, gather all the tools you’ll need. You’ll want a quick-release lever or an axle wrench, depending on your bike.
Make sure your bike is stable—using a bike stand or placing it on a flat surface. Clear the area around your bike so nothing gets in the way.
Ensure your bike is steady on a flat surface and clear the surrounding area for safe, hassle-free wheel removal.
Shift your gears to the smallest sprocket. This makes taking off the wheel easier. Also, check if your bike has disc brakes or rim brakes, and get ready accordingly.
If you have disc brakes, know how to handle the calipers to avoid any damage. Having everything prepared will make the process smoother and save you time.
Once everything’s in place, you’re all set to remove the rear wheel safely and efficiently.
Loosen and Remove the Quick-Release Skewer or Thru-Axle
Start by checking if your bike has a quick-release skewer or a thru-axle.
Loosen the fastening mechanism securely to free the wheel.
Then, carefully remove the skewer or axle to detach the rear wheel from your bike.
Identify Skewer or Axle
To remove your mountain bike’s rear wheel, you first need to identify whether it’s held in place by a quick-release skewer or a thru-axle.
Look at the center of the wheel’s axle. If you see a lever that clamps down and can be flipped open by hand, it’s a quick-release skewer.
These usually have a small knob or lever on one side and a nut or threaded end on the other. If the axle appears thicker, with no quick-release lever, and is secured with bolts or a large axle nut, it’s a thru-axle.
Thru-axles are often threaded or have a lever locking mechanism. Correct identification helps you know what tools and steps are needed to remove the wheel safely.
Loosen Fastening Mechanism
Grasp the quick-release lever or the thru-axle handle firmly and give it a strong, counterclockwise turn to loosen it. If you’re using a quick-release, you’ll feel it start to open as you turn.
For a thru-axle, turn the handle or screw it loose until it’s free from the dropout. Make sure to support the wheel as you loosen the mechanism so it doesn’t fall.
Don’t force it. If it’s tight, check for any debris or rust that might be causing resistance. Once loosened, you’ll notice the skewer or axle can be pulled out easily.
This step releases the tension holding the wheel in place, making removal straightforward in the next step.
Remove Quick-Release or Thru-Axle
Carefully pull out the quick-release skewer or thru-axle once it’s loosened. If you’re using a quick-release, unscrew the lever and slide the skewer out from the hub.
For a thru-axle, fully unscrew the axle bolt and gently pull it out. Be mindful of any spacers or washers, and keep track of their position.
Support the wheel to prevent it from falling as you remove the skewer or axle. Once it’s out, set the skewer or thru-axle aside in a safe place.
This step frees the wheel from the frame, allowing you to remove it completely. Make sure the wheel is loose and free before moving on to the next step.
Safely Detach the Brake System (Disc or Rim Brakes)
First, check if your bike has disc or rim brakes to figure out the right method.
Next, prepare the brake parts by loosening or removing the brake caliper or pads if needed.
Finally, release the brake tension so you can safely take off the wheel without any issues or damage.
Identify Brake Type
To safely detach the rear wheel, you need to identify whether your bike has disc brakes or rim brakes, since each requires a different approach. First, look at the braking surface: if the brake pads press directly on the wheel rim, it has rim brakes. If there’s a rotor attached to the hub, it’s disc brakes.
Next, check the brake calipers. Rim brakes use linear or V-brakes, while disc brakes have a caliper around the rotor. Finally, examine the brake lever. Pull it and observe the movement—rim brake levers pull a cable that tightens the brake pads, while disc brake levers often operate hydraulics or a cable linked to the caliper.
Correctly identifying your brake type ensures safe and effective wheel removal.
Prepare Brake Components
Before removing the wheel, you need to detach the brake components to prevent damage and ensure safety. For rim brakes, loosen the brake calipers or release the brake cable, making sure the brake pads don’t get caught or damaged.
If your bike has disc brakes, locate the quick-release lever or bolts holding the caliper in place. Carefully detach the caliper from the fork or frame, being careful not to strain the brake hose or cable.
Keep the brake pads separated to avoid contact and potential damage. If your brakes have quick-release mechanisms, open them fully to free the wheel.
Handle brake components gently to prevent misalignment or damage during wheel removal. Once everything is detached, you’re ready to safely remove the rear wheel.
Release Brake Tiston
When releasing the brake tension, you want to carefully disengage the brake system to avoid damage or misalignment. First, figure out if you’re dealing with disc or rim brakes.
Next, loosen the brake caliper bolts or quick-release levers to free the brake pads. Then, gently release the brake cable or hydraulic line, making sure there’s no tension left.
If needed, remove the brake caliper from the fork or frame. This makes it easier to take off the wheel and work on the brake system smoothly.
Carefully Remove the Rear Wheel From the Frame
Gently lift the rear wheel straight out of the dropouts, making sure not to force or twist it. Forcing it could damage the frame or the wheel. Hold the frame steady with one hand and grasp the wheel with your other hand.
Carefully slide the wheel backward and upward, keeping it aligned. This helps avoid scratching the frame or knocking parts loose. If your bike has quick-release skewers, loosen them fully before removing the wheel.
For bikes with thru-axles, unscrew or unclip the axle completely. Be mindful of brake components or derailers that might be attached. Gently move or disconnect them if needed.
Take your time during removal to prevent any accidental damage. Once the wheel is free, set it aside in a safe spot.
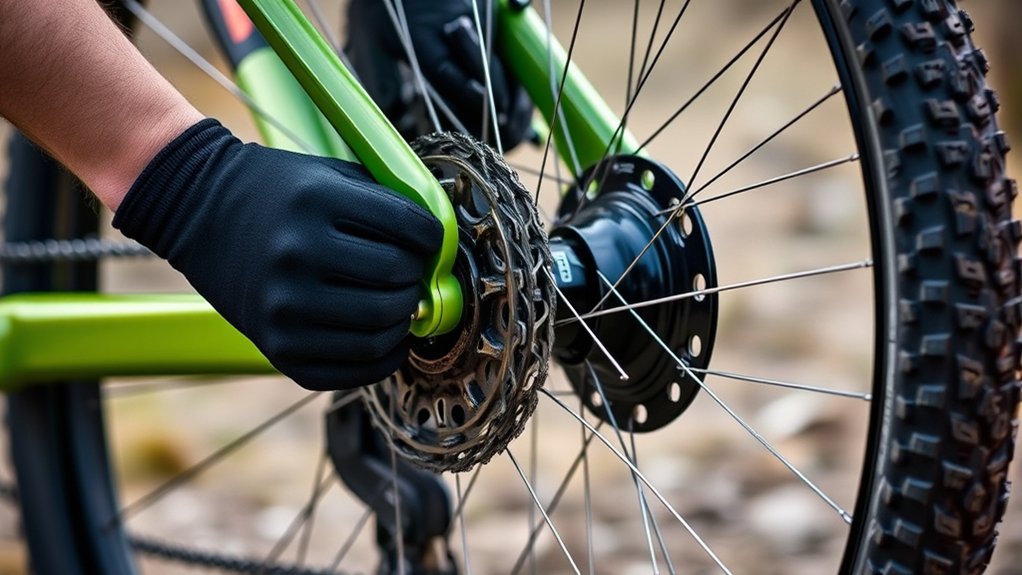
Remove the Cassette or Freehub if Necessary
If you need to replace or service the cassette or freehub, start by removing the rear wheel from the bike. Once it’s off, follow these steps to remove the cassette or freehub:
- Remove the cassette lockring: Use a cassette lockring tool and a wrench to turn it counterclockwise.
- Slide off the cassette: Carefully slide the cogs and spacers off the freehub body.
- Detach the freehub (if needed): Unscrew the freehub body from the hub using the appropriate tools.
Taking these steps guarantees proper access for maintenance or replacement. Make sure to keep all parts organized for reassembly. Proper removal minimizes risk of damage and prepares the wheel for any necessary repairs or upgrades.
Inspect the Wheel and Frame for Damage or Wear
Before removing the rear wheel, take a close look at the wheel and frame for any signs of damage or wear. Check the rim for cracks, dents, or corrosion.
Spin the wheel to see if it’s true. Wobbling means the rim might be warped or spokes are loose. Look for broken or worn spokes, which can affect stability.
Examine the hub and axle for rust, cracks, or too much play. Also, inspect the frame around the dropout area for dents, cracks, or stress marks.
Make sure the quick-release or axle is in good shape and works smoothly. Address any issues before moving on, as riding with damaged parts can be dangerous.
A thorough inspection helps prevent more damage and ensures safe reinstallation later.
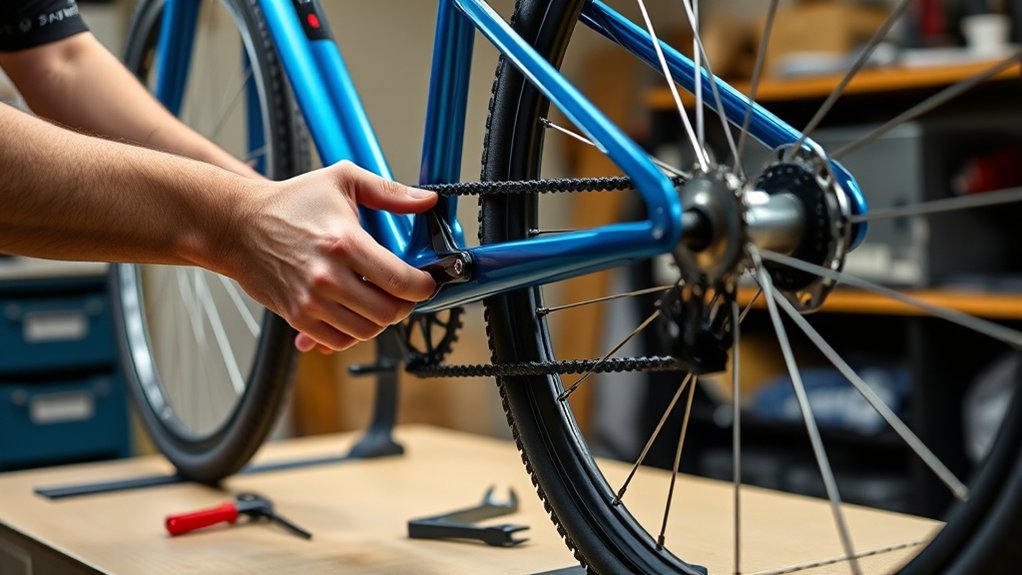
Reinstall the Rear Wheel and Secure the Axle or Quick-Release
To reinstall the rear wheel, position it so that the axle or quick-release lines up properly with the dropout slots on your bike frame. Make sure the wheel is centered between the frame stays. Once it’s in place, follow these steps:
Align the rear wheel with the dropout slots and ensure it is centered before securing.
- If you’re using a quick-release, tighten the lever until it’s snug against the fork or frame, then flip it to lock it securely.
- For axle bolts, tighten each nut evenly with a wrench, making sure the wheel stays centered.
- Check that the axle or quick-release is fully secured, with no side-to-side movement.
Finally, confirm the wheel spins freely without rubbing against the brakes or frame. Properly securing the wheel is essential for safe riding and smooth performance.
Perform Final Checks for a Smooth Reinstallation
Once the wheel is in place, it’s important to do some final checks to make sure everything is secure and working right. First, spin the wheel to see if it turns smoothly without wobbling or rubbing against the brake pads.
Check that the quick-release or axle clamp is tight and properly secured. Gently pull on the wheel to make sure it doesn’t shift or loosen. Inspect the brake system—make sure the brake pads are aligned and engaging correctly when you pull the brake lever.
If your bike has gears, verify that they shift smoothly. Finally, take the bike for a quick test ride to see if everything feels stable and responsive. Doing these checks helps prevent problems during your ride and makes sure your rear wheel is reinstalled correctly.
Frequently Asked Questions
How Do I Identify if My Bike Uses a Quick-Release or Thru-Axle?
You can tell if your bike uses a quick-release or thru-axle by looking at the rear wheel.
If you see a lever that you flip open or close, that’s a quick-release system.
If there’s a bolt that needs a wrench to remove, then it’s a thru-axle.
Quick-releases are usually shorter and easier to access.
Thru-axles tend to be sturdier, often threaded, and require tools to remove.
What Safety Precautions Should I Take Before Removing the Rear Wheel?
Before removing your rear wheel, think of it like securing a fragile treasure—safety first. You should wear gloves to protect your hands from dirt and sharp edges, and make certain your bike is stable, ideally on a stand.
Check that the brakes are disengaged to prevent accidental damage, and avoid applying excessive force. These precautions help prevent injuries and guarantee a smooth, safe removal process.
Can I Remove the Rear Wheel Without Disconnecting the Brake System?
Yes, you can remove the rear wheel without disconnecting the brake system if you have rim brakes. Just open the brake calipers or release the brake cable, then lift the wheel out.
For disc brakes, you usually don’t need to disconnect anything. Just make sure the brake rotor clears the caliper as you slide the wheel out.
Always check your specific brake setup before proceeding to avoid damage.
How Do I Properly Align the Cassette or Freehub During Reinstallation?
Think of aligning your cassette like fitting puzzle pieces together. To do it right, slide the cassette onto the freehub, making sure the smallest sprocket lines up with the gap in the freehub body.
Push it firmly until it seats fully, then secure the lockring with a wrench. Proper alignment guarantees smooth shifting and saves you from future frustrations, just like completing that tricky puzzle seamlessly.
What Should I Do if the Rear Wheel Won’T Come Out Easily?
If the rear wheel won’t come out easily, start by checking for any brake or derailleur obstructions. If you have disc brakes, release the brake. If needed, open the brake caliper to give yourself more room.
Gently wiggle the wheel side to side, applying light pressure. This can help loosen it up. Make sure the quick-release lever or axle nuts are fully undone.
If it’s still resisting, take a close look for any debris or damage around the axle. Sometimes dirt or bent parts can cause the wheel to stick.
Conclusion
Removing your mountain bike’s rear wheel is simple once you know the steps. Did you know that regular maintenance and quick repairs can extend your bike’s lifespan by up to 30%?
By mastering this process, you’ll save time and money, and keep riding longer. Just be sure to double-check everything before hitting the trails again.
With a little practice, you’ll be confidently removing and reinstalling your rear wheel in no time. This keeps your mountain biking adventures smooth and worry-free.