How to Build a Hybrid Bike in 8 Simple Steps
Building a hybrid bike can feel overwhelming, especially if you’re new to bike assembly or customization. Many people struggle with figuring out where to start or which parts to choose.
But don’t worry—you’re not alone, and with a little guidance, you can confidently put together a bike that fits your style and needs.
To build a hybrid bike in 8 simple steps, start by setting a budget and gathering essential tools like Allen wrenches and screwdrivers.
Then, learn about compatible components, choosing a frame suited to your riding style.
Assemble the frame, fork, and handlebar, ensuring all parts are aligned and tightened properly.
Adjust your saddle height and handlebar position for comfort.
Finally, test ride and fine-tune your bike for perfection.
Keep exploring tips to customize your ride even better.
Key Takeaways
- Gather all the essential tools you’ll need, set a budget, and organize your workspace before you start building.
- Take some time to understand the different bike components. Make sure everything is compatible, especially between the frame, drivetrain, wheels, and brakes.
- Choose the right frame size and style based on how you plan to ride. It’s a good idea to test the fit to ensure it feels comfortable.
- During assembly, adjust the saddle height, handlebar position, and other features to suit your comfort.
- Once everything is put together, take the bike out for a test ride. Use this opportunity to fine-tune the fit and controls.
- Make any necessary adjustments to ensure your ride is smooth and comfortable.
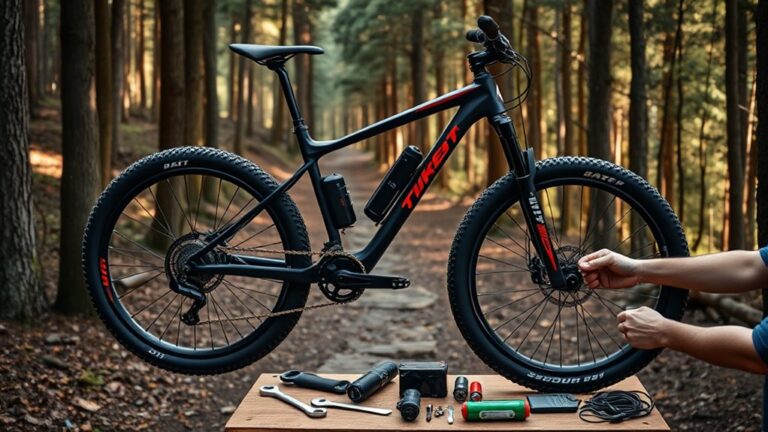
Determine Your Budget and Gather Essential Tools
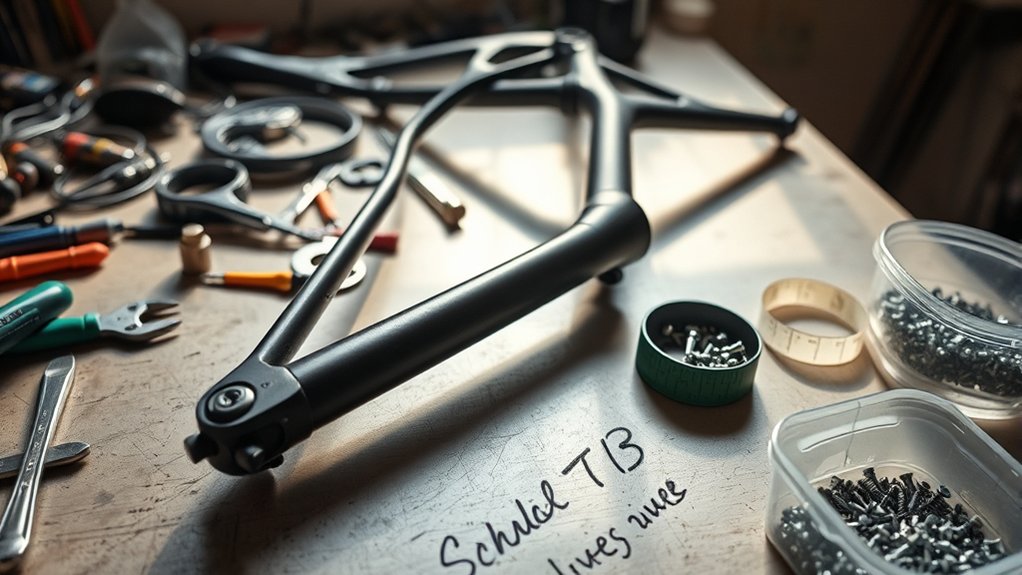
Before you start building your hybrid bike, it’s key to set a clear budget and gather the right tools. Think about how much you’re willing to spend, including parts, tools, and potential upgrades. Having a realistic budget helps you stay focused and avoid overspending.
Next, gather essential tools like Allen wrenches, screwdrivers, tire levers, a pump, and maybe a bike stand. These are necessary for assembling and adjusting your bike’s parts. Make sure your workspace is clean, well-lit, and organized to keep track of everything.
Having the right tools ready saves you time and frustration during the build. Planning ahead ensures your project goes smoothly and stays within your financial limits.
Understand the Basics of Hybrid Bike Components
Understanding the basic components of a hybrid bike is key to building one that fits your riding style. The main parts are the frame, drivetrain, and wheels.
The frame gives the bike its overall shape and support. It’s usually made of aluminum or steel and comes in different sizes to fit you comfortably.
The frame provides shape and support, typically made of aluminum or steel, in various sizes for comfortable fitting.
The drivetrain is what makes pedaling smooth across different terrains. It includes gears, shifters, and the chain, all working together to transfer power to the wheels.
Wheels are crucial for movement and stability. They consist of tires, rims, and hubs, which influence ride comfort and how fast you go.
Finally, brakes help you stop or slow down. You’ll find disc brakes or rim brakes, depending on the bike.
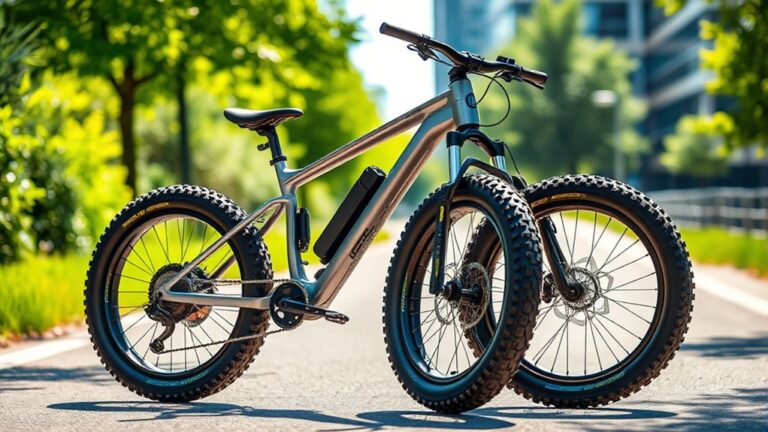
Choose the Right Frame Size and Style for Your Riding Needs
To find the right frame size, consider your height and how it matches the bike’s geometry.
Think about the style of bike that suits your riding, whether it’s for commuting, fitness, or casual rides.
Also, factor in the terrain you’ll be riding on to choose a frame and style that offer the best comfort and performance.
Match Frame to Height
Your bike’s frame size is crucial for comfort and control, so choosing one that matches your height is essential. To find the right fit, stand over the top tube of the bike; there should be about 1-2 inches of clearance for road bikes or 3-4 inches for mountain bikes.
Your seated position should feel natural, with your legs slightly bent at the bottom of each pedal stroke. Remember, a frame that’s too small or too large can cause discomfort and reduce your control.
Check the manufacturer’s sizing chart to match your height and inseam measurements. If possible, test ride different frames to see how they feel.
Properly matched frame size improves your riding experience, prevents injuries, and makes pedaling more efficient.
Select Suitable Bike Style
Choosing the right bike style and frame size depends on how and where you plan to ride. If you want comfort on city streets, a hybrid or comfort bike with a more upright position is ideal.
For faster rides on paved roads, consider a road-style hybrid with a lighter frame. If you plan to do some light off-road adventures, a mountain hybrid with wider tires and a sturdier frame suits better.
Think about your riding posture. If you prefer a relaxed stance, pick a bike with an upright frame. If you want a more aggressive riding position, go for a sportier style.
Always check that the frame size fits your height and reach. Picking the right style makes your rides more enjoyable and efficient.
Consider Riding Terrain
Selecting the right bike style and frame size depends on the terrain you’ll ride on most often. If you’re riding mainly on paved roads, a lightweight hybrid or city bike with an upright position is ideal.
For mixed terrains, go for a hybrid with wider tires for better grip and stability. Are you tackling rough trails or dirt paths? In that case, pick a sturdier frame with suspension to absorb shocks.
Flat handlebars give you control on uneven surfaces, while drop bars are better for longer rides on smoother terrain. Your riding style—whether commuting, fitness, or off-road adventures—also influences your choice.
Matching your bike’s design to your terrain ensures comfort, efficiency, and safety. This makes your riding experience more enjoyable and effective.
Select Compatible Drivetrain, Brakes, and Wheelset
The compatibility of your drivetrain, brakes, and wheelset is key to ensuring smooth performance and safety on your hybrid bike. First, check that your drivetrain components like the chain, cassette, and crankset match the same gear system and mounting standards.
For brakes, make sure your brake calipers are compatible with your frame and wheel rims, whether you’re going with rim or disc brakes. When choosing a wheelset, verify it fits your frame’s axle type and spacing, and that the hub and rim sizes match your brake system.
Using incompatible parts can lead to poor shifting, brake failure, or wheel misfit. Take the time to research and confirm compatibility for each component to build a reliable, efficient hybrid bike.
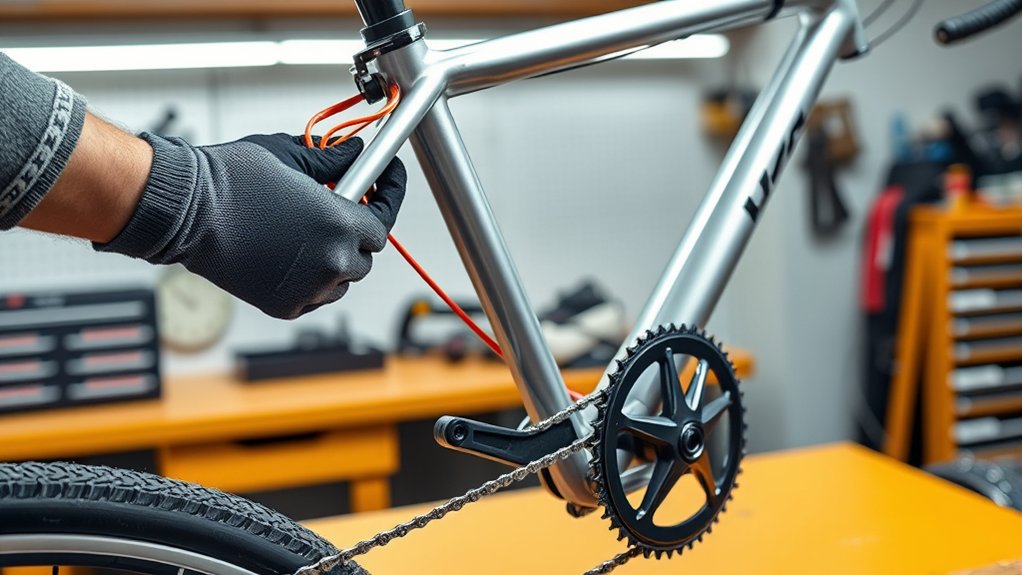
Assemble the Frame, Fork, and Handlebar Components
Begin by positioning the main frame and fork components on a clean, stable surface. Attach the fork to the head tube, making sure the steerer tube fits snugly and is aligned properly.
Tighten the headset bearings securely, but don’t over-tighten, to allow smooth steering. Next, connect the handlebar to the stem, then secure the stem onto the steerer tube, adjusting it for comfortable reach and control.
Verify that the handlebars are straight and tighten all bolts evenly. Confirm that the fork, frame, and handlebar are aligned correctly, and all bolts are firmly tightened.
Ensure handlebars are straight, bolts are even, and all components are properly aligned for safe, smooth riding.
Take your time to guarantee everything is secure and properly aligned, as this foundation affects the bike’s handling and comfort. Once assembled, you’re ready for the next steps.
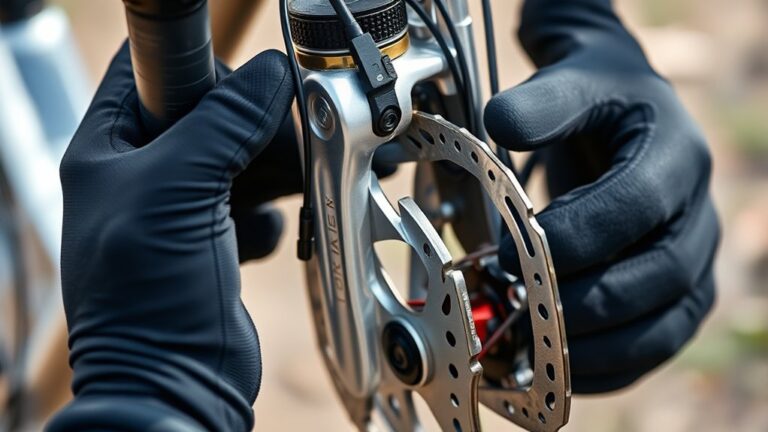
Install Gearing, Brakes, and Tires Correctly
Make sure your gears are properly aligned so shifting feels smooth and reliable. It’s a small step that makes a big difference during your ride.
Secure your brakes tightly to guarantee quick, safe stops. Double-check that everything is snug so you’re ready for any situation.
Finally, check that your tires are mounted correctly and inflated to the right pressure. Proper installation now helps you enjoy a safe, efficient ride.
Proper Gear Alignment
Ensuring your gears, brakes, and tires are properly aligned is key for a smooth and safe ride. First, check that your gears shift smoothly across all cogs. If shifting feels sluggish or noisy, adjust the derailleur so it lines up perfectly with each gear.
For brakes, make sure brake pads sit evenly against the rims or discs. They should engage fully when you squeeze the levers. Misaligned brakes can reduce stopping power or cause uneven wear.
Finally, verify that your tires are centered within the rims and properly inflated to the recommended pressure. Well-aligned gears, brakes, and tires improve handling, prevent early wear, and boost safety.
Take your time to fine-tune each component for the best performance on every ride.
Secure Brake and Tire Installation
Properly securing your brakes, gears, and tires is essential for a safe and efficient ride. Start by tightening the brake cables and making sure the brake pads contact the rims evenly.
Check that the brake levers engage smoothly without sticking. For gears, verify the derailleurs are aligned correctly and the shifters move smoothly through all gears.
Adjust the tension if necessary. When installing tires, make sure they are seated properly on the rims and inflated to the recommended pressure.
Confirm that the valve stems are secure and the tires are centered. Spin the wheels to check for wobbling or uneven contact.
Proper installation helps avoid accidents and improves performance, so take your time to double-check each component before heading out.
Adjust Saddle Height, Handlebar Position, and Other Settings for Comfort
To ride comfortably, you should fine-tune your saddle height, handlebar position, and other settings on your hybrid bike. Start by adjusting the saddle height so that when you sit on it, your leg is almost fully extended at the bottom of the pedal stroke, with a slight bend in your knee. This helps reduce strain and makes you more efficient.
Next, set the handlebar height to match your back’s natural position—higher for comfort, lower for better control. Make sure the handlebars are rotated so your wrists stay in a natural position. Don’t forget to check the saddle’s tilt; it should be level or slightly tilted forward.
Make small adjustments and test your comfort on a short ride. Keep an eye on your posture to ensure it stays relaxed and pain-free.
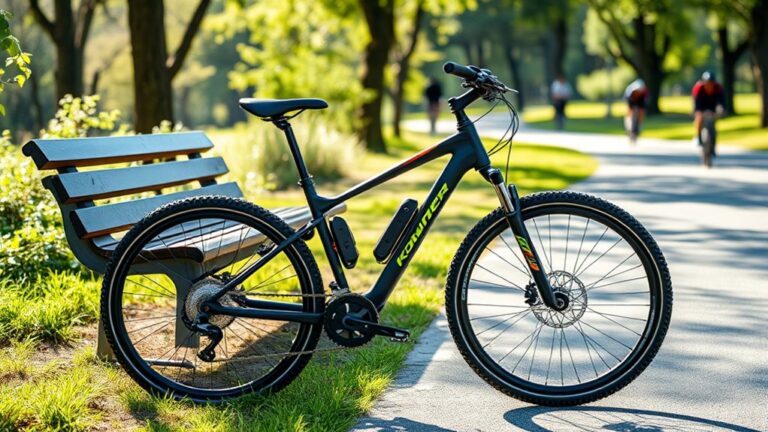
Test Ride and Fine-Tune Your Hybrid Bike for a Perfect Fit
Once you’ve made your initial adjustments, it’s important to take your hybrid bike for a test ride to see how it feels in real-world conditions. Pay attention to your comfort, control, and overall feel.
Ride on different terrains and vary your speed to spot any discomfort or awkward positions. If your hands, back, or knees feel strained, tweak your handlebar height or saddle position.
Check if you can easily reach the brakes and gears without stretching or straining. Make small adjustments and test again until everything feels natural.
Frequently Asked Questions
What Safety Gear Should I Wear When Building and Riding My Hybrid Bike?
When building and riding your hybrid bike, you should wear a helmet for head protection and gloves to safeguard your hands.
Consider safety glasses to protect your eyes from debris during assembly and riding.
Wear reflective clothing or accessories for visibility, especially at night.
Sturdy shoes with good grip help control your pedals, and knee and elbow pads provide extra safety if you’re new to cycling.
Always prioritize safety to enjoy your ride confidently.
How Do I Troubleshoot Common Issues During Assembly?
You can troubleshoot common assembly issues by carefully inspecting each component, making sure everything is properly aligned, and tightening all bolts and nuts.
If your brakes feel weak, check the cable tension and adjust it if needed. For gear shifting problems, ensure the derailleur is correctly aligned and the cables aren’t frayed.
Don’t forget to take your bike for a test ride after making adjustments. Most problems get fixed through patience and small, precise tweaks.
Can I Upgrade Components Later On?
Yes, you can upgrade components later on. As you ride your hybrid bike, you’ll discover which parts you’d like to improve, like shifting, brakes, or tires.
Upgrading is usually pretty straightforward if you pick compatible parts. Just keep your bike’s specifications in mind when shopping for replacements.
Regular maintenance and upgrades help your bike perform better and last longer, making your riding experience more enjoyable.
How Often Should I Maintain My Hybrid Bike?
You should maintain your hybrid bike regularly to guarantee smooth rides and safety. Aim for a quick check every few rides—inspect tires, brakes, and chain.
Every few months, do a more thorough tune-up, including lubrication and brake adjustments. Pay attention to unusual noises or sluggish performance, which signal urgent maintenance.
Staying consistent with these checks keeps your bike in top shape, preventing costly repairs and prolonging its lifespan.
What Are the Best Cleaning Practices for Hybrid Bikes?
You should regularly clean your hybrid bike to keep it in top shape. Use a gentle bike-specific cleaner or mild soap and water. Focus on removing dirt from the frame, chain, and gears, and dry everything thoroughly.
Avoid using high-pressure water, as it can damage components. After cleaning, lubricate the chain to prevent rust and ensure smooth rides. Regular cleaning helps reduce wear and extends your bike’s lifespan.
Conclusion
Building your hybrid bike might seem intimidating at first, but with patience and attention to detail, you’ll be riding in no time. Take it step by step, and soon you’ll have a bike you built yourself.
Follow these steps carefully, and you’ll end up with a custom ride tailored just for you. Remember, Rome wasn’t built in a day so don’t rush the process.
With perseverance, you’ll turn a pile of parts into a trusty steed ready to hit the road. Once it’s done, you’ll have a bike that’s built to last and perfect for your adventures.
In the end, building a hybrid bike is all about patience and attention to detail. You’ll be proud of your custom ride and enjoy every mile on your new bike.