7 Easy Steps to Adjust Mountain Bike Brakes
Having reliable mountain bike brakes is essential for your safety and confidence on the trail. Many riders struggle with adjusting their brakes correctly, leading to squeaks, rubbing, or poor stopping power. Don’t worry—you’re not alone, and mastering this simple maintenance can make a big difference.
To adjust your mountain bike brakes, first check your brake pads for wear and proper alignment. Loosen the caliper bolts, then center the caliper over the rotor to avoid rubbing.
Next, adjust the brake cable tension so pads move close but don’t drag. Fine-tune the brake lever reach for comfortable control. Test your brakes safely, then troubleshoot any squeaks or dragging.
Keep up with regular maintenance to guarantee lasting brake performance. Investigate these steps further to master smooth, reliable stopping power.
Key Takeaways
- Loosen the caliper bolts and center the caliper over the rotor. This helps prevent rubbing and ensures the brake pads contact the rotor evenly.
- Adjust the brake cable tension by loosening the anchor bolt. Pull the cable taut and then secure the bolt firmly.
- Fine-tune the brake lever reach using the adjustment screw. This makes the lever more comfortable and easier to control.
- Check the brake pads for wear or contamination. Clean the pads and rotor with rubbing alcohol if needed.
- Test how the brake lever responds. Make small adjustments until the brakes engage smoothly and quietly.
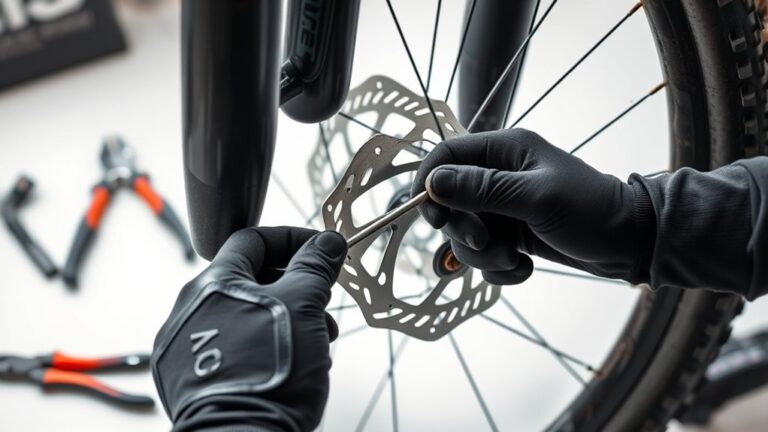
Check Your Mountain Bike Brake Pads for Wear and Alignment
Before you adjust your mountain bike brakes, check the brake pads for wear and alignment. Look closely at the pads to see if they’re worn down past the indicator line or unevenly. If the pads are too thin, it’s time to replace them.
Also, make sure the pads line up properly with the rotor. They should contact the rotor squarely without touching the tire or frame. Spin the wheel to check for any rubbing sounds, which signal misalignment.
If you spot any debris or oil on the pads or rotor, clean them with rubbing alcohol and a clean cloth. Ensuring your brake pads are in good shape and aligned correctly sets the foundation for smooth, safe braking before you proceed with any adjustments.
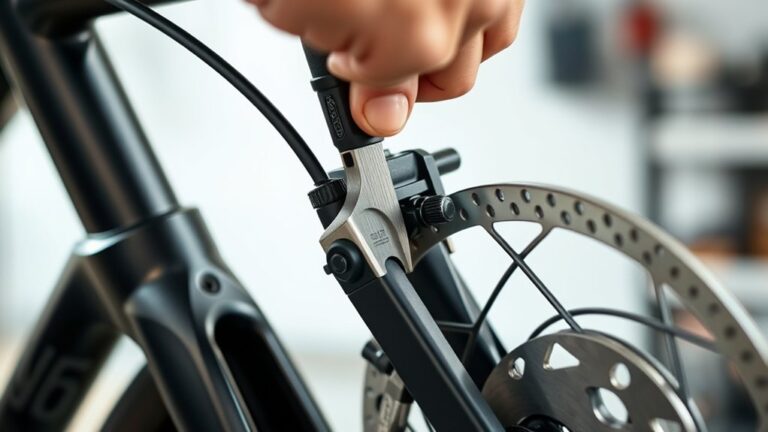
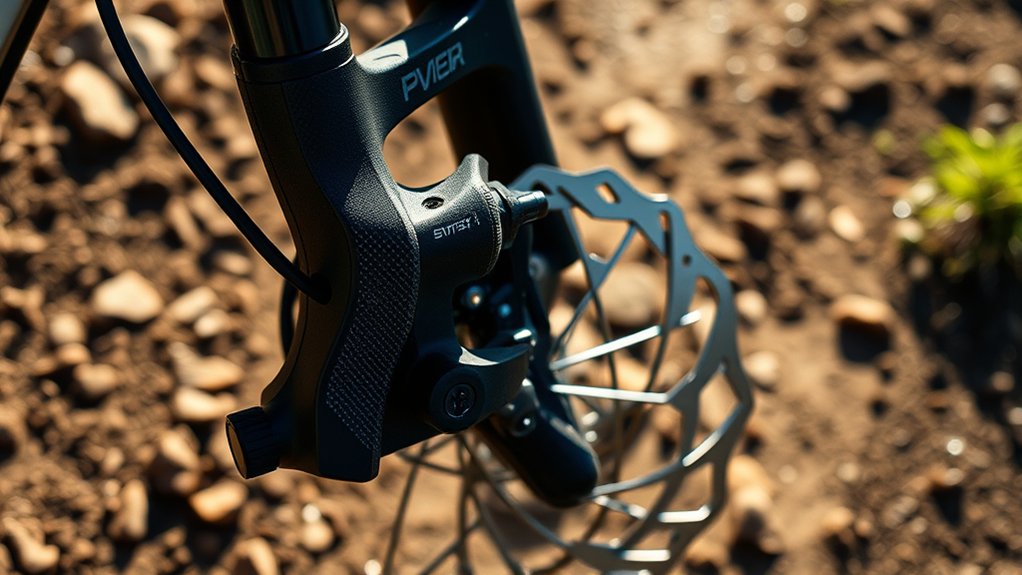
Loosen Brake Caliper Bolts and Center the Caliper Over the Rotor
Loosen the brake caliper bolts just enough so the caliper can move freely but won’t fall off. This step lets you shift the caliper side to side to perfectly center it over the rotor. A centered caliper guarantees even pad contact and smooth braking.
Use the table below to check key points as you center the caliper:
| Task | What to Look For |
|---|---|
| Bolt Looseness | Caliper slides, bolts stay put |
| Rotor Position | Rotor spins without rubbing |
| Caliper Alignment | Equal gap on both rotor sides |
| Final Bolt Tightness | Secure without over-tightening |
Once centered, tighten the bolts firmly to hold the caliper in place without misalignment. This prevents uneven pad wear and noisy brakes.
Adjust Brake Cable Tension for Optimal Response
After centering and securing the brake caliper, you’ll want to fine-tune the brake cable tension to make sure your brakes respond quickly and smoothly.
Start by loosening the cable anchor bolt slightly so you can adjust the cable. Pull the brake cable taut, but don’t overtighten. It should be snug enough that the brake pads move close to the rotor without rubbing when the lever isn’t engaged.
Next, tighten the anchor bolt securely to hold the cable in place. Squeeze the brake lever a few times to check the feel and response. If the lever feels too loose or the brakes don’t engage promptly, adjust the cable tension again.
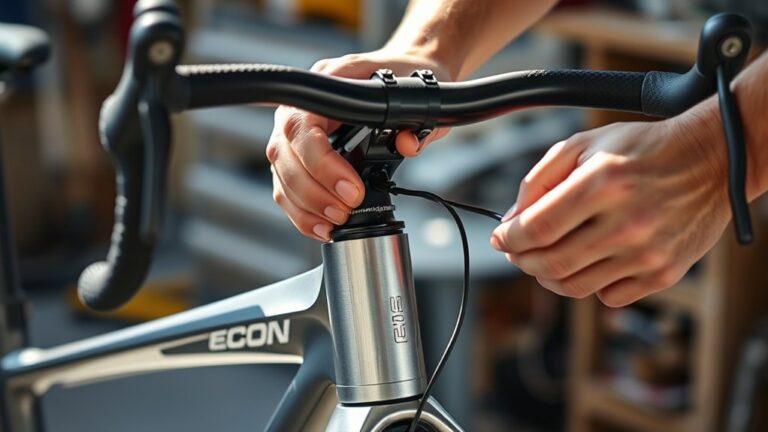
Fine-Tune Brake Lever Reach for Comfortable Control
While adjusting your brake cable tension guarantees effective stopping, fine-tuning the brake lever reach lets you control your bike comfortably and confidently. To start, locate the reach adjustment screw on your brake lever. It’s usually a small dial or screw near the pivot.
Turn it clockwise to bring the lever closer to the handlebar or counterclockwise to move it further away. Adjust it so your fingers can easily reach and squeeze the lever without overstretching or cramping.
This prevents fatigue and gives you precise modulation during rides. Remember, your brake lever should feel natural and responsive, allowing quick stops without strain. Take your time with small tweaks until you find the perfect position that suits your hand size and riding style.
Test Your Mountain Bike Brakes Safely on the Trail
When you’re ready to test your brakes, find a quiet, flat spot away from traffic and obstacles.
Gradually squeeze the brakes to see how they respond and make sure they engage smoothly.
This simple check helps you confirm everything’s working right before tackling more challenging terrain.
Choose a Safe Location
Finding the right spot to test your mountain bike brakes can make all the difference in your safety and confidence. You want a place with enough space to slow down gradually, away from traffic or steep drops. Look for a smooth, flat, or gently sloping trail section where you can focus solely on braking without distractions.
Here’s a quick guide to picking the perfect spot:
| Feature | Why It Matters |
|---|---|
| Clear of obstacles | Prevents sudden stops or crashes |
| Moderate incline | Tests brakes under real conditions |
| Low traffic area | Keeps you and others safe |
Choosing wisely helps you test your brakes effectively while staying safe. Always prioritize your surroundings before hitting the trail.
Check Brake Response
A crucial step in guaranteeing your mountain bike’s safety is to check the brake response on the trail. After adjusting your brakes, find a gentle slope where you can safely test them.
Ride at a moderate speed and gently squeeze the brake levers to feel how quickly and firmly your bike slows down. Pay attention to any delay or sponginess in the lever pull, which may mean further adjustment is needed.
Make sure both front and rear brakes engage smoothly without grabbing or noise. If you notice any issues, stop and fine-tune the brake pads or cable tension before riding faster or tackling steeper terrain.
Testing your brakes this way ensures they perform reliably when you need them most.
Troubleshoot Common Brake Problems: Squeaking and Dragging
If your brakes are squeaking or dragging, it’s important to find out what’s causing it quickly. You want to identify what’s making the noise and stop the pads from rubbing unnecessarily.
Once you know the issue, you can adjust the caliper alignment to get your brakes working smoothly again. This will help prevent further damage and ensure safe stopping.
Identifying Brake Squeak Causes
Brake squeaks often signal that something’s off with your bike’s braking system. First, check your brake pads: worn or glazed pads are common causes of noise. Look at the pad surface for glazing or embedded debris, as both can lead to squeaking.
Next, examine the rotor. If it’s dirty, warped, or oily, it can produce noise when you brake. Also, make sure your calipers are aligned properly because misalignment causes uneven pad contact and squeaks.
Sometimes, loose bolts or hardware vibrate and create noise, so tighten everything securely. Finally, consider environmental factors—wet or muddy conditions often cause temporary squeaks.
Pinpointing these causes helps you fix the problem quickly and keep your brakes running smoothly.
Eliminating Brake Pad Drag
Although the occasional squeak can be annoying, persistent pad drag can seriously affect your ride by causing extra resistance and wear. To eliminate brake pad drag, follow these steps:
- Check the brake lever free play – Make sure there’s enough space before the pads engage.
- Inspect the brake cable tension – If the cables are too tight, they can keep the pads pressed against the rotor.
- Clean the brake pads and rotor – Dirt or oil buildup can cause the pads to stick.
- Examine the brake caliper pistons – If they’re stuck or misaligned, they’ll cause constant pad contact.
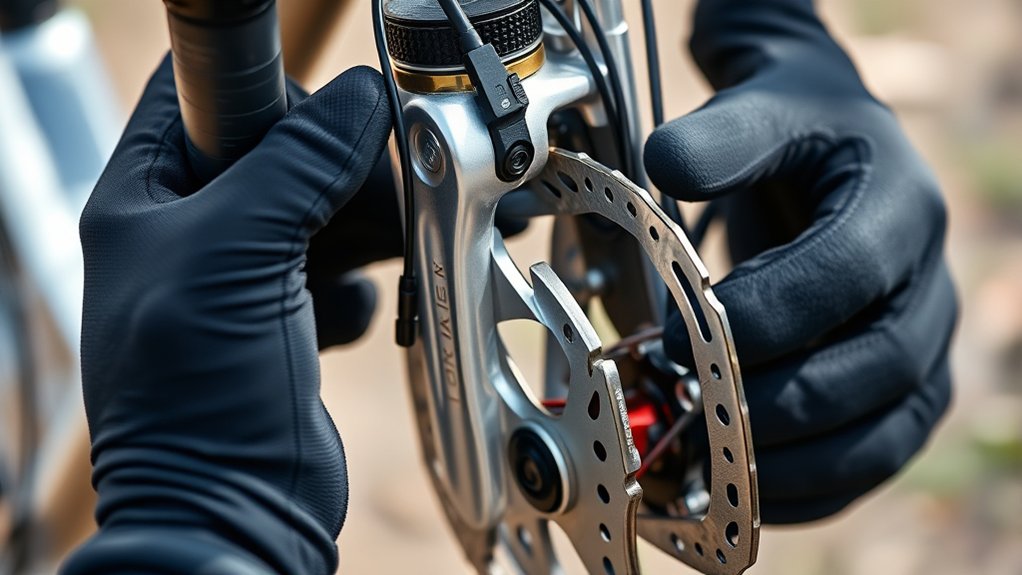
Adjusting Caliper Alignment
Two key signs that your caliper alignment needs adjustment are persistent squeaking and dragging. When your brake calipers aren’t centered over the rotor, the pads may rub unevenly, causing noise and extra friction.
To fix this, loosen the caliper mounting bolts just enough so the caliper can move side to side. Squeeze the brake lever firmly to center the caliper over the rotor, then keep the lever squeezed while tightening the bolts.
Release the lever and spin the wheel to check for rubbing or noise. If the rotor still drags or squeaks, repeat the process and fine-tune the caliper position.
Proper alignment guarantees smooth, quiet braking and prevents premature pad wear. So don’t skip this vital adjustment step.
Maintain Your Mountain Bike Brakes for Long-Term Performance
Regularly checking and cleaning your mountain bike’s braking system helps ensure it works reliably over time. To keep your brakes in top shape, follow these simple steps:
- Inspect your brake pads for wear and swap them out if they’re getting too thin.
- Clean the rotors with isopropyl alcohol to get rid of dirt and oil buildup.
- Check the brake cables or hydraulic lines for any damage or leaks, and replace them if needed.
- Adjust the brake calipers and levers to make sure everything lines up right and responds smoothly.
Frequently Asked Questions
What Type of Brake Fluid Is Best for Hydraulic Mountain Bike Brakes?
You should use mineral oil or DOT fluid for your hydraulic mountain bike brakes, but it depends on the brand. Most Shimano brakes use mineral oil, while SRAM and Magura often require DOT fluid.
Never mix the two because it can damage your system. Check your bike’s manual or brake caliper for the correct type.
Using the right fluid guarantees smooth braking and prevents corrosion, so don’t skip this step!
How Often Should I Replace My Mountain Bike Brake Cables?
You should replace your mountain bike brake cables every 6 to 12 months, depending on how often you ride and the conditions you face.
If you notice fraying, stiffness, or reduced braking performance, swap them out immediately. Regularly inspect your cables for wear and corrosion, especially after wet or muddy rides.
Keeping your cables fresh guarantees responsive braking and keeps you safe on the trails. Don’t wait until they fail!
Can I Use the Same Brake Pads for Front and Rear Brakes?
Yes, you can use the same brake pads for both front and rear brakes if they’re designed to fit your bike’s brake system. Just make sure the pads match the type of brakes you have—disc or rim.
Keep in mind, the front brake usually takes more wear, so you might need to replace those pads more often. Always check the pad thickness regularly to ensure safe and effective braking.
What Tools Do I Need for a Complete Brake System Overhaul?
Think of your brake system as the heartbeat of your bike, and to overhaul it, you’ll need the right tools. You’ll want a set of Allen wrenches, a torque wrench, a flathead screwdriver, and a brake pad spreader.
Don’t forget a bleed kit if you have hydraulic brakes, plus some isopropyl alcohol and clean rags. With these, you’ll breathe new life into your braking power and ride safely every time.
How Do I Properly Bed in New Brake Pads?
To properly bed in new brake pads, start by finding a safe area to ride. Accelerate to a moderate speed, then firmly apply the brakes to slow down without stopping completely.
Repeat this 10-15 times to transfer a layer of pad material onto the rotor evenly. Avoid hard stops initially, as this can glaze the pads.
This process guarantees better braking performance and longer pad life.
Conclusion
Now that you’ve fine-tuned your mountain bike brakes, imagine the smooth, confident stops waiting for you on every trail. Your brakes will respond perfectly to your touch, giving you control and safety in every turn.
Keep checking, adjusting, and maintaining your mountain bike brakes regularly. This keeps them in top shape and ready for any ride you take.
Remember, a little care today means many worry-free adventures tomorrow. So, ride on with confidence, knowing your mountain bike brakes are dialed in and reliable.