Set Mountain Bike Disc Brakes in 8 Easy Steps
Are you tired of struggling with your mountain bike disc brakes? You’re not alone—many riders find it tricky to get their brakes just right for smooth, reliable stopping power.
Luckily, setting up your disc brakes can be straightforward with a little guidance.
To set mountain bike disc brakes in 8 easy steps, start by understanding how they work and gather the necessary tools.
Remove old parts, then carefully install and align the new rotor and caliper.
Verify proper tightening and alignment for smooth operation.
If your bike has hydraulic brakes, you may need to bleed the system.
Regularly maintain and troubleshoot your brakes to keep them responsive and safe.
Keep going for detailed tips to perfect your setup.
Key Takeaways
- Understand how hydraulic and mechanical disc brakes operate before installation.
- Gather necessary tools like Allen wrenches and a torque wrench for precise assembly.
- Carefully remove old brake parts. Then, install the new rotor onto the hub, tightening the bolts evenly.
- Make sure the caliper is properly aligned over the rotor. Check that the clearance is even before tightening.
- Test the brake responsiveness and see if there’s any rubbing. Perform maintenance as needed to keep everything working smoothly.
How Do Disc Brakes Work on a Mountain Bike?
Disc brakes on a mountain bike work by using hydraulic or mechanical force to squeeze brake pads against a rotor attached to the wheel hub. When you pull the brake lever, the system activates: hydraulic brakes use fluid pressure, while mechanical brakes rely on cables.
This pressure pushes the brake caliper, which clamps the pads onto the rotor. The friction between the pads and rotor slows down the wheel, providing stopping power. The rotor, usually made of metal, spins with the wheel, so applying pressure effectively reduces your speed.
This process is quick and responsive, even in muddy or wet conditions, making disc brakes ideal for mountain biking. They give you consistent control, helping you navigate steep descents and tricky terrain safely.
Gather Your Tools and Prepare Your Bike for Installation
Gather all the tools you’ll need before you start installing your disc brakes. This includes Allen wrenches, a torque wrench, and a clean rag.
Next, prepare your bike by removing the wheels and inspecting the rotor and brake mounting areas. This will help ensure a smooth, efficient installation without any interruptions.
Essential Tools Checklist
Gathering the right tools is essential to guarantee a smooth and efficient disc brake installation on your mountain bike. Having the proper tools on hand prevents delays and reduces the risk of damaging components.
Here’s what you’ll need: Allen wrenches (typically 4mm, 5mm, or 6mm) for mounting brackets and calipers. A torque wrench is important to confirm proper tightening without over-tightening.
You’ll also want a bleed kit or syringe for brake fluid and bleeding if necessary. Don’t forget clean rags and isopropyl alcohol for cleaning parts and ensuring a smooth surface.
Make sure your tools are in good condition and easily accessible before starting. This preparation helps you work efficiently and makes sure your installation goes smoothly, saving time and avoiding frustration.
Bike Preparation Steps
Start by laying out all the tools you’ll need nearby, making sure they’re clean and in good condition. You’ll usually need Allen wrenches, a torque wrench, a screwdriver, and maybe a bleeding kit.
Double-check your bike’s manufacturer instructions for any specific tools or accessories. Before you start, shift your gears to the smallest sprocket and release the brake calipers if needed.
Clean the rotor and hub areas thoroughly to keep dirt from interfering with the installation. Carefully remove any existing brake components, noting how they’re assembled.
Inspect the frame and fork mounts for damage or debris. Proper preparation helps ensure a smooth installation, reduces mistakes, and keeps you working efficiently.
Getting your bike ready correctly sets a solid foundation for a successful disc brake setup.
Remove Old Brake Parts and Clear the Mounting Area
Start by carefully detaching the old brake components to avoid damaging your bike. Then, clean the mounting surface thoroughly to guarantee a smooth installation.
Finally, inspect the area for any signs of damage or wear that could affect your new brakes’ performance.
Detach Brake Components Carefully
Carefully detach the old brake components to avoid damaging your bike. Use the right tools, like a wrench or Allen key, to loosen the bolts.
Gently lift the brake caliper away from the rotor, making sure not to scratch the frame or rotor. Keep all screws and washers in a safe place so you don’t lose any small parts.
Carefully slide out the brake rotor if it’s still attached. Avoid using excessive force, and be careful not to bend or warp the rotor when removing it from the hub.
Watch out for brake lines and hoses. Don’t tear or cause leaks. Handle each part carefully and keep your workspace organized for a smooth replacement process.
Clean Mounting Surface Thoroughly
Before installing new brake components, it’s essential to thoroughly clean the mounting surface to guarantee proper alignment and function. Start by removing any leftover old brake parts, like pads or brackets, and set them aside.
Use a wire brush or a clean cloth to scrub away dirt, grease, and debris from the mounting area. If there’s stubborn grime, apply a small amount of isopropyl alcohol or a bike-specific cleaning solution.
Wipe the surface with a clean cloth to make sure it’s spotless. Confirm that no residue or dirt remains that could interfere with the new brake installation.
A clean, smooth mounting surface helps guarantee your disc brake will function correctly and stay aligned over time.
Inspect for Damage or Wear
Examine the existing brake components and mounting area for any signs of damage, wear, or corrosion. Look closely at the rotor, caliper, and mounting hardware for cracks, rust, or deformation.
Check the rotor’s surface for deep gouges or warping, which can affect braking performance. Inspect the caliper for leaks, stuck pistons, or damaged seals.
Verify the mounting holes are intact and free of debris. Look for rust or corrosion on metal parts, and check for cracks, dents, or warping in the rotor.
Also, examine for leaking brake fluid or damaged seals. Finally, inspect the mounting hardware for wear or breakage.
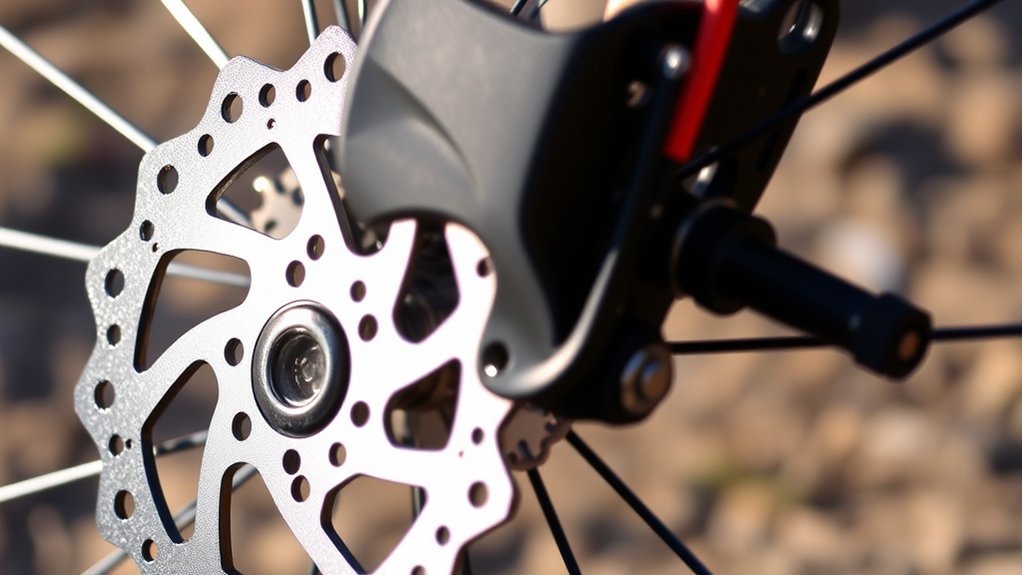
Install the Disc Brake Rotor on Your Mountain Bike
To install the disc brake rotor on your mountain bike, start by positioning the rotor onto the hub’s mounting flange, aligning the holes carefully. Make sure the rotor’s holes line up exactly with the hub’s bolt holes.
Use your fingers or a small tool to hold the rotor in place, then insert the mounting bolts through the holes. Tighten the bolts by hand first to keep everything aligned.
Once all bolts are in place, switch to a torque wrench and tighten them evenly in a crisscross pattern. This helps prevent warping or uneven tightening.
Check that the rotor spins freely without rubbing against the brake pads or caliper. Proper installation ensures smooth braking and prevents uneven wear.
Take your time to confirm everything is secure before moving on to the next step.
Attach and Align the Brake Caliper
Start by positioning the brake caliper over the mounted rotor, making sure it’s centered and aligned with the disc. Once in place, attach the caliper to the brake mount with the bolts.
Tighten the bolts evenly to keep the caliper steady. Next, check the alignment: the caliper should sit squarely over the rotor without touching it. You might need to loosen the bolts slightly, adjust the caliper’s position, then tighten again.
Use a flashlight if needed to see clearly. Keep an eye on the rotor as you adjust—there should be even clearance on both sides. When everything looks good, give the caliper a gentle squeeze to confirm it’s firmly mounted and aligned properly.
Proper alignment ensures smooth braking and prevents rubbing or noise.
Bleed the Hydraulic Brake System (if Applicable)
Once you’ve confirmed the caliper is properly aligned and securely mounted, it’s time to address the hydraulic brake fluid. If your brake system has air bubbles or fluid leaks, bleeding is necessary.
Start by removing the brake lever reservoir cap and attaching a clear hose to the bleed valve on the caliper. Submerge the other end of the hose in a container with a small amount of brake fluid.
Remove the brake reservoir cap, attach a clear hose to the bleed valve, and submerge the hose in brake fluid.
Pump the brake lever several times, then hold the lever while you open the bleed valve to release trapped air. Close the valve, then release the lever.
Repeat this process until you see steady, bubble-free fluid flowing through the hose. Keep the reservoir topped off with brake fluid throughout to prevent additional air from entering the system.
Test Your Disc Brakes and Fine-Tune the Adjustment
Test your disc brakes by squeezing the lever and checking for firm, immediate engagement. You want the brake lever to feel responsive, with no excessive travel or sponginess. If it feels soft or delayed, you may need to adjust the brake calipers or pads.
Here’s what to look for:
- The brake lever should pull smoothly without extra slack.
- Pads should contact the rotor evenly on both sides.
- You shouldn’t hear squealing or grinding sounds.
- The bike should stop firmly with minimal lever pull.
If the brakes aren’t performing well, fine-tune the caliper alignment, rotor clearance, or pad position. Proper testing and adjustment guarantee reliable stopping power and safe riding.
Maintain and Troubleshoot Your Mountain Bike Disc Brakes
Regularly maintaining and troubleshooting your mountain bike disc brakes ensures they work reliably when you need them most. Start by inspecting the brake pads for wear; replace them if they’re too thin.
Keep the rotors clean using isopropyl alcohol to remove dirt and oil. Check the brake fluid level and top it off if needed, making sure there are no leaks.
If your brakes feel spongy or don’t respond well, bleed the system to remove air bubbles. Adjust the caliper alignment if the brake pads rub against the rotor unevenly.
Listen for squeaking or grinding sounds, which might mean dirt or worn pads. Regular checks and quick fixes keep your brakes responsive, safe, and ready for any ride.
Frequently Asked Questions
Can I Upgrade My Rim Brakes to Disc Brakes on My Mountain Bike?
Yes, you can upgrade your rim brakes to disc brakes on your mountain bike, but it does require some work.
You’ll need to replace the wheel hubs with disc-compatible ones, install new disc brake mounts on the fork and frame, and swap out your brake levers and calipers.
Make sure your bike frame can handle disc brakes and check that they are compatible with your wheel size.
It’s a worthwhile upgrade for better stopping power.
What Safety Precautions Should I Take During Disc Brake Installation?
Did you know that proper installation can reduce brake failure risks by over 50%? To stay safe, wear gloves and eye protection to avoid injuries from brake fluid or debris.
Make sure your bike is stable, and double-check all bolts and connections before riding. Keep the brake fluid away from skin and eyes, and test the brakes in a safe area before hitting the trails.
Safety first guarantees a smooth ride!
How Often Should I Inspect and Replace Disc Brake Components?
You should check your disc brake components every few rides, especially if you ride often or on rough terrain. Keep an eye out for signs of wear, like thinner rotors, uneven brake pad wear, or less stopping power.
Replace your brake pads when they’re worn down to the indicator line, which is usually every 500 to 1000 miles. Regularly inspect for fluid leaks and make sure the rotors are clean and free of debris to keep your brakes working their best.
Are Hydraulic Disc Brakes More Effective Than Mechanical Ones?
Hydraulic disc brakes are more effective than mechanical ones, but only if you’re prepared for their complexity. Imagine the power of consistent, effortless braking that responds instantly at your fingertips. Hydraulics deliver that and help reduce hand fatigue.
However, they need regular maintenance and fluid checks to keep them working well. Mechanical brakes are simpler and easier to repair, making them a good choice for those who prefer low upkeep.
But they may lack the stopping power and modulation that hydraulic systems provide, especially on intense rides. So, your choice depends on how much you’re willing to maintain and the level of braking performance you need.
What Are Common Signs My Disc Brakes Need Servicing?
You’ll notice your disc brakes need servicing when they squeal or make grinding noises, which can mean dirt or worn pads.
If your brake lever feels soft or spongy, it’s usually a sign of air in the hydraulic system or fluid leaks.
Reduced stopping power or uneven pad wear are also signs that it’s time for some maintenance.
Keep an eye out for these signs to make sure your brakes stay reliable and safe.
Conclusion
And there you have it—your shiny new disc brakes ready to turn your mountain biking adventures from “oh no” to “whoa!”
Just remember, if your brakes start acting like moody teenagers or refuse to stop whining, a little maintenance and patience will bring them back to life.
After all, nothing says “I’ve got this” quite like confidently hitting those trails with brakes that actually do what they’re supposed to.
Enjoy your ride with your new mountain bike disc brakes—happy biking!