How to Change a Mountain Bike Chain in 7 Easy Steps
Are you tired of feeling frustrated every time your mountain bike chain starts slipping or gets stuck? You’re not alone—many biking enthusiasts struggle with maintaining their chains and keeping their rides smooth and trouble-free.
But don’t worry, changing a mountain bike chain isn’t as hard as it seems.
To change your mountain bike chain, first check for wear and gather tools like a chain breaker, pliers, and lubricant.
Shift to the smallest gears and remove the old chain using a master link tool or chain breaker.
Match the new chain’s length to the old one, then thread it through the chainring, derailleur, and cassette.
Connect the ends with a master link or pin, adjust the tension, and lubricate for smooth riding.
Keep following to master every step with confidence.
Key Takeaways
- Inspect the old chain for wear, rust, or damage using a chain wear indicator tool before starting.
- Shift to the smallest chainring and cog. Then, use a master link tool or chain breaker to safely remove the old chain.
- Measure the new chain against the old one and cut it to the correct length with a chain breaker tool.
- Thread the new chain through the front chainring, rear derailleur, and cassette. Make sure it’s routed properly and has the right tension.
- Connect the chain using a master link or chain pin. Once it’s connected, test the shifting and adjust the tension if needed.
Inspect Your Chain and Gather Tools
Before you start changing your mountain bike chain, take a close look at its condition. Check for rust, stiff links, or excessive stretching, which can lead to poor shifting or chain breakage.
Use a chain wear indicator tool if you have one. It provides a precise measurement of how much your chain has stretched.
Gather all the essential tools before you begin. Grab a chain breaker tool, a replacement chain compatible with your bike, and a pair of needle-nose pliers.
Having a rag and some bike lubricant handy will help with cleaning and maintaining the new chain. Getting everything ready upfront makes the process smoother and faster, so you won’t have to stop halfway to find something.
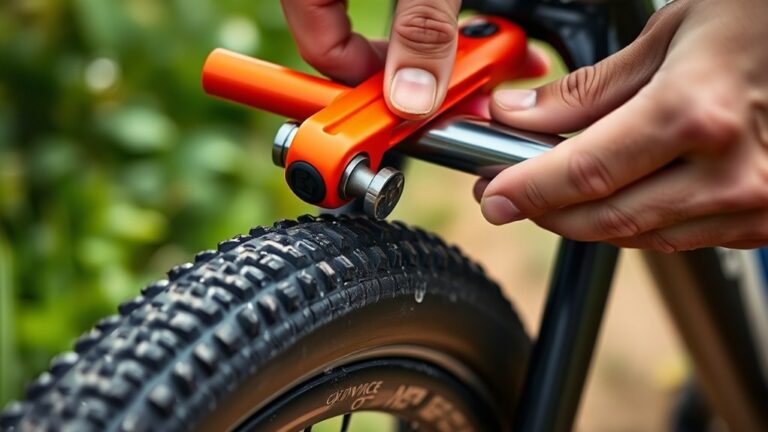
Remove the Old Chain Safely
Start by shifting your bike into the smallest chainring and the smallest rear cog to release tension on the chain. This makes it easier to work with and helps prevent injury.
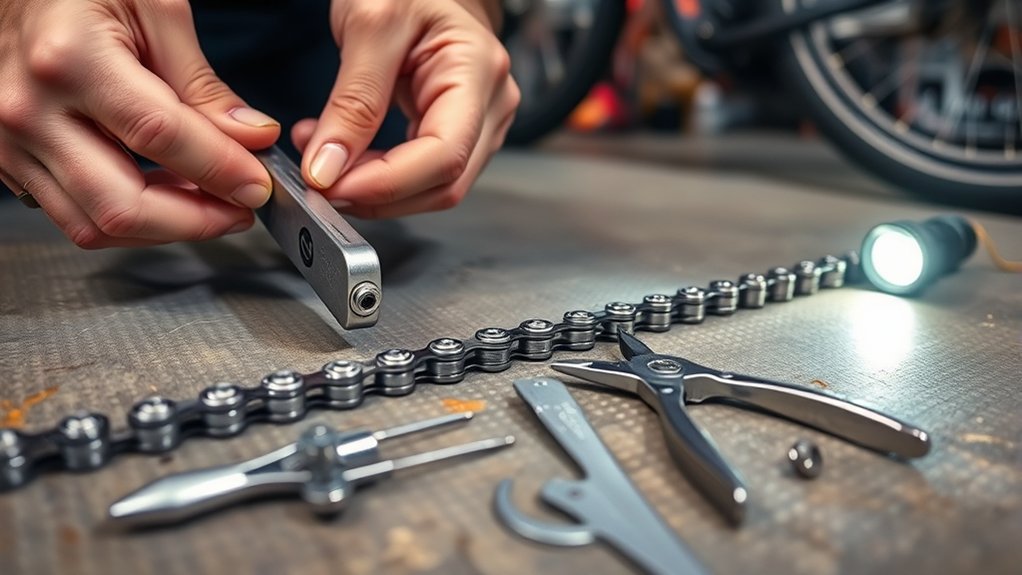
Next, locate the master link if your chain has one. It’s designed for quick removal. Use a master link tool or pliers to press the pins together and disconnect the chain.
Locate the master link and use a tool or pliers to press the pins and detach the chain quickly.
If there isn’t a master link, grab a chain breaker tool. Align the chain pin with the tool’s driving pin and turn the handle to push the pin out partially. Be careful to avoid bending the links.
Carefully remove the chain from the drivetrain, avoiding sharp edges. Keep the old chain aside safely—you might want to recycle it or inspect it further.
Measure and Cut the New Chain to Size
Determine the correct length for your new chain by laying it next to the old one or fitting it onto your bike’s drivetrain without connecting the ends. Make sure the chain is taut but not tight, then note where it should be cut. Use a chain breaker tool to carefully remove excess links.
Here’s a quick reference for chain lengths based on gear setups:
| Gear Setup | Approximate Chain Length (links) |
|---|---|
| Single Speed | 100 |
| 7 to 9 Speeds | 116 |
| 10 to 12 Speeds | 118 |
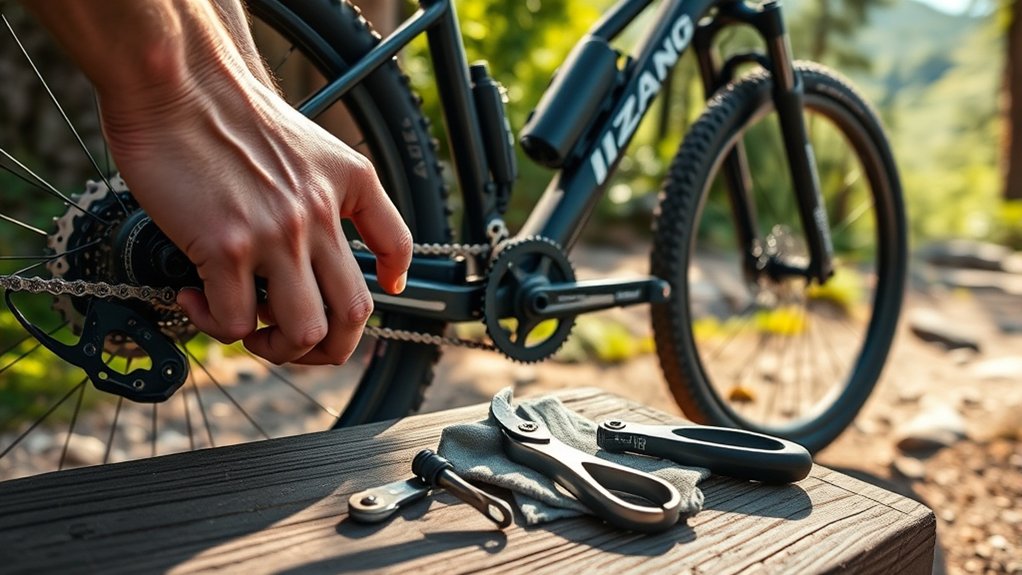
Thread the New Chain Through the Gears
After cutting the chain to the right length, you’ll need to carefully thread it through your bike’s gears. Start by positioning the chain around the smallest chainring at the front.
Then guide it through the rear derailleur, making sure the chain passes through the jockey wheels correctly. This helps ensure smooth shifting.
Next, wrap the chain around the smallest sprocket on the cassette. Keep the chain taut but avoid forcing it. If it feels tight, double-check the routing.
Proper threading is key for peak performance and to prevent chain drop or damage. Take your time to confirm the chain sits properly on each gear before moving on.
Once threaded, you’re ready to connect the chain, which we’ll cover in the next step.
Connect the Chain Using a Master Link or Pin
Secure the chain by connecting its ends with either a master link or a chain pin, depending on your chain type.
If your chain has a master link, align the ends and snap the link into place, making sure it clicks securely.
For chains without a master link, use a chain pin and a chain tool to press the pin through the link plates, joining the chain firmly.
Here’s a quick overview:
| Connection Method | Key Step |
|---|---|
| Master Link | Snap ends until it clicks |
| Chain Pin | Use chain tool to press |
| Both | Guarantee secure connection |
Properly connecting the chain ensures smooth pedaling and helps prevent chain failure while riding.
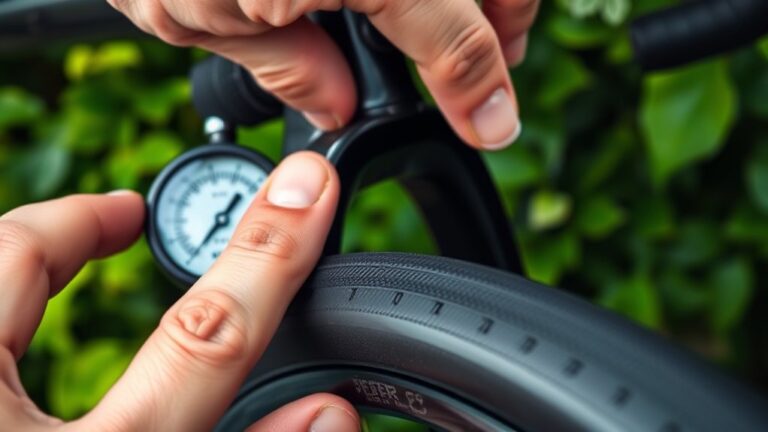
Check Chain Fit and Adjust Tension
Because a properly fitting chain affects both your bike’s performance and safety, you’ll want to check its length and tension carefully before riding. First, shift your bike into the smallest chainring and the smallest rear cog. This position lets you see if the chain is too tight or too loose.
The chain should have a little slack—about half an inch of vertical movement when you press it with your finger. If it’s too tight, it can strain the drivetrain. If it’s too loose, it might slip or come off.
To adjust tension, reposition the rear wheel or use the derailleur’s tension adjustment if available. Once you’re confident the chain fits well and moves smoothly, you’re ready for your next ride.
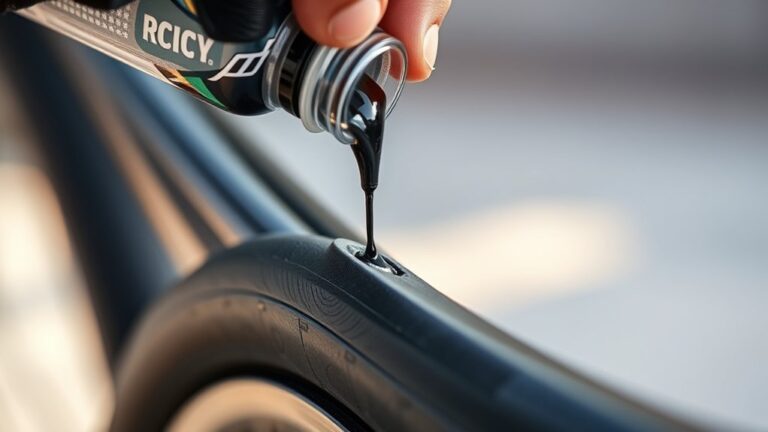
Lubricate the Chain for Smooth Riding
Once your chain fits well and moves smoothly, the next step is to lubricate it properly. Grab a bike-specific lubricant—wet lube for damp conditions or dry lube for dry trails.
Apply a small drop to each roller while turning the pedals backward to evenly coat the entire chain. Avoid over-lubricating because too much lube attracts dirt and grime, which can wear your chain faster.
After applying, let the lube settle for a few minutes, then wipe off any excess with a clean rag. This helps prevent buildup and keeps your drivetrain clean.
Regular lubrication reduces friction, prevents rust, and extends the life of your chain. Make it a habit to lubricate your chain every few rides to ensure smooth, efficient performance on every trail.
Frequently Asked Questions
How Often Should I Replace My Mountain Bike Chain?
You should replace your mountain bike chain every 2,000 to 3,000 miles, but it depends on how you ride and how well you maintain it.
If you ride in mud or rain often, swap it out more frequently to keep things running smoothly.
Regularly check for chain stretch with a tool. If it’s worn beyond 0.5%, it’s time for a new chain.
Replacing your chain at the right time helps keep shifting smooth and prevents extra wear on other parts.
What Type of Chain Lubricant Is Best for Mountain Biking?
You’ll want to use a wet lubricant for mountain biking since it outperforms dry lube by lasting up to 50% longer in muddy or wet conditions. Wet lube sticks to your chain better, preventing rust and reducing wear.
Just remember, it attracts more dirt, so be sure to clean your chain regularly. If you mostly ride in dry, dusty trails, a dry lube might suit you better to keep grime off your drivetrain.
Can I Use a Chain From a Different Bike Brand?
Yes, you can use a chain from a different bike brand as long as it matches your bike’s specs. Chains vary by speed (like 9, 10, or 12-speed), width, and length, so make sure the chain fits your drivetrain.
Don’t just grab any chain. Check the speed rating and size to ensure smooth shifting and to avoid damage. If you’re unsure, ask your local bike shop for advice.
How Do I Know if My Chainring or Cassette Needs Replacement?
You’ll know your chainring or cassette needs replacement when the teeth look like worn-down piano keys—uneven and sharp instead of smooth and rounded.
If your chain slips or skips during pedaling, that’s another sign.
Inspect both parts closely. If the teeth are visibly worn or the bike’s shifting feels rough, it’s time to swap them out.
Keeping these components fresh guarantees smoother rides and better gear performance.
What Are Signs of a Worn-Out or Stretched Chain?
You’ll notice your chain feels sloppy or skips gears under pressure. That’s a clear sign it’s worn out or stretched.
Another clue is if the chain looks visibly elongated or has stiff links. Using a chain checker tool can help you measure stretch precisely.
If your chain won’t sit properly on the chainring or cassette, or you experience frequent slipping, it’s time to replace it.
Replacing a worn chain keeps your ride smooth and helps prevent damage to other parts.
Conclusion
Now that you’ve changed your mountain bike chain, you’ll probably notice how smoothly your gears shift—almost like the bike’s thanking you. Funny enough, the same chain you once struggled with can become your best trail companion once it’s properly fitted and lubricated.
Keep this simple routine in mind, and every ride will feel fresh and effortless. Who knew that a quick mountain bike chain change could transform your whole biking experience?