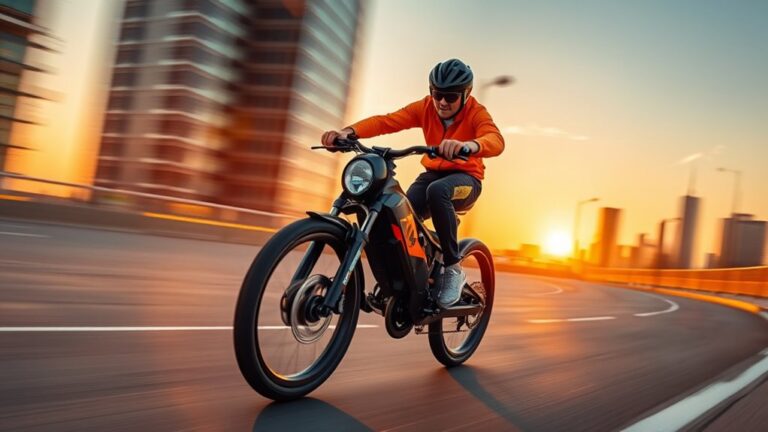
What Is a Road Bike Light?
Many cyclists know the struggle of riding in low-light conditions, feeling invisible to cars and pedestrians. You’re not alone—staying visible and safe can be a real challenge.
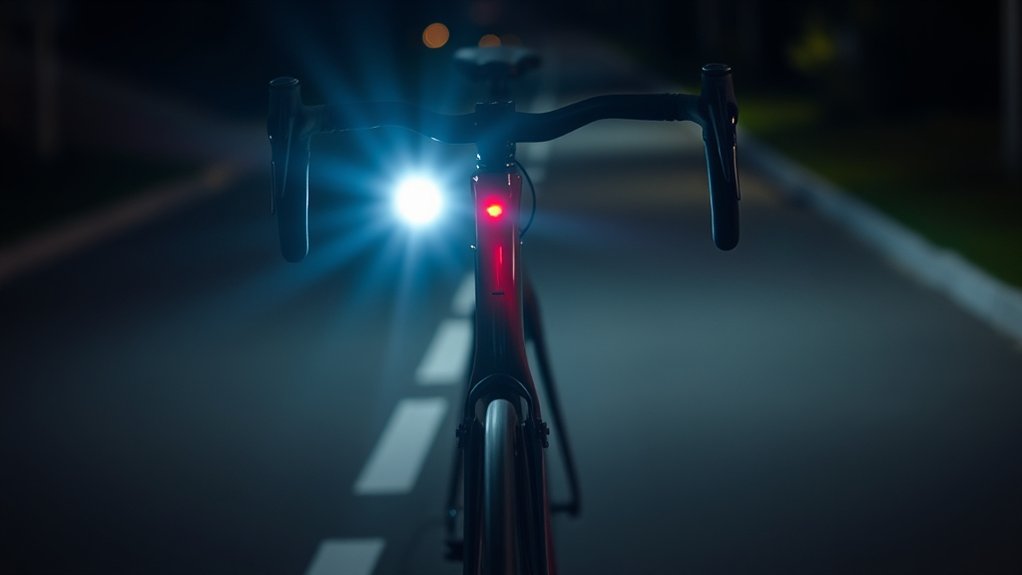
A road bike light is a safety device designed to boost your visibility and alert others when you’re riding in low-light conditions. It includes front lights to illuminate your path and rear lights to signal your presence from behind.
Properly choosing and using these lights can reduce accidents and keep you safe on the road.
If you want to learn more about selecting and using bike lights effectively, there’s plenty to explore ahead.
Key Takeaways
A road bike light is a device mounted on a bicycle to improve visibility and safety during low-light conditions.
It typically includes front lights to illuminate the path ahead and rear lights to alert others of your presence.
Bike lights often have different modes, like steady or flashing, to signal your intentions or attract attention.
They come with various brightness levels, measured in lumens, which affect how far and clearly they can be seen.
Making sure your lights are properly installed and maintained regularly will keep them working effectively.
Plus, it helps ensure you’re meeting safety regulations while riding at night or in poor visibility.
What Is a Road Bike Light and Why Is It Essential?
A road bike light is a small, portable device attached to your bike that illuminates the path ahead and makes you visible to others. It’s essential because it helps you see obstacles, road signs, and turns clearly, especially in low-light conditions or at night.
Being visible to drivers and pedestrians reduces the risk of accidents and keeps you safe. A good bike light also alerts others to your presence, preventing collisions. Whether you’re commuting, training, or exploring, having a reliable light lets you ride confidently in different conditions.
Without it, you risk missing important cues on the road and putting yourself in danger. In short, a road bike light is a simple but crucial tool to keep your rides safe and enjoyable.
How Do Bike Lights Keep Cyclists Safe in Low Light?
Bike lights make you more visible to drivers and pedestrians in low light, which helps reduce accidents. They make sure others can see you clearly when it’s dark outside.
They also signal your intentions, like turning or stopping, so people around you know what you’re planning to do. This helps them respond in time and stay safe.
Enhance Visibility to Others
When visibility drops in low-light conditions, bike lights are essential to ensure others can see you clearly. They serve as your safety signal, alerting drivers and pedestrians to your presence. Bright front and rear lights help you be seen from a distance and up close.
The right placement and using steady or flashing modes quickly catch attention. To understand how visibility improves, check out this table:
| Light Type | Purpose | Effectiveness |
|---|---|---|
| Front Light | Lights up your path | Helps others see you from ahead |
| Rear Light | Shows your position | Ensures others notice you from behind |
| Flashing Mode | Draws attention quickly | Stops cars and pedestrians faster |
| Brightness Level | Matches conditions | Enhances visibility in different situations |
| Proper Placement | Covers more angles | Maximizes your safety on the road |
Using these strategies keeps you safe while riding.
Signal Your Intentions
Clear signals are essential for communicating your intentions to others on the road, especially in low-light conditions. Bike lights help you do this by making your actions more visible.
For example, using your turn signals with flashing rear lights alerts drivers when you plan to turn or change lanes. A steady front light not only illuminates your path but also shows your presence.
Some bike lights come with specific modes, like a flashing pattern that signals caution or stops. Properly using your lights helps show others what you intend to do, reducing confusion and increasing safety.
Always check that your lights work correctly and are bright enough to be seen clearly. This is especially important during dawn, dusk, or nighttime rides.
Using your bike lights effectively through signaling keeps everyone safer on the road.
Prevent Accidents Effectively
Properly functioning bike lights are your best defense against accidents in low-light conditions. They make you visible to drivers, pedestrians, and other cyclists, which helps reduce collisions.
Front lights illuminate the road ahead, helping you see obstacles, potholes, or animals before you reach them. Rear lights alert others to your presence, especially when you’re braking or turning.
Using bright, flashing, or steady modes can make you even more visible. Remember, turning on high-quality lights in low-light or nighttime riding signals to others that you’re there, so they can react accordingly.
It’s also important to check and maintain your lights regularly to make sure they’re working well. With the right lighting, you can ride confidently, knowing you’re less likely to get into an accident.
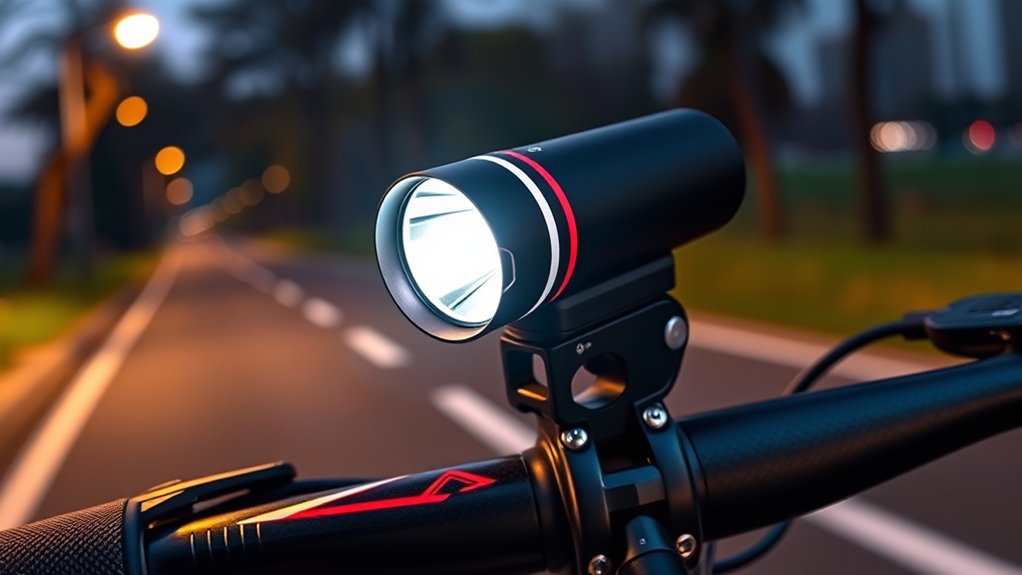
Types of Road Bike Lights: Front, Rear, and Combo Systems
Road bike lights come in three main types: front, rear, and combo systems, each serving a specific purpose to improve visibility and safety.
Front lights help you see the road ahead, especially in low-light conditions or at night. They come in various brightness levels and beam patterns to suit different riding environments.
Rear lights alert drivers and other cyclists to your presence from behind, reducing the risk of collisions.
Combo systems combine both front and rear lights into a single unit or set, providing extensive visibility with ease.
These systems are convenient, ensuring you’re always properly lit without needing multiple devices.
Choosing the right type depends on your riding habits, conditions, and safety priorities, so it’s important to understand the purpose of each.
Key Features to Consider When Picking a Bike Light
When choosing a bike light, focusing on key features can really improve your safety and riding experience. Think about brightness, battery life, mounting options, waterproofing, and beam pattern.
Brightness, measured in lumens, is all about visibility. The higher the lumens, the better you can see and be seen. Battery life ensures your light lasts through your ride, especially on longer trips.
Mounting options should be versatile and secure, fitting your bike and riding style easily. Waterproofing keeps your light working in rain or wet conditions. Beam pattern affects how well you see and how others see you.
Here’s a quick comparison:
| Feature | What to Look For |
|---|---|
| Brightness | Lumens, suitable for riding conditions |
| Battery Life | Duration, rechargeability |
| Mounting System | Compatibility, ease of attachment |
| Waterproofing | IP rating, durability |
| Beam Pattern | Wide or focused, depending on your needs |
How Bright Should Your Bike Light Be for Different Conditions?
When choosing your bike light, think about how bright it needs to be for different conditions.
For night rides, you’ll want a powerful light so you can see clearly and others can see you.
During the day, a lower brightness might be enough to alert others of your presence.
If you’re riding on mountain trails, a bright, focused beam helps you see uneven terrain and obstacles ahead.
Brightness for Night Rides
Choosing the right brightness for your bike light is key to staying safe during night rides.
If you’re on well-lit paths, a lower lumen light (around 200-400 lumens) is usually enough. It prevents blinding others and saves battery life.
For darker, tougher terrain or rural roads, go for a higher lumen light (500-1000 lumens). This helps you see obstacles clearly and stay visible.
When riding fast, brighter lights let you react quicker to hazards.
Remember, match your brightness to your environment. Too dim, and you might miss dangers. Too bright, and you could cause glare for others.
Adjust your light as needed, and test how it works in different conditions. That way, you’ll stay safe on all your night rides.
Daytime Visibility Needs
Daytime visibility is crucial for bike safety, especially in busy or low-light conditions. Bright lights help you stand out to drivers and pedestrians, which can prevent accidents.
For daytime riding, aim for at least 200 lumens so you’re noticeable in traffic. If you’re riding in shaded areas, under trees, or on cloudy days, consider bumping that up to 400 lumens or more.
Using flashing modes is also a good idea—they grab attention without using too much battery. Just remember, the goal is to be seen without blinding others.
Keep your lights clean and properly mounted so they’re always effective. Adjust the brightness based on your surroundings, and always put safety first by making sure you’re visible.
Mountain Trail Illumination
For mountain trail riding, your lighting needs are totally different from daytime visibility. You’ll want a powerful, focused beam to see obstacles, roots, and uneven terrain clearly.
A light with at least 1000 lumens is recommended for technical trails because it helps you spot hazards early. Brightness alone isn’t enough—look for a beam pattern that offers a wide spread, illuminating the trail ahead and the sides.
This wider illumination helps you anticipate turns and avoid surprises along the way. Battery life is also super important; make sure your light can last through your entire ride without dimming.
If you’re riding in remote areas, it’s a good idea to carry an extra battery or a backup light. Overall, pick a light that balances power, run-time, and beam quality to keep you safe and confident on those dark mountain trails.
Rechargeable vs. Battery-Powered Bike Lights: Which Is Better?
Are rechargeable bike lights really better than battery-powered ones? It depends on what you need. Rechargeables are super convenient—just plug them in, and you’re good to go again. They’re usually more cost-effective over time because you don’t have to keep buying disposable batteries. Plus, many rechargeables give you brighter light and longer battery life per charge.
On the other hand, battery-powered lights are great when you need quick replacements or don’t have access to charging options. They’re often lighter and easy to swap out during long rides. Think about these points:
- Rechargeables save money and cut down on waste.
- Battery-powered lights are perfect for quick swaps or emergencies.
- Rechargeable models tend to be brighter and last longer per charge.
In the end, it all comes down to how you ride and what you prefer.
How to Install and Maintain Your Bike Light Easily
Installing and maintaining your bike light is simple if you follow a few easy steps. First, attach the light securely to your handlebars or seat post, making sure it’s tight enough so it doesn’t move during your ride.
Check the user manual to see if your mounting bracket fits your bike properly. Regularly clean the light and its mount to keep it bright and visible. Also, check the battery life or charge indicator weekly to avoid any surprises.
| Tip | Reason |
|---|---|
| Tighten all screws | Prevents loose fittings while riding |
| Clean contacts regularly | Ensures consistent power and brightness |
What Are the Legal Rules and Best Practices for Bike Lighting?
Knowing how to properly install and maintain your bike light is just the first step. Understanding the legal rules and best practices helps ensure you’re riding safely and legally.
Always use your front light during low-light conditions or at night, and make sure it’s bright enough to be seen from a distance. Your rear light should be on whenever you’re riding in dark or low-visibility environments.
Use your front light at night and in low-light conditions for safety and visibility. Keep your rear light on in dark environments.
Keep your lights clean and functioning, replacing batteries or charging them regularly. Follow local laws, which often specify light brightness, color, and usage times.
To stay safe and legal, use front and rear lights when riding at night or in low visibility. Keep your lights properly charged and visible. Follow local lighting regulations and brightness standards.
Tips for Using Your Bike Light Effectively During Rides
Make sure your light is positioned properly to maximize visibility without blinding others. Adjust the brightness as needed based on your riding conditions — brighter for dark roads, dimmer in well-lit areas.
Staying mindful of these details helps you ride safely and legally at all times.
Proper Light Placement
Proper light placement is key to making sure you’re visible to others and can see the road clearly. Place your front light low and centered on your handlebars. This helps illuminate the path ahead without blinding oncoming riders or drivers.
For the rear light, position it high on your seat post or backpack. That way, it’s easy to see from behind, especially at intersections or in traffic. Make sure your lights are securely mounted so they don’t shift during your ride.
Adjust your front light downward a bit to avoid glare while still seeing the road clearly. Keep your rear light steady and visible, even on rough terrain. Proper placement helps prevent shadows, reduces glare for others, and makes sure your lights work well.
Mount front lights slightly below your handlebars for the best road illumination. Place rear lights where they’re directly visible to vehicles behind. Check your mounts regularly to keep your lighting consistent and effective.
Adjust Brightness Accordingly
Adjusting your bike light’s brightness during rides helps you see clearly without blinding others. Use higher settings in dark, unlit areas to improve visibility, and lower it when riding in well-lit zones or alongside traffic to avoid glare. Many lights have adjustable modes, so get familiar with their settings for quick changes.
Keep in mind, different conditions call for different brightness levels:
| Situation | Recommended Brightness |
|---|---|
| Night riding in total darkness | Maximum brightness |
| Urban riding with streetlights | Medium to low brightness |
| Riding close to pedestrians or vehicles | Lowest brightness to prevent glare |
Adjusting your light ensures safety, saves battery life, and respects others on the road.
Common Mistakes to Avoid When Choosing or Using Bike Lights
Choosing or using bike lights improperly can compromise your safety on the road. One common mistake is picking a light that’s too weak, making it hard for others to see you or for you to see the road ahead clearly.
Another mistake is ignoring how important proper mounting is. If your light isn’t secure, it can bounce around or fall off during your ride, which reduces your visibility.
Proper mounting is key—loose lights bounce and fall, reducing your visibility and safety.
Many riders also forget to turn their lights on during low-light conditions or at night. That’s a big no-no because it defeats the whole purpose of having a bike light.
To avoid these mistakes, always choose a bright, reliable light suited for your riding environment. Make sure it’s mounted securely and double-check it’s on before you start riding.
Being mindful of these simple tips can help you stay safe and visible on every ride.
Upgrading Your Bike Light System for Better Safety
Upgrading your bike light system can really boost your safety on the road, especially as riding conditions change or if you want better visibility. Start by choosing brighter lights with higher lumen output so you can see further and be seen more clearly.
Consider switching to rechargeable LED lights for consistent performance and convenience. Adding a secondary light, like red tail lights or side visibility lights, helps you stand out from all angles.
Make sure your lights are properly mounted at the right height and securely fastened. If you ride at night or often in low-light conditions, investing in a high-quality, waterproof, and durable system is a smart move.
Regularly check your lights for battery life and functionality to ensure they work when you need them most. Upgrading your system keeps you safer and more visible on every ride.
Frequently Asked Questions
How Often Should I Replace or Recharge My Bike Light Batteries?
You should replace or recharge your bike light batteries when they start to dim or no longer provide enough brightness for safe riding. Typically, rechargeable batteries need recharging after about 2 to 4 hours of use, depending on the model.
For disposable batteries, replace them once they’re drained or if the light’s brightness noticeably drops. It’s a good idea to check your lights before each ride to make sure they’re working properly.
And don’t forget to carry spare batteries or a charger so you’re always prepared.
Can I Use a Bike Light for Outdoor Activities Other Than Cycling?
Yes, you can use a bike light for outdoor activities beyond cycling. Many bike lights are versatile, bright, and durable enough for camping, walking, or running in low-light conditions. Just make sure the beam is suitable for what you’re doing and that it’s securely mounted or held.
Keep in mind, some bike lights might not be designed for long-distance or high-impact use outside of cycling. So, it’s a good idea to pick one that fits your specific needs.
Are There Specific Bike Lights Designed for Different Weather Conditions?
Yes, there are bike lights designed for different weather conditions. In fact, studies show that nearly 50% of cycling accidents happen in poor visibility conditions.
You should choose waterproof or water-resistant lights for rain or snow, so they keep working even when wet. Bright, flashing modes also help in foggy or rainy weather, making you more visible.
Always check the IP rating to match your bike light with your weather conditions.
How Do I Ensure My Bike Light Is Compatible With My Bike?
You guarantee your bike light is compatible with your bike by checking its mounting system and power source. Look for lights with adjustable straps or mounts that fit your handlebars or seat post easily.
Make sure the voltage and connector type match your bike’s power system if it’s rechargeable or integrated. Reading the product specifications carefully helps prevent any surprises.
If you’re unsure, it’s a good idea to ask your bike’s manufacturer or visit a local bike shop. They can help you find a light that fits perfectly and works well with your bike.
What Is the Average Lifespan of a Good Quality Bike Light?
A good quality bike light usually lasts between 2 to 5 years, depending on how often you ride and how well you take care of it.
You can make it last longer by regularly charging or replacing the batteries, keeping it clean, and storing it properly when not in use.
High-quality lights with tough components tend to stick around longer.
Pay attention to how it performs; if the brightness dims or it stops working, it’s probably time to replace or repair it.
This helps ensure you stay safe during your rides.
Conclusion
By choosing the right bike light and using it properly, you can stay safe on every ride. For instance, riding at dawn with a bright front light and a flashing rear light makes you more visible to drivers, which helps prevent accidents.
Be sure to check your lights regularly and upgrade them when needed. Staying proactive about your bike lighting keeps you safe, confident, and ready to enjoy cycling in all conditions.
Remember, a good road bike light is essential for safe riding, especially in low-light situations.