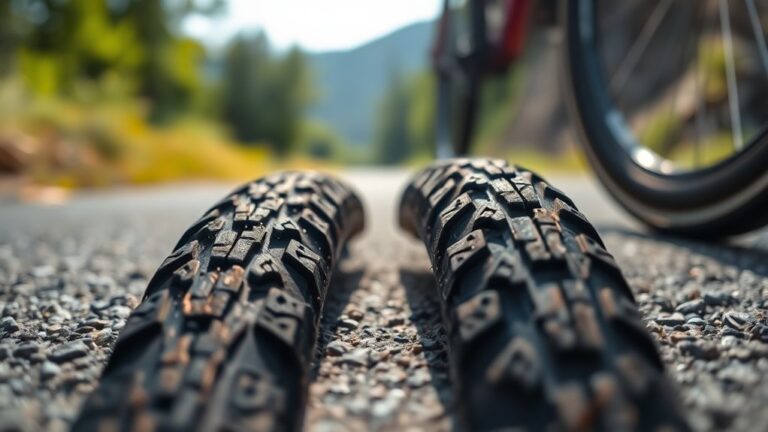
How Much Sealant to Use in Road Bike Tires Step by Step
If you’ve ever struggled with flat tires or wondered how to keep your road bike running smoothly, you’re not alone. Many riders find managing tire sealant levels tricky, but it’s a simple fix once you get the hang of it. Properly using sealant can save you time and hassle on your rides.
To determine how much sealant to use in your road bike tires, start with 2 to 4 ounces, depending on your tire size—smaller tires need less, wider ones need more.
Remove the valve core, measure the sealant carefully, and inject it into the tire using a syringe or nozzle.
Rotate the wheel to distribute the sealant evenly and ensure the valve is fully closed. Keep an eye on the sealant levels over time for peak performance.
To learn detailed steps, continue exploring below.
Key Takeaways
- Check your tire size and look at the manufacturer’s recommendations to find out how much sealant you should use.
- Measure out 2 to 4 ounces of sealant. You can use a syringe or a measuring cup for accuracy, depending on how wide your tire is.
- Next, remove the valve core. Then, carefully inject the sealant into the tire through the valve.
- After that, rotate the wheel to spread the sealant evenly inside the tire. This helps it coat the inside surface properly.
- Make sure the valve is screwed back on tightly. Keep an eye on the sealant level and check periodically to ensure everything’s sealing well.
How Much Sealant Do You Need for Your Road Bike Tires
How much sealant you need depends on the size of your road bike tires. Typically, a standard 700c road tire requires about 2 to 4 ounces of sealant.
Standard 700c tires need about 2 to 4 ounces of sealant for optimal puncture protection.
If your tires are a bit larger or smaller, adjust accordingly. For example, wider tires like 25mm or 28mm might need closer to 3 or 4 ounces.
Smaller tires, such as 23mm, could need just under 2 ounces. Always check the sealant manufacturer’s recommendations for specific amounts.
Using too little sealant can reduce puncture protection, while too much might add unnecessary weight. Measure carefully and fill your tires to the right level.
This ensures optimal performance and puncture resistance. Proper sealant volume keeps your ride smooth and worry-free.
Key Factors That Affect Sealant Volume for Road Tires
Your tire size and volume directly influence how much sealant you’ll need, with larger tires requiring more to effectively seal punctures. The consistency and type of sealant also matter, as thicker formulas may need less but work differently.
Furthermore, riding conditions and the environment, like temperature and terrain, can impact how much sealant is necessary for peak performance.
Tire Size and Volume
The size and volume of your road bike tires are key factors that directly affect how much sealant you’ll need. Bigger tires hold more air and need more sealant to seal punctures properly.
Smaller tires, on the other hand, require less sealant. To estimate the amount, consider your tire’s volume, which depends on its width and diameter.
Use this table for guidance:
| Tire Size | Approximate Volume (ml) | Sealant Needed (ml) |
|---|---|---|
| 23mm x 700c | 40-50 | 15-20 |
| 25mm x 700c | 45-55 | 15-25 |
| 28mm x 700c | 50-60 | 20-30 |
Knowing your tire’s size helps you choose the right amount of sealant for effective puncture protection.
Sealant Consistency and Type
Choosing the right sealant type and maintaining the proper consistency is key because they directly affect how much sealant you’ll need for your road tires.
Different sealant types vary in thickness, drying time, and sealing ability, which impacts how well they seal punctures and how much you should add.
Thinner sealants spread more easily and can give better coverage in narrow tires, but you might need more volume to be effective.
Thicker sealants seal larger punctures faster but might be overkill for small holes.
Consistency is important too—too thick can clog valves or be hard to distribute evenly, while too thin may leak out quickly.
Pick a sealant suited for road bikes and adjust the consistency if needed to get the best performance and avoid over-application.
Riding Conditions and Environment
Riding conditions and the environment are key factors in deciding how much sealant you’ll need for your road tires. If you often ride in wet, muddy, or rough terrain, you’ll probably need more sealant to effectively seal punctures and prevent leaks.
Hot, dry climates can cause sealant to evaporate faster, so you’ll want to top it up more often. On the other hand, cooler or more stable environments slow down evaporation, meaning you can use less sealant.
If you ride aggressively or at high speeds, increased heat can impact the sealant’s performance. This might mean more frequent maintenance to keep your tires sealed.
Knowing your typical riding conditions helps you figure out the right amount of sealant. That way, your tires stay sealed, and your ride stays smooth and safe.
Preparing Your Tire and Measuring Sealant Accurately
Before adding sealant, make sure your tire is clean and properly prepared. This helps the sealant stick better and work more effectively.
Use an accurate measurement tool to add the right amount of sealant. Too much or too little can impact how well it performs.
Getting the measurement right and preparing your tire properly are key to getting the best results from your sealant.
Tire Preparation Steps
To guarantee your sealant performs effectively, start by preparing your tire properly. Begin by removing the valve core if possible, to allow easy access inside the tire.
Deflate the tire completely, then inspect the interior for debris or sharp objects that could cause punctures. Use a clean cloth to wipe the rim and inside of the tire, making sure there’s no dirt or grease that could interfere with the sealant sticking.
If you’re installing a new tire or tube, double-check that it’s properly seated on the rim. Make sure the valve stem is accessible and securely fastened.
Properly preparing your tire creates a clean, airtight environment that helps the sealant seal punctures more effectively.
Precise Sealant Measurement
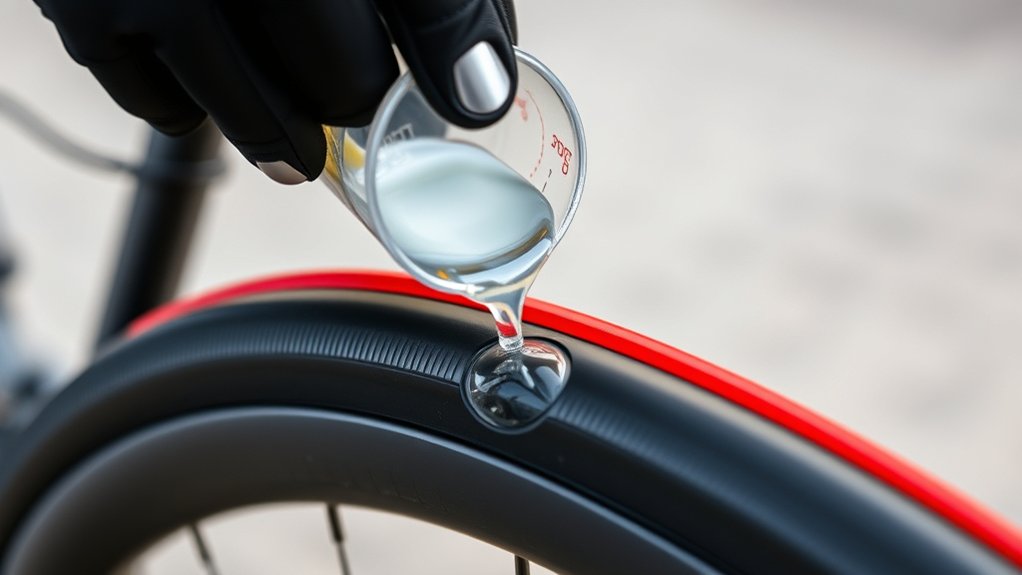
Making sure you measure the sealant accurately is essential for maximum puncture protection. Before pouring, check your tire’s recommended sealant amount, usually listed on the product or bike manufacturer’s guide. Use a syringe or a measuring cup for precision.
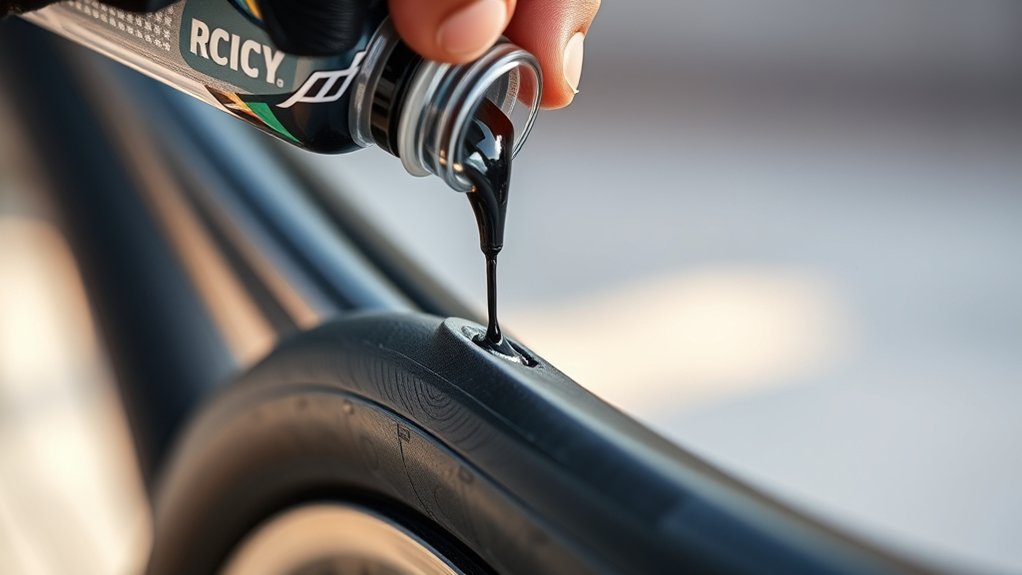
Remove the valve core to make pouring easier, then carefully inject the exact amount of sealant needed. Avoid overfilling, as too much can cause imbalance or mess. If you’re reusing old sealant, estimate its volume to avoid excess.
After measuring, reinsert the valve core securely and rotate the tire to distribute the sealant evenly. Proper measurement makes certain of effective sealing without waste or imbalance, giving you peace of mind during your ride.
Accurate sealant measurement is key to maintaining peak tire performance.
How to Apply Sealant Properly to Your Road Bike Tires
Applying sealant properly to your road bike tires is key for good puncture protection and smooth rides. First, remove the valve core using a valve core remover. This makes it easier to inject the sealant.
Shake the sealant bottle well to ensure the ingredients are evenly mixed. Attach a syringe or nozzle to the valve and carefully inject the recommended amount of sealant into the tire.
Shake the sealant bottle thoroughly and carefully inject the recommended amount into the tire.
Once you’ve filled the tire, spin and rotate the wheel to spread the sealant evenly inside. Then, securely reinsert the valve core and check for any leaks.
Make sure the valve is fully closed so no sealant escapes. Doing this right helps keep your tires sealed against punctures and ensures consistent performance on the road.
Tips for Monitoring Sealant and Preventing Flats
Ever wonder how to keep an eye on your sealant and avoid those annoying flats? Regular checks help your tires stay sealed and ready to go. Here are four simple tips:
- Check your sealant levels every 2–3 months and top them off if needed. It’s a quick way to keep everything working smoothly.
- Inspect your tires for punctures or leaks before every ride, especially after long or rough rides. Catching issues early saves you trouble later.
- Rotate your tires periodically to spread out the sealant evenly and prevent it from clumping up. It helps maintain a good seal.
- Look inside for signs of drying or thickening. If the sealant gets too thick, it won’t seal as well, so keep an eye on its condition.
Troubleshooting Sealant and Tire Issues in Road Cycling
When you start experiencing flats or inconsistent tire performance, diagnosing the root cause is essential. First, check if the sealant has dried out or isn’t evenly distributed inside the tire. If the sealant looks old or clumpy, it might not seal punctures effectively anymore.
Inspect the tire for embedded debris or small cuts that may bypass the sealant’s ability to seal. Also, verify the tire’s bead is seated correctly on the rim. An improperly seated bead can cause slow leaks.
If the valve isn’t sealing properly, air can escape, leading to flat spots. Sometimes, a quick test with soapy water around the valve and tire can reveal leaks. Address these issues promptly to restore your tire’s sealing ability and ensure safe, reliable rides.
Frequently Asked Questions
How Often Should I Reapply Sealant to My Road Bike Tires?
You should reapply sealant every 2 to 3 months, depending on riding conditions and how much you use your tires.
Regularly check the sealant level through the valve or by visual inspection. If you notice frequent punctures or the sealant seems to be low, it’s time to add more.
Consistent reapplication helps keep your tires protected from punctures and prevents the sealant from drying out. This way, your tires stay well-sealed and ready for your rides.
Can I Use the Same Sealant for Different Tire Brands?
Yes, you can generally use the same sealant for different tire brands, but it’s a good idea to check if it’s compatible with your tires. Some sealants work better with certain rubber types or tire styles.
Mixing different sealants might impact how well they work or cause clumping. So, always read the instructions on the product.
If you’re unsure, it’s best to ask the manufacturer to make sure the sealant works with your specific tires.
What Are Signs That My Sealant Has Dried Out?
You’ll notice your sealant has dried out when you see fewer or no bubbles during a puncture repair. Also, if your tires lose pressure faster than usual, that’s a sign something’s up.
If the sealant looks thick, crusty, or has turned into a solid mass inside the tire, it’s time to add fresh sealant. Make sure to check your tires regularly and reapply sealant every few months to keep it working well.
Is Sealant Effective in Cold Weather Conditions?
Yes, sealant can still work well in cold weather, but its effectiveness might decrease as temperatures get lower.
Cold conditions cause the sealant to thicken, which makes it less able to quickly seal punctures.
To keep it working properly, you might need to add a bit more sealant or warm your tires before riding.
It’s also a good idea to check your sealant levels regularly and consider switching to a formula made for low temperatures if you often ride in cold climates.
How Do I Remove Old Sealant Before Reapplying?
To remove old sealant, start by deflating your tire completely. Take the tire off the rim and pour out any remaining sealant into a cloth or sink.
Next, use a brush or cloth to scrub the inside of the tire and rim, making sure to remove all residue. Rinse with water if needed, then dry everything thoroughly before reapplying fresh sealant and putting your tire back on.
Conclusion
By paying close attention to how much sealant you add and staying vigilant about your tire’s health, you can enjoy smoother rides and fewer surprises on the road.
With a little care and regular checks, you’ll keep your tires happy and your cycling experience seamless.
Remember, a well-maintained setup often leads to more enjoyable journeys.
So, treat your tires gently, and they’ll reward you with reliable performance every time you hit the pavement—especially if you use just the right amount of sealant.