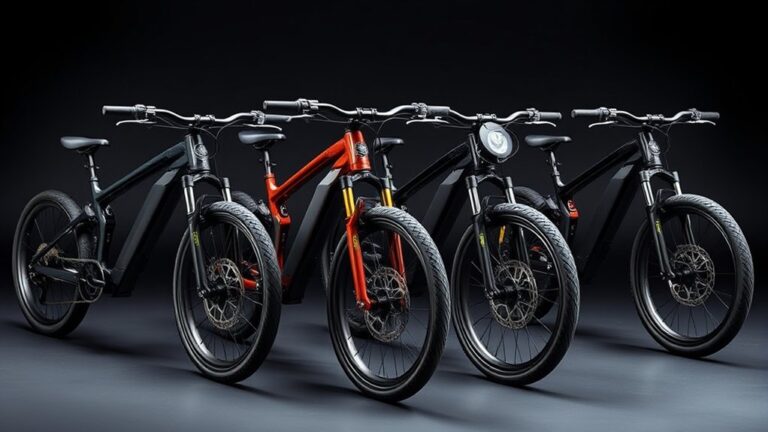
How to Put a Threadless Fork on Your Old Road Bike
Are you tired of your old road bike feeling clunky or outdated? If you’ve been dreaming of refreshing your ride without buying a whole new bike, you’re not alone. Many cyclists struggle with upgrading their bikes on a budget, especially when it comes to changing the fork.
To put a threadless fork on your old road bike, first identify if your current fork and headset are threaded. Then choose a threadless fork and compatible headset that fit your frame’s steerer tube diameter.
Remove the old fork and headset carefully. Install the new headset cups and crown race, slide in the new fork, and adjust spacers for the right stem height.
Tighten the top cap to eliminate play and test your setup for smooth steering. Keep exploring to master fine-tuning and maintenance.
Key Takeaways
- First, check if your old bike has a threaded steerer tube. Measure its diameter to see if it matches a threadless fork you plan to get.
- Next, gather everything you need: a threadless fork that fits your bike’s steerer diameter, a compatible threadless headset, a star nut or compression plug, and the tools you’ll need.
- To remove the old fork, loosen the stem bolts. Then, take off the locknut and slide the stem out. Carefully extract the fork from the frame.
- Once the old fork is out, install the new threadless headset cups into the head tube. Fit the crown race onto the new fork.
- Insert the new fork into the head tube, then install the spacers and stem at your desired height. Tighten the top cap enough to eliminate any play but not so tight that it affects steering smoothly.
- Finally, test your setup by riding the bike. Check how it handles and make sure the headset feels smooth. If you notice any play or misalignment, adjust the preload or spacers accordingly.
How To Identify Your Old Bike’s Fork And Headset Type
Before you install a threadless fork on your road bike, you need to figure out what type of fork and headset your current setup has. First, check if your existing fork has a threaded or threadless steerer tube.
Identify your bike’s fork and headset type before installing a threadless fork to ensure compatibility.
Threaded forks have visible threads near the top, while threadless ones are smooth. Next, look at your headset. If it has an adjustable cup and locknut on top, it’s probably threaded.
If your headset uses sealed cartridge bearings inside the frame’s head tube, then it’s likely threadless. Measure the steerer tube diameter, usually 1 inch or 1 1/8 inches, to make sure everything fits.
Getting these details right helps you pick the right replacement fork and headset, so you avoid costly mistakes when installing.
What Tools And Parts You’ll Need For The Conversion
Once you’ve figured out your bike’s fork and headset type, gathering the right tools and parts will make the conversion much easier. You’ll need to replace the threaded fork with a threadless one, so accurate measurements are important.
Here’s what you’ll want to have ready: a threadless fork that fits your bike’s steerer tube diameter and axle type, a compatible threadless headset, and a star nut or compression plug to secure the stem on the steerer tube.
Don’t forget your Allen wrenches and a crown race setter. These tools are essential for installing the headset and tightening bolts properly.
Having everything on hand will make the switch smoother and help you avoid unexpected delays during installation.
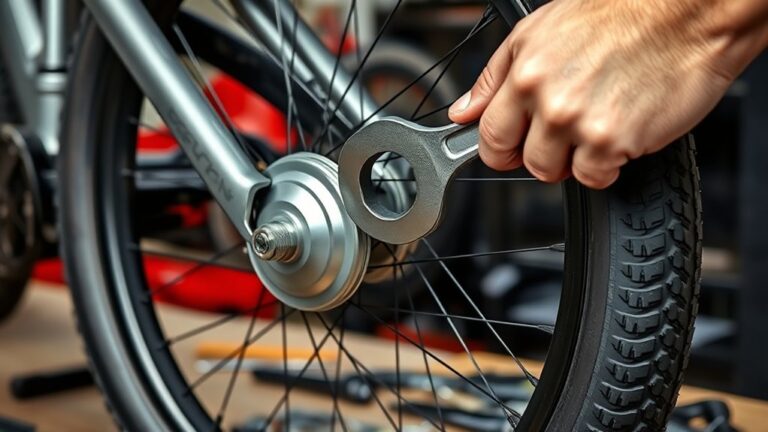
How To Remove Your Old Threaded Fork And Headset
First, you’ll want to identify all the parts of your threaded fork and headset.
Next, loosen the stem and locknut so you can free the fork.
Finally, carefully extract the fork from the frame to prepare for the new setup.
Identifying Threaded Fork Components
The crown race, locknut, and threaded steerer tube make up the key components of a threaded fork that you’ll need to identify before removal. First, locate the threaded steerer tube extending from the fork’s crown; it’s the part that screws into the headset.
Next, find the locknut, a large nut that secures the headset bearings and prevents loosening. Below the locknut, you’ll see the adjustable race, which fine-tunes bearing tension.
At the base of the fork’s steerer tube, the crown race sits tightly against the fork crown, providing a smooth surface for the headset bearings to rest on.
- Threaded steerer tube
- Locknut
- Adjustable race
- Crown race
Recognizing these parts helps you confidently proceed with fork removal.
Loosening Stem and Locknut
Start by loosening the stem bolts to free the stem from the threaded steerer tube. Use an appropriately sized Allen key or wrench to back off these bolts, but don’t remove them completely yet.
Next, locate the locknut above the headset. This secures the fork in place. Use a headset wrench to turn the locknut counterclockwise until it loosens. You may need to hold the lower race steady with another wrench to prevent it from spinning.
Once the locknut is loose, you can fully remove the stem bolts and carefully slide the stem off the steerer tube. At this point, the locknut and stem should be free, allowing you to proceed with removing the fork assembly.
Keep your tools handy for the next steps.
Extracting Fork From Frame
After loosening the stem bolts and removing the locknut, you’re ready to take the fork out of the frame. First, hold the front brake to stop the wheel from turning.
Next, gently pull the fork down while carefully sliding out the headset bearings. If the fork is stubborn, tap the crown race lightly with a rubber mallet to loosen it.
Finally, remove the fork completely from the head tube.
Here’s a quick rundown:
- Secure the front brake to keep the wheel steady.
- Pull the fork downward, freeing the headset bearings.
- Tap the crown race lightly if the fork is stuck.
- Fully extract the fork from the frame.
Now your old threaded fork is out and ready for the new threadless setup!
How To Choose A Compatible Threadless Fork For Your Frame
Before picking a threadless fork, make sure it fits your frame’s specs. Check the steerer tube diameter and length carefully to match your bike.
Getting these details right ensures a safe and smooth upgrade. Taking the time to verify compatibility can save you headaches down the road.
Frame Compatibility Check
Choosing a compatible threadless fork for your road bike starts with understanding your frame’s specs. You want the new fork to fit perfectly to keep things safe and running smoothly.
Begin by checking a few key points:
- Frame Material: Make sure the fork material matches or works well with your frame to prevent any damage.
- Brake Type Compatibility: Confirm the fork supports your brake system, whether it’s caliper or disc brakes.
- Axle Type and Spacing: Check that the fork’s axle spacing lines up with your front wheel hub for a proper fit.
- Fork Length and Rake: Pick a fork with similar length and rake to keep your bike’s handling just right.
Steerer Tube Specifications
Two key factors determine whether a threadless fork will fit your frame: the steerer tube diameter and its length. First, measure your current fork’s steerer tube diameter—most road bikes use either 1 inch (25.4 mm) or 1 1/8 inch (28.6 mm). You must match this exactly to ensure the new fork fits your headset and frame.
Next, check the steerer tube length. It needs to be long enough to pass through your headset and frame’s head tube, plus extra for the stem and spacers. If it’s too short, you won’t be able to secure the stem properly.
When shopping, confirm these specs on the fork’s product details. Keeping these measurements accurate guarantees a safe, snug fit and smooth steering on your upgraded bike.
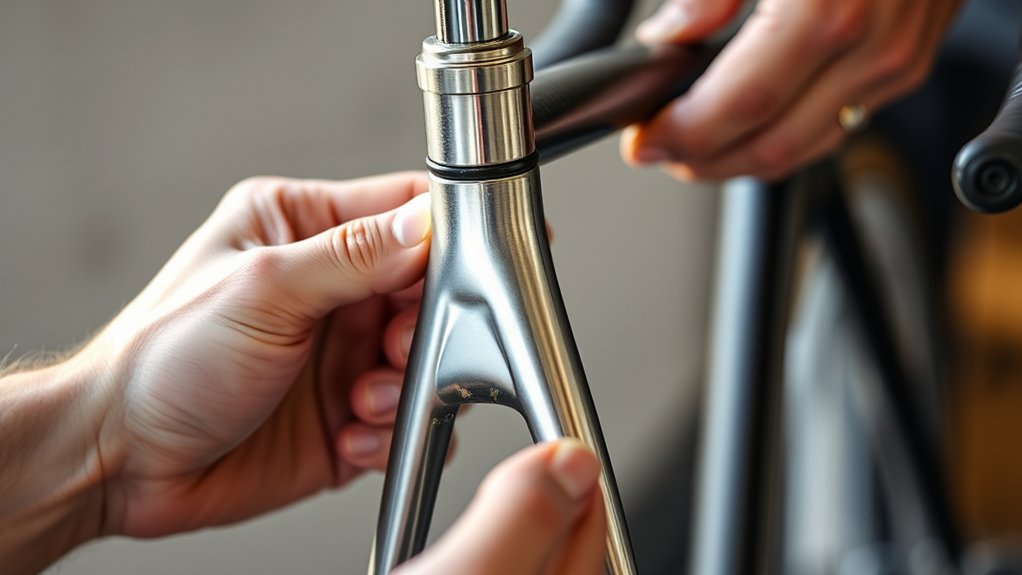
How To Install A Threadless Fork Headset On Your Old Frame
Start by removing the old threaded fork and headset from your frame so you’re ready for the threadless system. Make sure the head tube is clean and smooth before installing the new parts.
Once that’s done, carefully press the headset cups into the frame using a headset press tool. Keep them aligned and make sure they’re fully seated.
Next, insert the bearing races into the cups. Check that the bearings sit smoothly without binding or feeling tight.
Then, place the crown race on the new fork’s steerer tube. Tap it gently until it sits flush against the race seat.
Finally, slide the fork into the head tube, making sure the bearings are properly aligned. Confirm everything fits securely and rotates smoothly before moving on.
How To Fit And Adjust Your New Threadless Fork
With the fork properly seated in the head tube and the bearings aligned, you’re ready to fit and adjust your new threadless fork. First, slide the stem onto the fork’s steerer tube, making sure it sits flush against the headset spacers.
Add any extra spacers above or below the stem to get your handlebar height just right. Next, place the top cap on the steerer tube and tighten it enough to remove any play in the headset bearings. Don’t overtighten, or steering will become stiff.
Once the top cap feels snug, tighten the stem bolts to hold the stem firmly onto the steerer. Finally, check your adjustments by turning the handlebars. They should move smoothly without any looseness or binding.
Your fork is now fitted and ready for safe riding.
Troubleshooting Common Problems When Switching To A Threadless Fork
Although switching to a threadless fork can boost your bike’s performance, you might run into a few common issues during installation and adjustment. Here’s how to troubleshoot them:
- Steerer tube too long or short. Measure carefully before cutting, and adjust spacers accordingly to avoid misalignment or headset problems.
- Headset binding or looseness. Make sure you have proper preload on the headset bearings. Tighten the top cap just enough to remove play without making it stiff.
- Incompatible stem clamp size. Double-check that your stem’s clamp diameter matches the fork’s steerer tube. Use an appropriate stem if needed.
- Brake caliper alignment problems. Adjust the brake mount position and caliper angle to ensure the pads contact the rim properly.
Fixing these issues will keep your new fork running smoothly and safely.
How To Test And Fine-Tune Your Upgraded Fork Setup
Take your bike for a short ride to see how the new fork handles turns, braking, and the overall responsiveness. Pay attention to any strange vibrations or pulling, as these could mean alignment issues.
Next, check the headset for smoothness. Gently apply the front brake and rock the bike back and forth. If you hear knocking, the headset might need some adjustment.
If the steering feels too tight or loose, tweak the headset preload. Loosen the stem bolts, adjust the top cap bolt, then tighten everything carefully. Also, look down the fork to check its alignment—misalignment can cause poor handling.
Finally, make sure all bolts are torqued to the right specs. Repeat the process until the steering feels precise and comfortable, and your upgraded fork performs confidently on the road.
Why Should You Switch To A Threadless Fork On Your Old Road Bike?
Once you’ve dialed in your fork setup for smooth handling and precise steering, you might wonder why switching to a threadless fork on your old road bike is worth it. There are several clear benefits to making the upgrade.
First, improved adjustability means you can easily tweak stem height and angle for maximum comfort and control. It’s a simple way to customize your ride.
Easily fine-tune stem height and angle for a personalized, comfortable, and controlled riding experience.
Next, better compatibility allows your bike to fit modern components. That means access to a wider range of parts and upgrades.
Enhanced durability comes from the fact that threadless systems reduce wear on the headset and tend to be more robust overall.
Finally, simplified maintenance is a big plus. With fewer parts and no threaded headset, servicing your bike becomes quicker and less frustrating.
Frequently Asked Questions
Can I Use a Threadless Fork on a Vintage Steel Frame?
Yes, you can use a threadless fork on a vintage steel frame, but you’ll need a few adjustments.
Make sure the fork’s steerer tube matches your frame’s head tube diameter. You might need a headset adapter or a new headset that fits both the frame and fork.
Also, check the fork’s axle-to-crown length to keep the bike’s geometry right. With the right parts and some careful measuring, you’ll get it working smoothly.
Will Switching Forks Affect My Bike’s Warranty?
About 70% of bike warranties become void if you modify key components like the fork. So yes, switching forks will likely affect your bike’s warranty, especially if it’s still under coverage.
Manufacturers usually see forks as a crucial part of the frame’s safety, so changing them can void your warranty. If you want to keep your coverage, it’s best to check with the manufacturer first.
Otherwise, you’re taking a risk by swapping forks without approval. It’s always good to be cautious to avoid losing your warranty.
How Does a Threadless Fork Impact Bike Handling?
A threadless fork can improve your bike’s handling by offering more precise steering and better stiffness compared to threaded forks. You’ll notice quicker responses when cornering and increased stability at higher speeds.
However, it might slightly change your bike’s geometry, so it’s important to check compatibility carefully. Overall, you’ll enjoy a smoother and more controlled ride, especially if you’re upgrading from an older, less responsive fork design.
Are There Weight Differences Between Threaded and Threadless Forks?
Yes, threadless forks are usually lighter than threaded ones because they have fewer parts and simpler designs.
You’ll notice the weight savings especially if the threadless fork is made from carbon or high-grade aluminum. This reduction can help improve your bike’s responsiveness and handling.
But keep in mind, the exact difference depends on the materials and how the fork is built.
If you’re looking to cut some weight, switching to a threadless fork can be a smart choice.
Can I Reuse My Old Headset With the New Fork?
Just like trying to fit a square peg in a round hole, you usually can’t reuse your old threaded headset with a new threadless fork. They’re designed differently—threaded headsets sit inside the frame, while threadless ones clamp on.
You’ll likely need a new threadless headset to match the fork and frame. Double-check your frame’s compatibility, but in most cases, upgrading the headset is part of the process.
Conclusion
Switching to a threadless fork on your old road bike can boost your ride’s performance and comfort. Did you know that over 70% of modern road bikes use threadless forks for better handling and easier maintenance?
By following these steps, you’ll not only modernize your bike but also enjoy smoother steering and quicker adjustments. It’s a simple upgrade that makes a big difference.
Give your classic ride a fresh upgrade. It’s easier than you think and totally worth it for a more enjoyable ride on your road bike.