How to Measure Road Bike Frame Size in 7 Easy Steps
Finding the perfect road bike frame size can feel overwhelming, especially with so many measurements and options out there. You’re not alone—many riders struggle with getting that ideal fit, which can impact comfort and performance.
To measure your road bike frame size, start by measuring your inseam with a book between your legs, then multiply that length by 0.67 to estimate the frame size.
Next, confirm by measuring the seat tube from the bottom bracket to the top tube, and check the top tube length for a comfortable reach.
Test your handlebar and seat adjustments to see if they feel comfortable and support good posture.
Proper sizing makes a big difference in your riding experience—keep going to find tips on dialing in the perfect fit.
Key Takeaways
- Measure your inseam length by standing against a wall. Place a book between your legs and mark where it touches the wall.
- Use this measurement to calculate your frame size. Multiply your inseam length in centimeters by 0.67, then round to the nearest whole number.
- To confirm your frame size, measure the seat tube length. Do this from the center of the bottom bracket to the top of the seat tube.
- Next, measure the top tube length horizontally. Aim from the center of the head tube to the center of the seat tube. This helps ensure you get the proper reach and comfort.
- Finally, test and adjust your seat height, saddle position, and handlebar reach. Doing this will help you find an ergonomic and comfortable riding posture.
Measure Your Inseam to Start Your Road Bike Fit
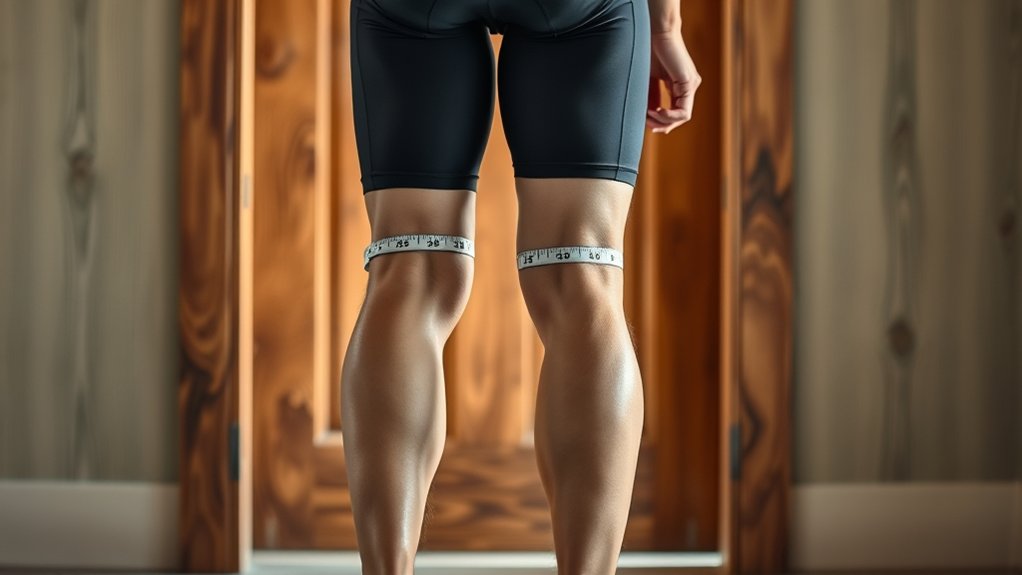
To get an accurate road bike fit, start by measuring your inseam. Stand with your back against a wall, feet about six inches apart.
Place a book or flat object between your legs, pressing it firmly against your crotch. This mimics the bike saddle’s position. Make sure it’s level and snug without causing discomfort.
Mark the wall where the top edge of the book meets it. Then, measure from the floor to that mark using a tape measure. This is your inseam length, which helps determine the right bike size.
Take a few measurements to ensure accuracy. Knowing your inseam will help you avoid an ill-fitting frame that could lead to discomfort or injury during your rides.
Calculate Your Road Bike Frame Size From Inseam
Now that you’ve measured your inseam, it’s time to turn that number into your perfect road bike frame size. Using accurate measuring tools helps ensure you get a precise fit that matches your body.
Just follow a few simple formulas to find the frame size that feels right for you. It’s easier than you might think and makes a big difference in your comfort and performance.
Measure Your Inseam Length
How do you find the perfect road bike frame size? Start by measuring your inseam length accurately.
Stand with your back against a wall, feet about 6-8 inches apart. Place a hardcover book or similar object snugly between your legs, mimicking the bike saddle’s position.
Make sure it’s level and pressed firmly upward but don’t force it uncomfortably. Have someone use a tape measure to measure from the floor up to the top edge of the book.
This measurement is your inseam length. It’s essential because it helps determine the frame size that will give you the best comfort and efficiency on the bike.
Take your time with this step to guarantee your road bike fits just right.
Convert Inseam To Frame
Once you have your inseam measurement, you can convert it into the ideal road bike frame size. Multiply your inseam length (in centimeters) by 0.67 to get a good estimate of the frame size you need.
For example, if your inseam is 80 cm, multiplying by 0.67 gives you 53.6 cm, which corresponds to a 54 cm frame. This calculation works because it factors in your leg length relative to the geometry of typical road bikes.
Keep in mind, frame sizes are usually rounded to the nearest whole number. Always check manufacturer sizing charts since geometry can vary slightly between brands.
Using this simple formula helps you narrow down your options and find a bike frame that fits your body comfortably for better performance and control.
Use Accurate Measuring Tools
Use accurate measuring tools to get the best results when calculating your road bike frame size from your inseam.
Start with a reliable tape measure or a meter stick to get a precise inseam length. Stand upright against a wall with your feet about 6-8 inches apart, and measure from the floor to your crotch.
Avoid using a soft tape measure that can stretch or bend easily, as this might give you incorrect readings. If possible, use a book or flat object between your legs to mimic the bike’s saddle height, then measure carefully.
Accurate measurements guarantee you pick a frame size that fits well, which improves comfort and performance. Don’t rush this step—precision here saves you from costly mistakes later on.
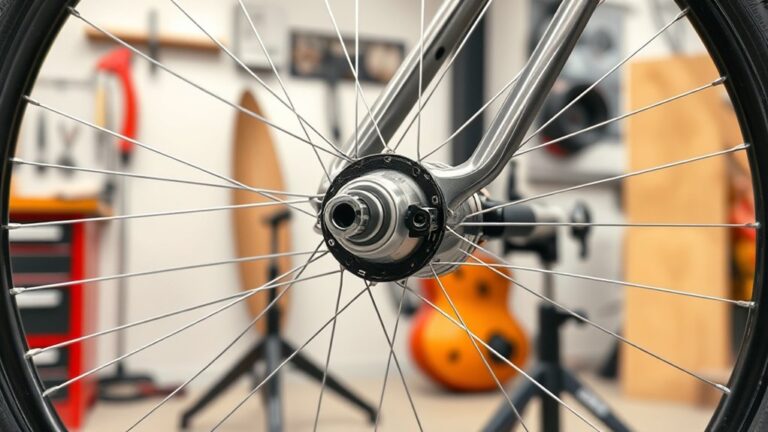
Confirm Frame Size by Measuring the Seat Tube
To confirm your frame size, start by locating the seat tube on your bike.
Measure from the center of the bottom bracket up to the top of the seat tube using a tape measure or ruler.
This measurement helps ensure your frame size matches your body for a comfortable ride.
Locate Seat Tube Position
Before you confirm your road bike frame size, you’ll need to locate the seat tube position, as this is essential for an accurate measurement. The seat tube runs from the bottom bracket (where the pedals connect) up to the seat post clamp. Pinpointing this tube guarantees you measure the correct part of the frame.
To find the seat tube:
- Identify the bottom bracket shell at the crankset’s center.
- Follow the tube extending upward toward the saddle.
- Note where the seat post inserts into the frame.
- Confirm the tube’s alignment with the bike’s main triangle.
Once you’ve clearly found the seat tube, you’re ready to measure it correctly. This helps verify the frame size tailored to your fit.
Measure From Center
One key step in confirming your road bike frame size is measuring the seat tube from its center. Start by finding the center of the bottom bracket shell, where the crank arms attach.
This point marks the lower end of the seat tube measurement. Then, measure straight up to the center of the top tube where the seat post inserts into the frame.
Make sure your tape measure or ruler follows a straight line along the seat tube’s axis for accuracy. This measurement, usually in centimeters or inches, is the effective length of the seat tube and matches your frame size.
Use Accurate Measuring Tools
Accurate measuring tools make all the difference when confirming your road bike frame size by the seat tube. Using the right tools guarantees you get a precise measurement, which is essential for a comfortable ride. You’ll want to avoid guesswork and rely on instruments that give clear, consistent results.
Here’s what you should use for the best accuracy:
- A reliable tape measure or a bike-specific frame measuring device
- A ruler or caliper for finer details around the seat tube
- A level to make sure your bike is standing straight while measuring
- A notepad or digital device to record your measurements immediately
With these tools, you’ll confidently determine your frame size, making your road cycling experience smoother and more enjoyable.
Check Top Tube Length for Comfortable Reach
The top tube length is key to how your bike feels in terms of reach and comfort. To check it, measure the horizontal distance from the center of the head tube to the center of the seat tube.
This length influences how stretched out or cozy you’ll feel while riding. If it’s too long, you might overreach, causing discomfort in your shoulders and back. If it’s too short, you’ll feel cramped and have less control.
Make sure the top tube matches your torso and arm length so you can maintain a natural riding posture. Remember, this measurement affects how easily you can handle your bike, so take your time to get it right before making other adjustments.
Test Reach and Handlebar Position on Your Road Bike
Start by sitting on your bike and gripping the handlebars to see how the reach feels. You want to make sure your arms aren’t overstretched or cramped, which can cause discomfort or poor control. Pay attention to your posture and ease of movement as you test.
To properly assess reach and handlebar position, check these:
- Your elbows should be slightly bent, not locked.
- You shouldn’t feel like you’re leaning too far forward or sitting too upright.
- The handlebars should be roughly level with your saddle or slightly lower.
- You should be able to comfortably reach brake levers without straining your wrists.
Adjust the stem length or handlebar height if needed to improve comfort and control before finalizing your frame size choice.
Compare Your Measurements to Road Bike Size Charts
Once you’ve tested the reach and handlebar position, you can compare your body measurements to standard road bike size charts. These charts usually match your inseam length and height to recommended frame sizes, typically shown in centimeters.
Find a chart from a reputable bike brand or retailer, since sizing can vary slightly between manufacturers. Look for your inseam measurement first because it’s the most accurate indicator of frame size.
Check reputable brands for sizing charts and prioritize your inseam measurement for the most accurate frame size.
Next, check your overall height to see if the suggested size fits within the recommended range. If you’re between sizes, consider your riding style and comfort preferences.
Using these charts helps narrow down your options quickly, so you can pick a frame size that matches your body and riding needs before making fine-tune adjustments.
Adjust Seat and Handlebars for a Perfect Fit
Achieving a perfect fit means adjusting your seat and handlebars to match your body and riding style. Start by setting your seat height so your leg has a slight bend at the bottom of the pedal stroke.
Next, move the saddle forward or backward to align your knee over the pedal axle. Adjust handlebar height and reach to keep a comfortable, aerodynamic posture without strain.
Keep these tips in mind:
- Make sure your hips don’t rock while pedaling.
- Align handlebars to avoid wrist discomfort.
- Test adjustments with short rides before finalizing.
- Recheck your settings periodically for comfort and efficiency.
Fine-tuning these elements improves control, power, and overall riding enjoyment.
Frequently Asked Questions
What Materials Are Commonly Used for Road Bike Frames?
You’ll find road bike frames commonly made from aluminum, carbon fiber, steel, and titanium. Aluminum is lightweight and affordable, making it a great choice if you want a good balance of performance and price.
Carbon fiber is super light and absorbs road vibrations well, which is perfect if you’re into high performance. Steel offers durability and a smooth ride but tends to be heavier.
Titanium combines strength and lightness, but it costs more. Your choice depends on your budget, riding style, and comfort preferences—so pick what suits you best.
How Does Frame Geometry Affect Bike Handling?
Frame geometry directly affects how your bike handles by influencing stability, responsiveness, and comfort. A steeper head tube angle makes your bike more agile and quick in turns, while a slacker angle improves stability at high speeds.
The top tube length changes your riding posture, affecting control and comfort. When you choose geometry that matches your riding style, you’ll enjoy better handling whether you’re climbing, sprinting, or cruising.
Can Women Use the Same Sizing Methods as Men?
You can think of bike sizing like choosing a tailored suit—while men and women both need measurements, their shapes differ. Yes, you can use the same sizing methods, but you’ll want to adjust for your unique proportions, especially torso and leg length.
Don’t just grab a frame because it fits “standard” numbers; listen to your body’s story. Fine-tuning guarantees comfort and control, making every ride feel custom-made just for you.
What Are the Benefits of Carbon vs. Aluminum Frames?
You’ll find carbon frames are lighter and absorb road vibrations better, giving you a smoother, more comfortable ride. They also offer greater stiffness, which improves power transfer when you pedal hard.
Aluminum frames are more affordable and durable, making them great for beginners or rougher conditions. If you want performance and comfort, go carbon.
If you need budget-friendly toughness, aluminum’s your best bet.
How Often Should I Recheck My Bike Fit After Purchase?
You should recheck your bike fit at least once a year or after any big changes like new shoes or pedals. If you start feeling discomfort, it’s a good idea to reassess.
If you’re riding more or pushing yourself harder, do it sooner. Your body can change over time, so regular adjustments help keep you comfortable and efficient.
Don’t hesitate to see a professional fitter if something feels off. That way, you’ll enjoy your rides more and reduce the risk of injury.
Conclusion
Now that you know how to measure your road bike frame size, you’ll ride more comfortably and efficiently. Remember, “measure twice, cut once” applies here—taking accurate measurements upfront saves you from discomfort later.
By following these steps and making adjustments to your seat and handlebars, you’ll ensure your bike fits you perfectly. A well-fitted bike makes all the difference in your cycling experience, so take your time and enjoy the ride!