How to Remove Mountain Bike Pedals in 7 Easy Steps
Are you tired of struggling to remove mountain bike pedals? You’re not alone—many cyclists find this task tricky and frustrating.
Whether you’re upgrading, replacing, or doing maintenance, knowing how to remove pedals easily can save you time and effort.
To remove your mountain bike pedals, first identify if they’re flat or clipless and pick a 15mm pedal wrench or an 8mm Allen wrench accordingly.
Position your bike securely—use a stand or flip it upside down—and set the crank arms for support.
Turn the right pedal counterclockwise, the left pedal clockwise, applying steady pressure to loosen.
Once loose, unscrew by hand and inspect threads.
Keep going to learn how to handle stubborn pedals and care for your crank arms afterward.
Key Takeaways
- First, figure out what type of pedals you have. Look for the flats or hex fittings to know what tools you’ll need before you start.
- Grab a 15mm pedal wrench or an 8mm Allen wrench. These will give you the right leverage and fit so you can remove the pedals smoothly.
- Secure your bike on a stand or flip it upside down. This makes it way easier to reach and work on the pedals.
- Turn the right pedal counterclockwise to loosen it. For the left pedal, turn it clockwise. This helps you unscrew them properly.
- Once the pedals are off, clean the threads. Applying some lubricant will help keep everything working well when you put new pedals on.
How to Identify Your Mountain Bike Pedal Type
Before you remove your mountain bike pedals, you need to identify their type because different pedals require different removal methods. Start by checking if your pedals are flat or clipless.
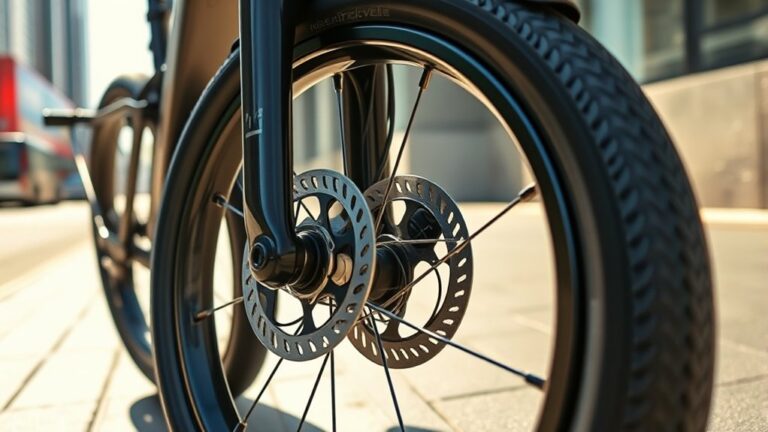
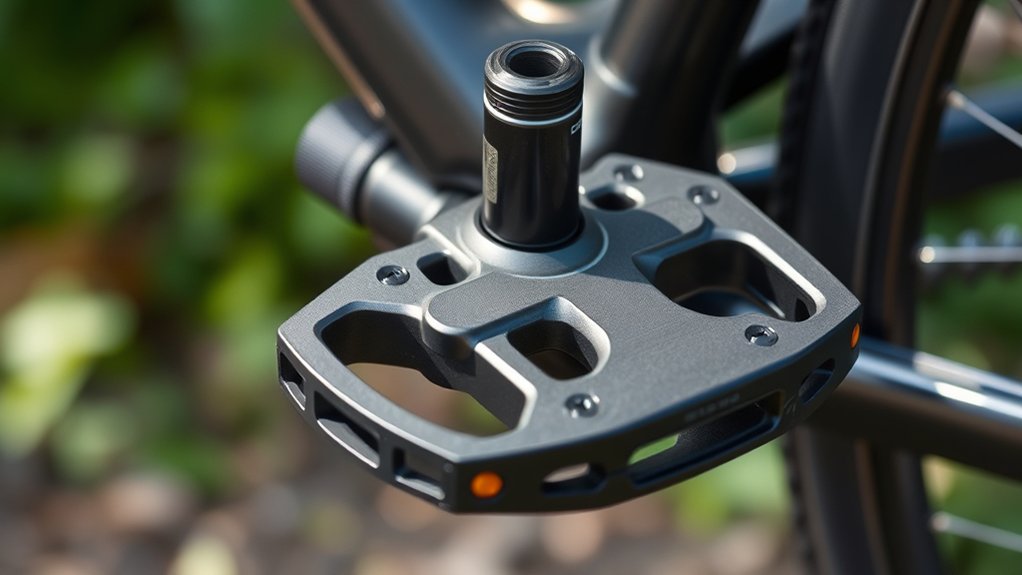
Flat pedals have a wide platform and no special attachment system, while clipless pedals have a mechanism that locks into cleats on your cycling shoes. Next, look at the pedal axle—most pedals use a 15mm wrench flat, but some might have an 8mm or 6mm hex socket on the inside or outside of the crank arm.
Also, note the pedal’s orientation. The right pedal tightens clockwise and loosens counterclockwise, while the left pedal is reverse-threaded. Identifying these traits will help ensure you don’t damage your bike or tools during removal.
How to Choose the Right Tools for Pedal Removal
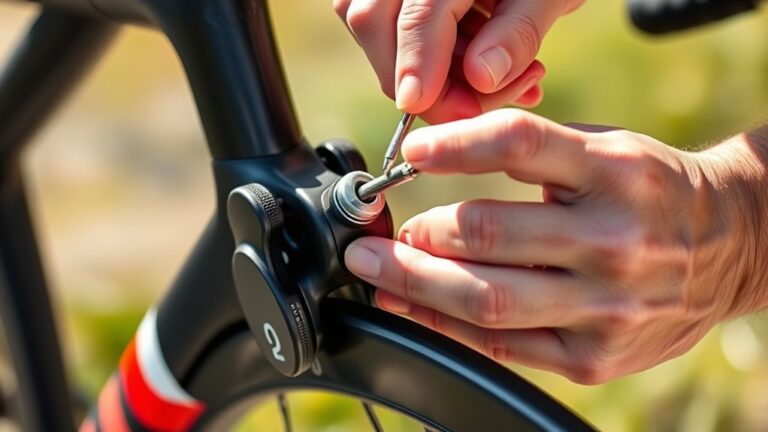
Knowing your pedal type and orientation helps you pick the right tools for removal. Most mountain bike pedals need either a 15mm pedal wrench or an 8mm Allen wrench.
If your pedals have flats on the spindle, a pedal wrench is best because it gives you more leverage. For pedals with an internal hex fitting at the end of the spindle, an Allen wrench fits perfectly.
Make sure your wrench is long enough to give you good leverage, especially since pedal threads can be tight. Avoid using adjustable wrenches—they can slip and damage the pedal or crank.
Use a long wrench for leverage and avoid adjustable wrenches to prevent slipping and damage.
Some pedals come with a specific tool designed by the manufacturer. So, check your pedal model’s instructions.
Choosing the right tool makes pedal removal smooth and prevents damage.
How to Position Your Mountain Bike for Easy Pedal Removal
To make pedal removal easier, position your mountain bike so you have clear access to both pedals and enough room to work without strain.
Ideally, place your bike on a stable surface like a bike stand or lean it securely against a wall. This keeps it steady and prevents wobbling while you’re working.
Turn the crank arms so the pedals are horizontal or slightly angled. This gives you better leverage and space to maneuver your wrench.
If you don’t have a bike stand, flip the bike upside down, resting it on the saddle and handlebars. Just make sure it’s stable and won’t scratch.
Proper positioning lets you apply force comfortably, reducing the risk of injury and making pedal removal quicker and smoother.
Which Way Should You Turn Your Pedal Wrench?
Which way should you turn your pedal wrench to loosen your mountain bike pedals? The answer depends on which side you’re working on.
The direction to turn your pedal wrench depends on whether you’re loosening the right or left mountain bike pedal.
For the right pedal, or drive side, turn the wrench counterclockwise to loosen it. For the left pedal, or non-drive side, turn the wrench clockwise because of its reverse threading.
This setup helps prevent the pedals from loosening during rides. Make sure your wrench fits snugly on the pedal axle flats to avoid slipping.
Apply steady, firm pressure in the correct direction, and the pedal should start to unscrew. Forcing the wrench the wrong way won’t help and might damage the threads.
Knowing this simple rule saves you from frustration and guarantees you remove pedals safely and efficiently.
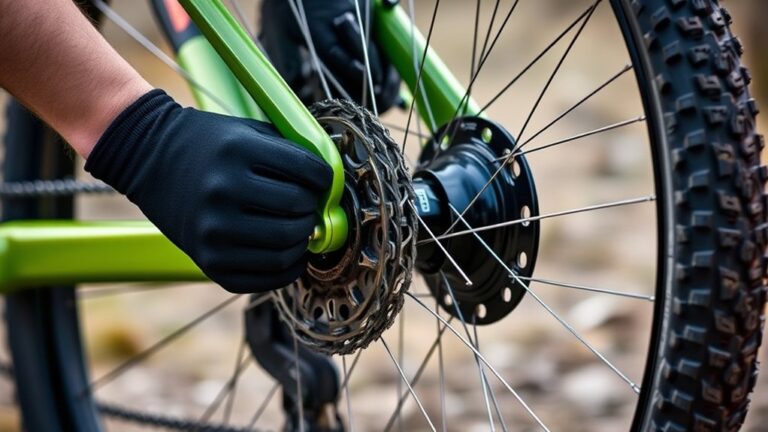
7 Easy Steps to Remove Mountain Bike Pedals
Understanding the correct direction to turn your pedal wrench sets you up for a smooth removal process. First, position your bike securely, either upside down or on a stand.
Second, locate the pedal wrench flats on the pedal axle. Third, place the wrench firmly on these flats.
Fourth, for the right pedal, turn the wrench counterclockwise; for the left, clockwise. Fifth, apply steady pressure to loosen the pedal—don’t rush it.
Sixth, once loosened, unscrew the pedal by hand to remove it completely. Finally, inspect the threads for dirt or damage before reinstalling or storing the pedals.
Following these steps carefully helps you remove your mountain bike pedals efficiently and without damage.
How to Handle Stubborn or Rusted Pedals Safely
Many stubborn or rusted pedals won’t budge with basic wrenching alone, but you can still remove them safely by using the right techniques and tools.
Start by applying a penetrating oil to the pedal threads and let it soak for at least 10-15 minutes to loosen rust and grime.
Use a longer wrench or a pedal wrench with a longer handle for better leverage, but avoid using excessive force to prevent damage.
If the pedal still won’t move, try gently tapping the wrench handle with a rubber mallet to break the rust bond.
Always turn pedals in the correct direction—remember, the left pedal is reverse-threaded.
Taking these careful steps helps you avoid stripping threads or injuring yourself while removing stubborn or rusted pedals.
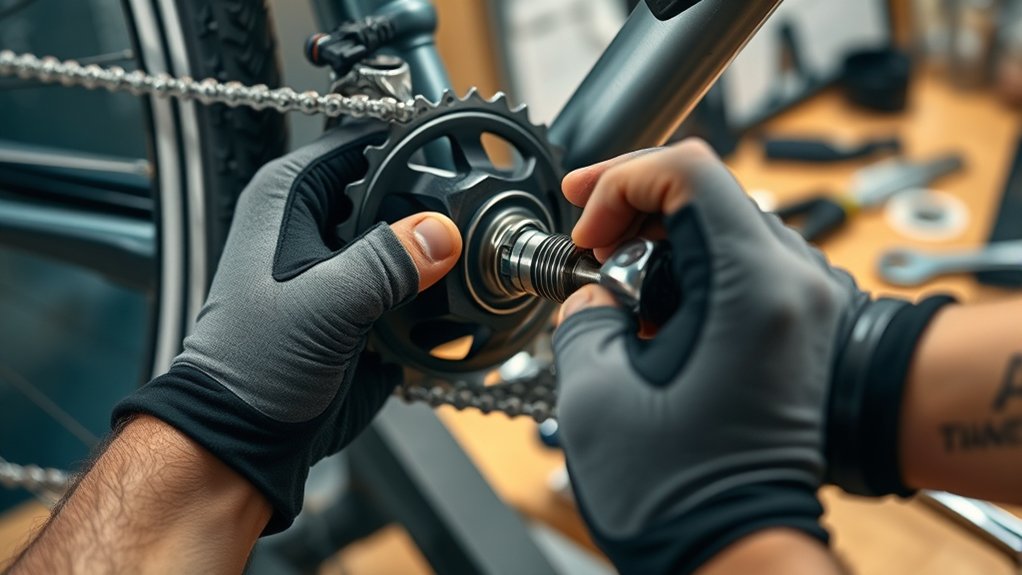
Post-Removal Care for Your Pedals and Cranks
Once you’ve taken off your pedals, make sure to clean them thoroughly to prevent any buildup and wear. It’s a good idea to inspect the crank arms carefully for any damage or cracks before putting everything back together.
Finally, don’t forget to apply lubricant properly. This helps keep your components running smoothly and can really extend their lifespan.
Cleaning Pedals Thoroughly
After you’ve removed your mountain bike pedals, take some time to clean them thoroughly. This helps ensure they perform smoothly and last longer.
Start by wiping off dirt, mud, and debris with a rag or brush. Use a degreaser to break down stubborn grime, especially around the spindle and bearings.
Rinse with water but avoid soaking the pedals to protect the internal parts. Dry them completely with a clean cloth.
If your pedals have removable pins or parts, take them off and clean each piece individually to prevent buildup. Finally, apply a light layer of grease or lubricant to the spindle and moving parts before reinstalling.
Keeping your pedals clean not only improves their function but also helps you spot wear early. This way, your rides stay smooth and safe.
Inspecting Crank Arm Condition
A close inspection of the crank arms is essential once you’ve removed the pedals. Check for any visible damage like cracks, deep scratches, or bends that could weaken their strength.
Pay attention to the pedal threads inside the crank arms; worn or stripped threads can cause pedals to loosen or fall off during rides. Also, look for signs of corrosion or dirt buildup that might affect the pedal’s fit or longevity.
If you spot any issues, it’s best to address them before reinstalling the pedals to ensure safety and performance. Taking this step helps keep your bike reliable and prevents unexpected problems on the trail.
Keep the crank arms clean and damage-free so you can enjoy a smooth, worry-free ride.
Applying Lubricant Properly
Two key areas require proper lubrication to keep your pedals and crank arms functioning smoothly: the pedal threads and the crank arm interfaces. After removing your pedals, clean these areas thoroughly to remove dirt and old grease.
Apply a thin, even layer of high-quality bicycle grease to the threads before reinstalling pedals. This helps prevent seizing and makes future removal easier. Don’t forget to lubricate the crank arm interfaces where the pedal spindle meets the crank.
This ensures smooth rotation and reduces wear. Be careful not to over-lubricate, as excess grease can attract dirt and grime. Proper lubrication extends the lifespan of your components and keeps your bike performing at its best.
Make this a regular part of your maintenance routine to keep your mountain bike pedals turning freely and your rides smooth.
Frequently Asked Questions
How Often Should I Replace My Mountain Bike Pedals?
You should replace your mountain bike pedals every 1 to 2 years, depending on how often and hard you ride.
If you notice worn-out grip, loose bearings, or damaged threads, it’s time for new pedals.
Also, if they feel rough or make noise while spinning, don’t wait.
Regularly check them to avoid unexpected failures and keep your rides smooth and safe.
Can I Use Regular Bike Pedals on a Mountain Bike?
Think of using regular bike pedals on a mountain bike like wearing dress shoes for a hike. They might work, but they won’t give you the grip or durability you need.
Yes, you can use regular pedals, but mountain bike pedals are designed for tougher terrain and better traction. If you want control and safety on rough trails, it’s smarter to stick with pedals made specifically for mountain biking.
What Are the Signs of Worn-Out Mountain Bike Pedals?
You’ll know your mountain bike pedals are worn out if you feel excessive play or looseness when spinning them.
Also, if the pedal body cracks, the bearings grind, or they don’t spin smoothly, it’s time to replace them.
Look for worn or missing traction pins that reduce grip, and check for rust or corrosion.
If your feet slip more often or the pedals feel unstable, those are clear signs you need new pedals.
Are There Different Pedal Removal Techniques for Clipless Pedals?
Yes, there are different techniques for removing clipless pedals. Usually, you’ll need a specific wrench or Allen key for them.
Remember, the drive-side pedal is turned counterclockwise to remove, like most pedals. But the non-drive side pedal unscrews clockwise, which can be a surprise.
Always check your pedal’s threading direction before you start. It saves you from struggling and possibly damaging the threads.
How Do I Prevent Pedal Damage During Removal?
To prevent pedal damage during removal, always use the right tools, like a proper pedal wrench or Allen key. Don’t force the pedal if it’s stuck; instead, apply some lubricant and let it sit for a while.
Turn the wrench counterclockwise on the drive side and clockwise on the non-drive side. Keep your bike stable, and avoid using excessive force to protect the threads and pedal body from stripping or cracking.
Conclusion
Removing your mountain bike pedals might seem tricky at first, but with the right tools and steps, it’s pretty straightforward and safe.
Don’t worry if they feel stuck—applying a bit of lubricant and patience usually does the trick without damaging your bike.
Once you’ve got them off, maintenance and upgrades become much easier.
Just follow these steps, and you’ll be back on the trail in no time, with pedals perfectly ready for your next ride.