How to Loosen Mountain Bike Brakes in 8 Easy Steps
Are your mountain bike brakes feeling too tight, making every ride less enjoyable? You’re not alone—many cyclists struggle with brake tension that’s either too stiff or too loose. Luckily, fixing this is easier than you think with just a few simple steps.
First, check if your brakes are too tight by squeezing the lever and noting wheel resistance. Gather needed tools like Allen wrenches and a screwdriver. Loosen cable tension using the barrel adjuster by twisting it counterclockwise.
Next, adjust cable tension at the caliper by loosening the anchor bolt and pulling slack. Align brake pads for a 1-2 mm gap, then test the lever feel and fine-tune as necessary.
Troubleshoot any issues and perform a safety check before riding. Keep going to refine your setup and guarantee safe braking. With patience, you’ll have your brakes feeling just right in no time.
Key Takeaways
- Use the barrel adjuster by twisting it counterclockwise to gradually loosen the brake cable tension.
- Loosen the cable anchor bolt at the brake caliper and pull the cable slightly to add slack.
- Make sure the brake pads have a 1-2 mm gap from the rim or rotor. This helps prevent constant rubbing and noise.
- Check that the brake lever feels less sensitive. Also, ensure the wheel spins freely without any drag.
- Once everything looks good, tighten all bolts securely.
- Test the brakes to make sure they stop smoothly and effectively.
Check If Your Mountain Bike Brakes Are Too Tight
How can you tell if your mountain bike brakes are too tight? Start by squeezing the brake lever firmly. If the wheel slows down immediately or barely spins when you release the brake, it’s a sign the brakes might be too tight.
Also, check the brake pads. If they’re constantly rubbing against the rim or rotor even when you’re not braking, that’s another clear indicator. Listen for any unusual noises like squealing or grinding, which can mean the pads are pressing too hard.
Finally, test your ride. If the brakes feel overly sensitive or cause excessive drag, you’ll want to adjust them. Identifying these signs early helps maintain smooth, safe braking and prevents unnecessary wear on your bike components.
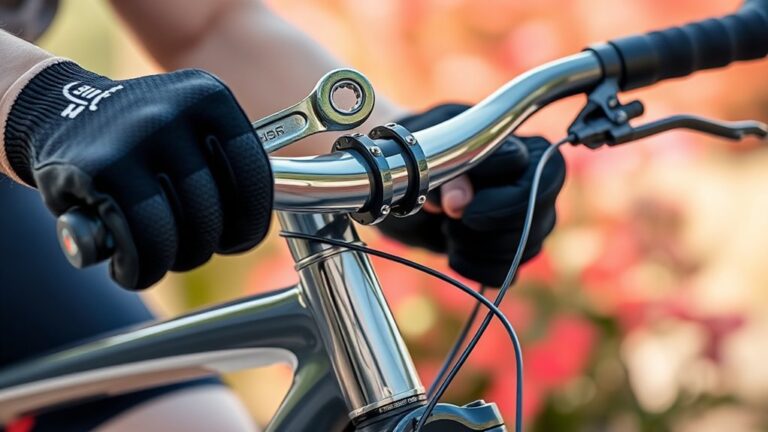
Gather Tools Needed to Loosen Mountain Bike Brakes
Before loosening your mountain bike brakes, gather the right tools to make the process smooth and effective. You’ll need a set of Allen wrenches, typically sizes 4mm and 5mm, since most brake bolts use these.
A flathead screwdriver can come in handy for minor adjustments. Prepare a pair of needle-nose pliers to grip and manipulate the brake cable if necessary.
Moreover, keep a clean rag nearby to wipe any dirt or grease from the brake components. If your bike uses rim brakes, having a small adjustable wrench might help loosen certain nuts.
Having these tools within reach saves time and reduces frustration. Once you have everything ready, you’ll be set to adjust your brakes confidently and safely.
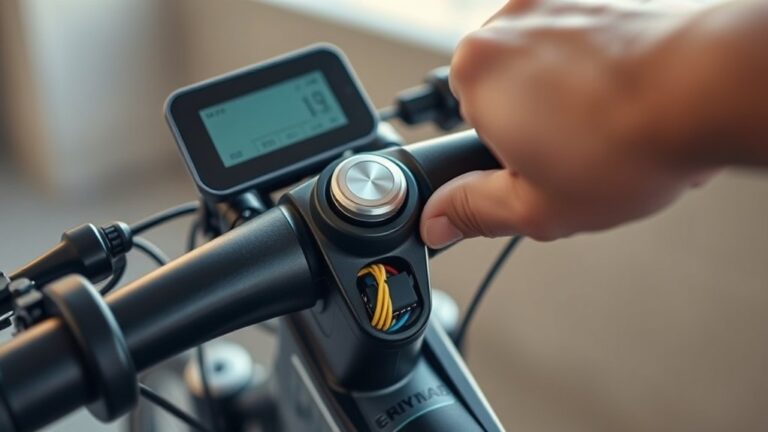
Loosen the Mountain Bike Brake Cable Using the Barrel Adjuster
First, find the barrel adjuster near the brake lever or caliper.
Then, twist it counterclockwise to loosen the brake cable tension.
Finally, squeeze the brake lever to check if the feel is just right.
Locate The Barrel Adjuster
You’ll find the barrel adjuster on the brake lever or near the brake caliper along the brake cable housing. It’s a small, cylindrical piece that screws in and out to fine-tune brake cable tension.
Before you start loosening your brakes, take a close look at these areas on your bike. The barrel adjuster often looks like a knurled nut or a ridged cylinder, designed for easy grip.
If you don’t see one on the brake lever, check the brake caliper itself. Knowing exactly where the barrel adjuster sits is essential because it’s your tool for quick adjustments without needing extra tools.
Once located, you’re ready to move on to the next step in loosening your mountain bike brakes.
Twist To Adjust Tension
Turn the barrel adjuster counterclockwise to loosen the brake cable tension and create more space between the brake pads and the rim. As you twist, you’ll see the brake pads move slightly away from the wheel, reducing friction and making it easier to spin.
Do this gradually—small turns make a big difference. If the brakes feel too loose, just turn the barrel adjuster clockwise to tighten the cable again. Keep an eye on the pad clearance so the gaps aren’t too big, which could affect stopping power.
Using the barrel adjuster is a quick way to fine-tune your brakes without any tools. It’s perfect for on-the-go adjustments. Once you find the right tension, your brakes should feel responsive but not overly tight or dragging on the rim.
Check Brake Lever Feel
After adjusting the barrel adjuster, squeeze the brake lever to check how it feels and responds. You want the lever to move smoothly without feeling too tight or too loose.
If it feels too tight, your brakes might still be grabbing too much. If it’s too loose, the brakes won’t engage properly.
Follow these steps to evaluate the brake lever feel:
- Squeeze the lever halfway and hold it steady.
- Make sure the lever doesn’t touch the handlebar; if it does, loosen the cable more.
- Check for smooth, consistent resistance as you pull.
- If the feel isn’t right, turn the barrel adjuster and test again.
Repeat until you find the perfect brake lever tension for safe riding.
Adjust Mountain Bike Brake Cable Tension at the Caliper
First, find the brake caliper bolts to get to the cable anchor. Loosen the anchor bolt so you can move the cable to adjust the tension.
Once you’ve set the right tension, tighten the bolt back up. Then, pull the brake lever to check if the feel is just right.
Locate Brake Caliper Bolts
You’ll find two main bolts securing the brake caliper to your mountain bike frame or fork. These bolts are key to adjusting and loosening your brakes effectively.
To locate them, start by positioning your bike so you can easily access the brake caliper on the wheel. Look closely at where the caliper clamps around the rotor or rim.
Identify the two bolts—usually hex or Allen head—that hold the caliper in place. Check if these bolts are tight or slightly loosened, as this affects cable tension adjustments.
Adjust Cable Anchor Position
Loosen the cable anchor bolt slightly to free the brake cable, which helps you adjust its tension at the caliper.
Once it’s loose, pull the cable through the anchor to reduce tension and create more slack. This makes the brake pads less tight on the rim or rotor.
Make small, gradual changes and avoid over-loosening, as it could cause brake drag or poor stopping power.
After adjusting, hold the cable firmly in place and tighten the anchor bolt securely to prevent slipping.
Check that the brake arms move freely without rubbing the wheel. This sets the foundation for proper brake function and comfort.
Before testing the lever tension, ensure your adjustments are precise for smooth, responsive braking.
Test Brake Lever Tension
Squeeze the brake lever to feel how much tension the cable has at the caliper. If the lever feels too tight or too loose, it’s time to adjust the cable tension for better braking. Here’s how to test and tweak it:
- Squeeze the lever firmly and see how close the brake pads get to the rim or rotor.
- If the pads barely move or don’t engage quickly, the cable is too loose.
- If the lever pulls too close to the handlebar before the brakes engage, the cable is too tight.
- To fix this, turn the barrel adjuster or loosen the cable anchor bolt to reposition the cable, then retighten it.
Repeat the test until the lever feels responsive but not too stiff.
Adjust Mountain Bike Brake Pads for Proper Clearance
Before you fine-tune your mountain bike brakes, make sure the pads sit at the right distance from the rim or rotor. Start by loosening the bolts that hold the brake pads just enough to move them.
Position each pad so it lines up evenly with the braking surface without touching it when you release the brake lever. Aim for a 1-2 millimeter gap to prevent constant rubbing but still ensure effective stopping power.
Once you’re happy with the position, tighten the bolts securely so the pads don’t shift during your ride. Spin the wheel to check that the pads don’t drag or touch the rotor or rim.
Having the right clearance keeps your brakes responsive and reduces wear. Take your time adjusting the pads before moving on to other brake settings.
Test Brake Lever Feel and Adjust Cable Tension
Once you’ve set the brake pads properly, check how the brake lever feels when you pull it. It should engage smoothly without feeling too tight or too loose. If the lever pulls too close to the handlebar or feels spongy, adjusting the cable tension can help.
After setting brake pads, ensure the lever pulls smoothly without being too tight or loose for safe riding.
Follow these steps to test and adjust:
- Squeeze the brake lever and see how far it moves before the brakes engage.
- If it travels too far, find the barrel adjuster near the lever or caliper.
- Turn the barrel adjuster counterclockwise to increase tension and reduce lever travel.
- If needed, loosen the cable anchor bolt, pull the cable tighter, and then retighten the bolt for a more precise adjustment.
Keep testing until the lever feels firm and responsive.
Troubleshoot Common Brake Issues After Loosening
After loosening your mountain bike brakes, you might notice issues like reduced stopping power or uneven pad contact. These problems often come from cable tension, pad alignment, or rotor condition. Fix them quickly to stay safe on your ride.
| Issue | Solution |
|---|---|
| Weak stopping power | Tighten the cable a bit |
| Pads rub the rotor | Adjust the pad alignment |
| Brake lever feels spongy | Bleed the hydraulic system if needed |
| Uneven pad wear | Check if the rotor is warped |
| Noise when braking | Clean the rotor and pads |
Do a Quick Safety Check Before Your Ride
Although you’ve adjusted your mountain bike brakes, you still need to do a quick safety check to make sure everything works properly. This step helps keep your ride safe and smooth.
Follow these four quick checks before hitting the trail:
- Brake Lever Feel – Squeeze each lever to make sure it feels firm, not spongy or too loose.
- Pad Alignment – Ensure the brake pads contact the rim or rotor evenly and don’t rub when released.
- Cable Tension – Check the brake cables for proper tension; they shouldn’t be slack or overly tight.
- Wheel Spin – Spin the wheels to confirm they rotate freely without brake drag or wobble.
Doing these checks will help prevent brake failures and give you confidence on every ride.
Frequently Asked Questions
How Often Should I Replace My Mountain Bike Brake Pads?
You should replace your mountain bike brake pads every 500 to 700 miles, but it really depends on how and where you ride.
If you notice your braking isn’t as strong, hear squealing, or see the pads worn down to the metal, it’s time to change them.
Make sure to check your pads regularly, especially after long rides or riding through muddy conditions.
Keeping an eye on them helps ensure your brakes stay reliable and your rides stay safe.
Can I Use Oil to Lubricate My Brake Cables?
Think of your brake cables like the veins of your bike, needing smooth flow but no slickness that causes slipping. You shouldn’t use oil to lubricate brake cables because it can attract dirt and grime, gumming up the system.
Instead, use a dedicated cable lubricant or light grease designed for bike cables. That way, your brakes stay responsive, and you avoid the sticky mess oil can create, keeping your ride safe and smooth.
What Are the Signs of Worn-Out Brake Cables?
You’ll notice worn-out brake cables if your brakes feel less responsive or need more lever pull to engage.
Look for frayed or rusted cables, which can cause sticking or uneven braking.
If your brake lever feels spongy or doesn’t return smoothly, that’s another sign.
Also, check for visible cable damage or corrosion.
Replacing worn cables promptly keeps your braking reliable and safe on every ride.
How Do Hydraulic Brakes Differ From Mechanical Brakes?
Hydraulic brakes use fluid to transfer force, giving you smoother, stronger, and more consistent braking with less effort. Mechanical brakes rely on cables to pull the brake arms, making them simpler but often less powerful and precise.
You’ll find hydraulic brakes self-adjust as pads wear, while mechanical ones need manual adjustments. So, if you want better performance and easier maintenance, hydraulic brakes are the way to go.
Is It Safe to Ride With Slightly Loose Brakes?
Sure, riding with slightly loose brakes is like juggling flaming torches—thrilling until you drop one. You might get away with it on flat, slow rides, but don’t fool yourself; your stopping power’s compromised.
Loose brakes won’t save you from surprises or emergencies. Tighten them properly so you don’t turn your ride into an unintended thrill-seeker’s stunt.
Better safe and in control than airborne and out of control!
Conclusion
Now that you know how to loosen your mountain bike brakes in just 8 easy steps, you’ll enjoy smoother rides and better control.
Don’t worry—loosening your brakes won’t compromise safety if you follow each step carefully and do a final check.
In fact, properly adjusted brakes can boost your confidence on the trails. So take your time, trust the process, and get ready for a safer, more enjoyable ride every time.
And remember, learning how to loosen mountain bike brakes is a simple way to improve your cycling experience.