How to Put Drop Bars on a Hybrid Bike
Are you tired of your hybrid bike feeling a bit limited in versatility? Many riders wish they could switch up their handlebars for a more comfortable or sporty feel, especially for longer rides.
If that sounds like you, you’re not alone—adding drop bars can truly transform your riding experience.
To put drop bars on your hybrid bike, first verify they suit your riding style, especially for long rides. Choose lightweight, comfortable bars, and gather tools like an allen wrench, screwdrivers, and cable cutters.
Remove your current handlebars, clean components, then align and attach the drop bars securely, adjusting height and angle for comfort.
Confirm brake and gear cables are properly tensioned and aligned.
For detailed steps and tips, keep exploring how to customize your setup for the best ride.
Key Takeaways
- Remove the existing handlebars and cables, then clean and prepare the stem for the new drop bars.
- Choose appropriate drop bars based on your comfort, riding style, and material preferences.
- Attach the drop bars to the stem, making sure they are properly aligned. Gradually tighten the bolts using a torque wrench to avoid over-tightening.
- Adjust the height, reach, and wrist angle to ensure comfort and improve aerodynamics. Align the brake levers so they are parallel to the handlebars.
- Reconnect and tune the brake and gear cables. Take your bike for a test ride and make small adjustments to get the perfect fit and performance.
Decide if Drop Bars Are Right for Your Hybrid Bike
Are drop bars the right choice for your hybrid bike? Think about your riding style and what feels comfortable to you.
Drop bars are great if you enjoy long rides, want multiple hand positions, or prefer a more aerodynamic posture. They can make climbing easier and help reduce fatigue on extended trips.
Drop bars enhance long rides with multiple hand positions and an aerodynamic posture for easier climbing.
If you mainly use your bike for quick errands or prefer a more upright, relaxed position, flat or riser bars might be a better fit. Consider where you’ll ride most often and how you want to feel while riding.
Drop bars can give your bike a sporty vibe, but they do take some getting used to if you’re used to traditional hybrid handlebars.
Before deciding, think about your riding goals and comfort needs. This will help you figure out if drop bars are the right choice for you.
Choose the Best Drop Bars for Your Hybrid
Choosing the right drop bars for your hybrid bike depends on your riding style and comfort preferences. If you prefer casual rides, go for lightweight, classic drop bars that give you multiple hand positions without feeling overwhelming.
For longer or more aggressive rides, look for bars with a wider drop and flatter tops. These help reduce fatigue and give you better control. Comfort is really important, so pick bars with ergonomic curves or padded options if your hands tend to go numb.
Material also matters. Aluminum is lightweight and affordable, while carbon offers better shock absorption. Think about how you’ll grip the bars—on the tops, hoods, or drops—to find what works best for you.
Ultimately, choosing the right drop bars makes your ride more comfortable, controlled, and versatile. It’s all about finding what fits your style and needs.
Tools and Materials You Need for Installation
Before you start installing drop bars, gather the necessary tools and materials to ensure a smooth process. Having the right equipment on hand prevents delays and keeps things safe.
You’ll need basic tools like an Allen wrench set, screwdrivers, and a bike pump. It’s also important to have new handlebar tape or grips, plus cable cutters for trimming brake and gear cables.
Additionally, having lubrication oil for moving parts and a rag for cleaning components can make the job easier. Proper preparation helps avoid mishaps and makes the installation quicker and more efficient.
How to Install Drop Bars on Your Hybrid Bike
Start by preparing your bike components, making sure the handlebars and brake levers are clean and ready for installation. Next, position the drop bars correctly, aligning them with your bike’s stem and cables.
Finally, securely attach the bars, ensuring everything is tight and properly aligned. This way, you’ll be ready for safe and comfortable riding.
Preparing Bike Components
Gather all the necessary components and tools before beginning, so you can work efficiently and avoid interruptions. This guarantees a smooth installation process and minimizes errors.
Start by inspecting your drop bars, shifters, brake levers, and cables to confirm compatibility with your hybrid bike. Check that you have the correct tools, including Allen wrenches, screwdrivers, and cable cutters.
Prepare your workspace by organizing components for easy access. Clean all contact points on your handlebars and brake levers to ensure a secure fit.
Finally, review your bike’s specifications to confirm the correct sizes and types of components needed. This preparation helps prevent surprises mid-installation and assures a safe, professional upgrade.
Proper planning sets the foundation for a successful drop bar installation.
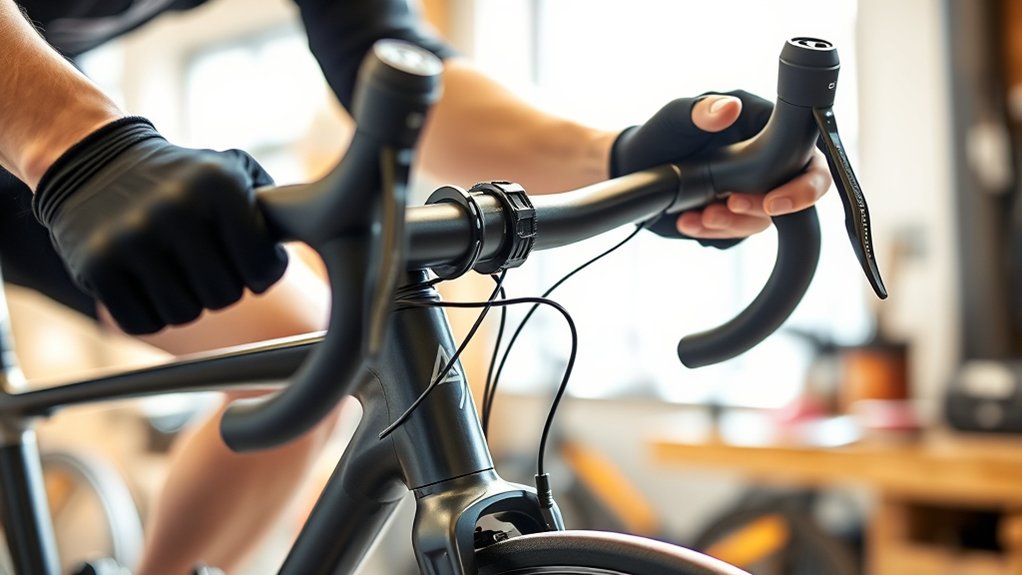
Attaching Drop Bars Properly
To attach the drop bars securely to your hybrid bike, position the bars onto the stem so they sit evenly and align with your preferred riding position. Make sure the drops curve downward comfortably and the tops are level with your handlebars.
Gradually tighten the clamp bolts, alternating sides to keep the bars centered. Double-check the alignment before fully tightening. If you have a torque wrench, use it and follow the manufacturer’s specifications for proper tightness.
Proper attachment prevents slipping and guarantees comfort. Here’s a quick visual guide:
| Step | Action | Tips |
|---|---|---|
| 1 | Position the bars on the stem | Align with rider’s reach |
| 2 | Tighten clamp bolts evenly | Avoid overtightening |
| 3 | Check alignment and comfort | Make adjustments if needed |
| 4 | Final tighten and secure | Confirm stability |
Adjust Drop Bar Position for Comfort and Control
Adjusting the drop bar position for comfort and control involves fine-tuning the handlebars so they fit your riding style and body size. Proper positioning can reduce fatigue and improve handling.
Start by adjusting the height to match your torso and arm length, ensuring a natural, relaxed grip. Then, move the handlebars forward or backward to find the right reach, avoiding overstretching or cramped shoulders.
Rotate the drops slightly for a comfortable wrist angle and better aerodynamics. Use these key adjustments to elevate your riding experience:
- Set handlebars at a height that aligns with your saddle level
- Adjust reach for a comfortable, slightly bent elbow position
- Fine-tune the angle of the drops for wrist comfort
- Verify handlebars are centered and symmetrical
Test ride and make incremental adjustments for the perfect fit.
Troubleshooting Common Drop Bar Installation Issues
When installing drop bars, you might run into issues with brake lever alignment, cable tension, or handlebar wraps. It’s important to adjust these parts properly to keep your ride safe and comfortable.
Let’s look at how to troubleshoot and fix common problems quickly and effectively. Taking the time to get everything just right makes a big difference in your riding experience.
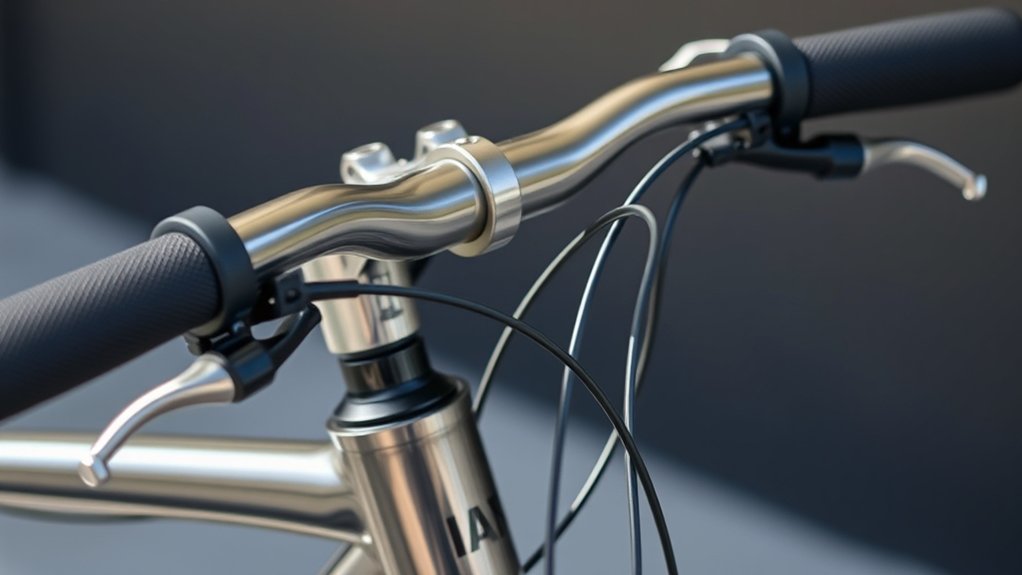
Aligning Brake Levers Properly
Properly aligned brake levers are essential for safe and comfortable riding, but it’s easy to overlook their positioning during installation. Correct alignment ensures you can brake efficiently without strain or discomfort.
To do this, loosen the clamp bolts slightly and position the levers so they’re comfortably reachable from your riding position. Then, tighten the bolts securely.
Make sure the levers are parallel to the handlebars and not tilted inward or outward. Check that the reach feels right for your fingers, so you can access them quickly without stretching.
Confirm that the levers are parallel to the handlebars. Verify the reach fits your hand comfortably. Avoid tilting the levers inward or outward for a natural feel.
Maintain a relaxed wrist position and double-check that everything is tightened for stability. Properly aligned levers make your ride safer and more comfortable.
Ensuring Correct Cable Tension
Making sure your cable tension is just right is key for smooth and reliable shifting and braking. If the cables are too tight, your brakes might drag or the shifting could feel stiff, making it hard to control.
On the other hand, loose cables can lead to sluggish responses or missed gear changes. To check tension, squeeze the brake levers— they should feel firm but not overly tight.
When shifting, operate the shifters and watch the derailleur. It should move smoothly without hesitation. Use the barrel adjusters on the derailleur or shifters to fine-tune tension.
Turn the barrel adjusters clockwise to tighten the cable and counterclockwise to loosen it. Make small adjustments and test after each one to ensure precise, responsive shifting and braking.
Proper tension keeps your drop bars functioning safely and efficiently, making every ride more enjoyable.
Securing Handlebar Wraps
Securing handlebar wraps tightly and evenly is key for a comfortable grip and safe ride. If your wraps feel loose or uneven, it can cause discomfort or slipping. To fix this, start by wrapping consistently, keeping even tension throughout.
Use finishing tape or bar-end plugs to secure the ends neatly, so they don’t unravel. Make sure the wraps are snug but not too tight, to avoid damaging the tape or handlebar surface. Check for smooth, even coverage without gaps or overlaps.
If needed, rewrap sections that are uneven or loose. Properly secured wraps improve control and help reduce fatigue on long rides. Use high-quality handlebar tape for better grip and durability.
Apply tension evenly during wrapping to prevent bunching. Secure the ends with finishing tape or plugs. Avoid wrapping too tightly to prevent damage. Regularly inspect your wraps and rewrap if necessary.
Maintaining and Upgrading Your Drop Bars Over Time
Over time, maintaining and upgrading your drop bars keeps your ride comfortable and efficient. Regular checks ensure components stay tight, preventing unwanted movement that can cause discomfort or accidents.
Upgrading parts like brake levers or shifters can improve your control and riding experience. Consider replacing worn grips or adding new tape for better comfort and grip.
Keep your drop bars clean and free of debris. When upgrading, think about your riding style to choose the right components. Here’s a quick guide:
| Maintenance Tasks | Upgrades to Take into Account | Tips for Longevity |
|---|---|---|
| Tighten bolts regularly | New ergonomic grips | Store in a dry, cool place |
| Clean with mild soap | Better brake levers | Inspect annually |
| Check for corrosion | Lightweight handlebars | Use protective tape |
Stay attentive to your handlebars to keep your ride smooth and safe.
Frequently Asked Questions
Can I Install Drop Bars on a Mountain Bike?
A stitch in time saves nine, and yes, you can install drop bars on a mountain bike. You’ll need the right adapters, like riser bar to drop bar adapters, and possibly new brake levers compatible with the drop bars.
Be prepared to make some adjustments to the cable length and brake or shifter positioning. With patience and the right tools, you can customize your bike to enjoy a more aerodynamic riding style.
Are Drop Bars Compatible With Disc Brake Systems?
Yes, drop bars can work with disc brake systems, but it really depends on the specific handlebars and brake levers you pick. You’ll want drop bars that are designed for disc brakes, with the right mounting options.
Make sure the brake levers are compatible with your disc brake system, and check that your bike’s fork and frame can handle the new setup. Proper installation is key for safety and top performance.
How Do I Choose the Correct Handlebar Width?
You choose the correct handlebar width by measuring your shoulder width or thinking about your riding style. For comfort and control, pick a width close to your shoulder measurement, usually between 38-44 cm.
Narrower bars are better for technical riding or racing, while wider bars give you more stability for casual rides. If you can, try out different widths to see what feels best.
Make sure your hands can rest comfortably without strain or reaching too far. Testing different options helps you find the perfect fit for your riding style and comfort.
What Safety Precautions Should I Follow During Installation?
When installing drop bars, wear gloves to protect your hands and ensure a good grip. It’s also a good idea to make sure your bike is stable, like on a repair stand or flipped upside down.
Double-check that all bolts are tight to prevent any loose parts. Keep your workspace tidy so you don’t accidentally trip or knock things over.
Finally, gently test the handlebars before riding to make sure everything feels secure and aligned. That way, you can ride safely and confidently.
Can I Switch Back to Flat Bars Easily Later?
Switching back to flat bars is like flipping through a familiar book—you can do it, but it might take some effort.
You’ll need to remove the drop bars, undo the brake and gear cables, and then install the flat bars.
Make sure all components are securely attached during the switch.
You might also need to make some adjustments to the brake and shifter positions for a comfortable fit.
Conclusion
Installing drop bars can really change your hybrid bike, giving you more riding options and comfort. Did you know that riders who customize their handlebars report a 25% increase in riding enjoyment?
By choosing the right drop bars and installing them carefully, you’ll boost both control and comfort. Regular maintenance is key to keeping your setup in top shape.
This way, your bike stays reliable and ready for every ride. Putting drop bars on your hybrid bike is an easy upgrade that makes a big difference. Happy cycling!