How to Wrap Handlebar Tape on a Road Bike in 8 Easy Steps
Many road cyclists know the struggle of wrapping handlebar tape just right—getting it snug, even, and comfortable can be tricky. If you’ve ever felt frustrated with your tape slipping or uneven wrapping, you’re not alone.
Luckily, with a bit of guidance, you can master this simple skill and improve your riding experience.
To wrap your road bike’s handlebar tape, start by gathering your tools and removing the old tape carefully, making sure to clean the handlebars thoroughly.
Wrap the new tape with consistent tension to guarantee a snug fit, covering the entire handlebar for comfort and grip. Secure the ends with finishing strips, add bar end plugs, and trim any excess tape.
If you notice issues or want to know maintenance tips, keep exploring to learn more.
Key Takeaways
- Remove the old tape and give your handlebars a good clean before you start.
- Begin wrapping the tape at the bar end. Secure it in place with tape or finishing strips.
- Wrap with steady tension, making sure to overlap slightly. This will give you a smooth, secure layer.
- Tuck and secure the tape neatly at the brake hood and handlebar ends.
- When you’re done, trim any excess tape. Insert the bar end plugs to keep everything tidy.
- Make sure all edges are secure so nothing comes loose while you’re riding.
Gather Your Tools and Materials for Handlebar Tape
Before you start wrapping your handlebar tape, make sure you have everything you need. A clean pair of scissors is great for trimming tape ends, and you might want some electrical or handlebar tape adhesive for extra security.
Gather scissors and adhesive to secure your handlebar tape smoothly and securely.
It’s also important to have the handlebar tape itself, preferably with a finishing strip or bar end plugs included. Keep a cloth or rag nearby to clean the handlebars before you start wrapping.
You might find a small flat-head screwdriver or a tire lever useful for tucking the tape in neatly. Check that your tape is long enough to cover the entire handlebar comfortably.
Having everything ready beforehand will make the wrapping process smoother and less frustrating. This way, you can focus on wrapping tightly and evenly.
Remove Old Handlebar Tape Properly
Start by loosening the end caps to free the tape. Carefully peel off the old tape, being careful not to damage the handlebars.
Then, remove any remaining adhesive to create a clean surface for the new tape.
Loosen End Caps
To remove the old handlebar tape, start by loosening the end caps that hold the tape in place. You can use a small screwdriver or just your fingers to gently pry them out of the handlebar ends.
Be careful not to apply too much force because the caps can crack easily. Once you’ve removed them, set the end caps aside in a safe spot—they’ll be needed when you wrap the new tape.
If the caps are stuck, try wiggling them a little or use a flat tool to loosen them. Loosening the end caps makes it easier to peel off the old tape without damaging the handlebar.
This step ensures you get a clean surface for the new tape, giving you a secure and professional finish.
Peel Old Tape Carefully
Gently peel back the old handlebar tape, pulling it away from the bar in smooth, steady motions. Use your fingers to lift the tape from one end, avoiding abrupt yanks that could damage the bar or disturb the cables.
As you peel, check for any remaining adhesive or stubborn spots. Patience helps prevent tearing or messing up the handlebar surface.
To keep track of your progress, refer to this quick guide:
| Step | Tip | Caution |
|---|---|---|
| Start at one end | Grip firmly and pull slowly | Don’t rush, peel evenly |
| Lift tape gently | Use fingers rather than tools | Avoid scratching the bar |
| Remove in sections | Peel in small portions | Prevent tears or damage |
| Watch for sticky spots | Remove leftover adhesive if needed | Handle carefully |
| Finish at the ends | Ensure tape is fully peeled | Check for tears |
Remove Remaining Adhesive
Once you’ve peeled away most of the old tape, it’s important to deal with any leftover adhesive. Use a clean cloth or paper towel dampened with isopropyl alcohol or a gentle adhesive remover.
Gently rub the area to loosen and lift the sticky residue. Avoid harsh chemicals that might damage your handlebars or paint.
If the adhesive is stubborn, apply a bit more solvent and let it sit for a minute before rubbing again. Be patient and thorough to make sure all the residue is gone so the surface is smooth for the new tape.
Afterward, wipe the handlebars with a clean, dry cloth to remove any leftover solvent. Cleaning properly ensures your new tape will stick well and last longer.
Why Removing Old Tape Matters Before Wrapping
Removing old tape guarantees the new layer sticks firmly and stays in place. It also prevents buildup that can cause uneven wrapping or discomfort while riding.
Taking the time to clear away the old tape makes for a cleaner, more secure finish.
Ensuring Proper Adhesion
Before wrapping new handlebar tape, make sure to remove the old tape completely. Residual tape or adhesive can cause slipping and uneven coverage.
Follow these steps to ensure good adhesion:
- Clean the handlebars with alcohol or a degreaser to get rid of dirt and oils.
- Carefully remove any leftover adhesive or tape remnants.
- Dry the handlebars thoroughly so moisture doesn’t affect the tape’s stickiness.
- Check for rough spots or damage and smooth or repair them if needed.
Preventing Tape Buildup
Leaving old tape and adhesive on your handlebars can cause buildup that leads to uneven wrapping and slipping. When you don’t remove the old tape, leftover glue and debris can create an uneven surface, making it harder for new tape to stick properly. This can result in loose sections or bubbles that compromise comfort and grip.
To prevent this, take the time to thoroughly clean your handlebars before wrapping. Use a gentle solvent or rubbing alcohol to remove any residue, ensuring a smooth surface. Removing old tape and adhesive not only promotes a cleaner appearance but also improves the longevity and security of your new handlebar tape.
Starting fresh helps you achieve a professional, secure wrap that lasts longer and feels better during your ride.
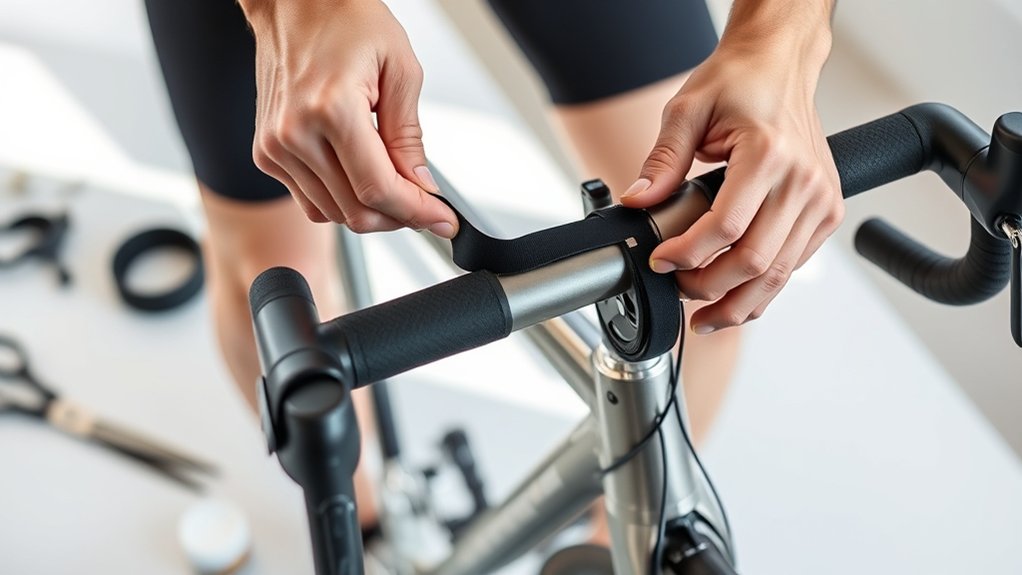
Wrap the Handlebar for Comfort and Security
To guarantee your ride is both comfortable and secure, start by wrapping the handlebar with a continuous layer of tape, overlapping each pass slightly to create a cushioned grip. This helps distribute pressure evenly and reduces slipping.
To maximize comfort and security:
- Keep the tape taut as you wrap to avoid wrinkles.
- Apply consistent tension to prevent loose spots.
- Overlap each pass by about half the tape’s width for cushioning.
- Cover the entire handlebar, including the drops and tops, for full control.
This method creates a firm, comfortable grip that won’t shift during rides. Paying attention to tension and overlap helps you achieve a professional finish, guaranteeing your handlebar feels secure and cozy every time.
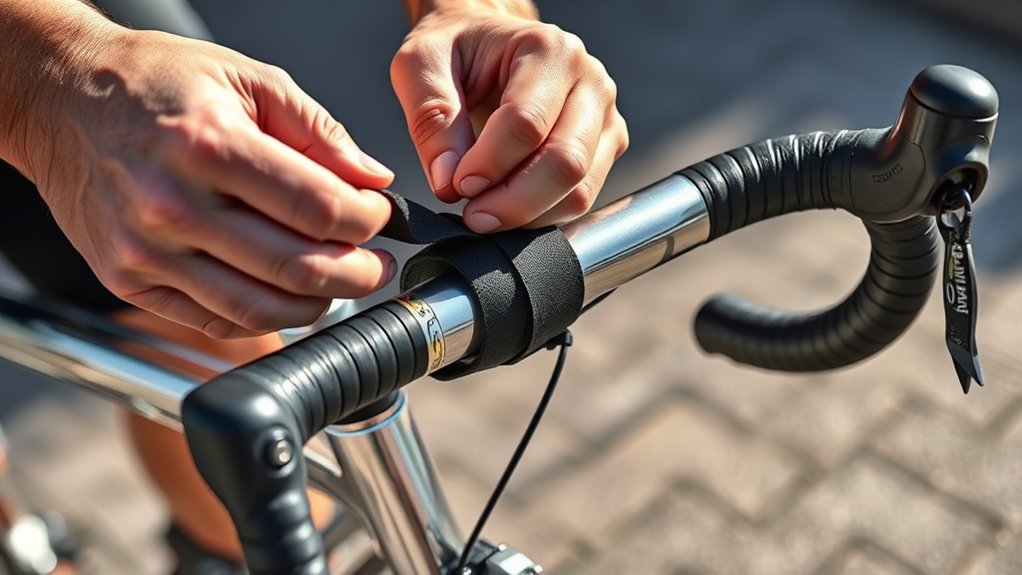
Finish and Secure the Handlebar Tape Ends
Once you’ve wrapped the handlebar tape to your satisfaction, it’s important to secure the ends so they don’t slip or unravel during your ride. Tuck the end of the tape underneath the last layer.
Then, use finishing strips or electrical tape to hold it in place. Wrap the tape tightly around the handlebar end, making sure it stays flush and secure.
If your tape has adhesive backing, press it firmly to activate the glue and create a solid bond. For extra security, you can also wrap a small piece of electrical tape over the end, covering any exposed tape edges.
This will keep everything tight and protect the tape from peeling back. Before moving on, make sure the end is smooth and secure.
Add Bar End Plugs and Final Details
Adding bar end plugs is the final step to give your handlebar wrap a polished look and boost safety. First, pick plugs that fit snugly into your handlebar ends.
Next, insert each plug firmly into the open ends, making sure they sit flush. Use a rubber mallet or your hand to tap them gently into place if needed.
Double-check that the plugs are secure and won’t fall out during rides. Finishing with these plugs not only improves your bike’s look but also keeps sharp edges and debris out of the handlebars.
For an extra clean look, consider trimming any excess tape or making sure it’s evenly wrapped. These small details finish off your handlebar wrap and help boost your riding confidence.
Troubleshooting Common Wrapping Problems
Many riders run into common wrapping problems like tape slipping, wrinkles, or uneven tension, which can affect both comfort and look. If the tape slips, make sure you’ve wrapped it tight enough and used enough adhesive or finishing tape.
Wrinkles usually happen from uneven tension. To fix this, peel off the affected section and rewrap, keeping consistent pressure as you go. For uneven tension, focus on keeping each wrap tight and even.
If the tape bunches up at the ends, smooth it out while wrapping, making sure there’s no slack. Using good quality tape and taking your time helps prevent these issues. Always double-check each layer before moving on, and don’t hesitate to rewrap small sections if needed.
Following proper technique will give you a smooth, secure finish every time.
Tips for Maintaining and Replacing Handlebar Tape Over Time
Over time, handlebar tape can wear out, get dirty, or lose its grip, which can affect both comfort and safety. To keep your bike in top shape, check your tape regularly.
Inspect it for tears or significant wear and replace it when needed. Cleaning the tape with a mild soap solution helps remove dirt and sweat, extending its lifespan.
If the tape starts to loosen, re-tighten it to ensure a secure grip during your rides. When replacing, choose high-quality tape that offers better grip and durability for your riding style.
Maintaining your handlebar tape not only makes riding more comfortable but also helps prevent accidents caused by slipping. Stay attentive and replace it as needed for safer, more comfortable rides.
Frequently Asked Questions
How Do I Choose the Right Handlebar Tape Thickness?
You should choose handlebar tape thickness based on your comfort and riding style. Thicker tape offers more padding and absorbs shock, making it great for long rides or rough terrain.
Thinner tape gives you better feedback and control, which is perfect for racing or precise handling. Try different thicknesses to see what feels best for you.
Also, think about your hand size and grip preferences. This way, your hands won’t tire quickly during rides, and you’ll enjoy a more comfortable experience.
Can I Reuse Old Handlebar Tape if It’s Still Sticky?
Yes, you can reuse old handlebar tape if it’s still sticky and in good condition.
Before reapplying, remove any dirt, sweat, or debris. Check for tears or wear; if the tape is damaged, it’s best to replace it.
Reusing sticky tape saves money, but make sure it adheres well and provides enough grip. If it’s losing stickiness or looks worn, replacing it will give you a secure, comfortable grip.
What’s the Best Way to Clean Handlebar Tape?
Think of your handlebar tape as a delicate manuscript that needs gentle care. To clean it, mix a small amount of mild soap with water, then dampen a soft cloth or sponge. Gently wipe down the tape, avoiding excessive moisture.
For stubborn grime, use a soft-bristled brush. Rinse with a damp cloth and dry thoroughly. Regular cleaning keeps your tape looking fresh and gives you a better grip during rides.
How Often Should I Replace My Handlebar Tape?
You should replace your handlebar tape every 1 to 3 months, depending on how often you ride and the wear it takes.
If you notice cracks, unraveling, or a loss of grip, it’s time to swap it out. Regularly checking your tape helps keep your rides comfortable and safe.
Don’t wait too long—fresh tape keeps your hands comfortable and your control precise.
Are There Different Wrapping Techniques for Drop and Flat Handlebars?
Think of drop and flat handlebars as different dance partners, each needing its own style. For drop bars, you’ll weave the tape in a flowing, layered pattern to match their curves. This helps ensure comfort when you twist and turn.
Flat bars, on the other hand, call for a simple, tight wrap. It’s like a steady march, giving you a firm grip without any extra flair. Adapting your wrapping technique to each handlebar type makes your ride secure and comfortable every time.
Conclusion
Now that you’ve wrapped your handlebar tape, think of each coil as a protective hold, shielding your hands and guiding your ride through winding roads and open skies.
Like a well-wrapped scroll guarding secrets, your tape keeps comfort close and performance secure.
With this skill, you’re not just customizing your bike—you’re wrapping it in confidence and care.
Every ride becomes a journey, and your handlebars serve as a steadfast grip on adventure’s endless horizon.
Mastering how to wrap handlebar tape on a road bike makes every ride smoother and more enjoyable.