How You Can Change Handlebars on a Hybrid Bike
Changing handlebars on a hybrid bike can seem tricky, especially if you’re new to bike maintenance. Many riders struggle with finding the right fit and ensuring everything is secure for a comfortable ride. Don’t worry—you’re not alone, and with a few simple steps, you can customize your handlebars for better comfort and control.
To change handlebars on your hybrid bike, start by removing the old handlebar carefully with the right tools, like Allen wrenches, and guarantee you keep track of all components.
Choose a handlebar suited to your riding style, then attach and align it properly, tightening bolts gradually in a crisscross pattern.
Test stability and comfort before riding. If issues come up, troubleshooting will help. If you want detailed steps, keep exploring to learn more.
Key Takeaways
- Choose the right handlebar type for your riding style. Options include flat, riser, or drop bars.
- Before you start, gather all the tools you’ll need. Think Allen wrenches, screwdrivers, and some bike grease.
- Carefully loosen and remove your old handlebar. Be gentle so you don’t damage any other parts.
- Once it’s out, align your new handlebar properly. Make sure it fits well and tighten all the bolts evenly.
- Reattach the brake and gear levers. Adjust them so they feel comfortable for you.
- Take your bike for a test ride to check that everything feels stable and works smoothly.
Why Changing Your Hybrid Bike Handlebar Matters for Comfort and Control
Changing your hybrid bike handlebar can really improve your riding experience because the right handlebar boosts both comfort and control. When you switch to a handlebar that fits your riding style, you’ll feel less fatigue and strain on your hands, wrists, and shoulders.
This is especially helpful if you ride long distances or tackle mixed terrains. A more comfortable handlebar helps you maintain better posture and reduces pressure points, making your ride more enjoyable.
On the other hand, the right handlebar also improves control by giving you better leverage and stability. Whether you prefer a more upright position or a slightly aggressive stance, choosing the right handlebar helps you handle corners, bumps, and obstacles with ease.
Ultimately, the right handlebar makes every ride safer and more enjoyable.
How to Choose the Right Handlebar for Your Riding Style
How do you choose the right handlebar to match your riding style? Think about how you ride most often—whether it’s commuting, mountain biking, or just riding for fun. Your handlebar impacts your comfort, control, and efficiency.
For city riding, a flat or riser handlebar gives you better control and comfort. If you’re doing long-distance rides, drop bars help reduce fatigue and make you more aerodynamic. Mountain bikers usually go for wide, flat, or riser bars to stay stable on rough trails.
Use this table to find the best handlebar for your style:
| Riding Style | Handlebar Type | Benefits |
|---|---|---|
| Commuting | Flat or Riser | Comfort and control |
| Long-distance | Drop Bars | Better aerodynamics and efficiency |
| Mountain biking | Wide Flat or Riser | Stability and maneuverability |
Gather the Tools and Parts You Need for Handlebar Replacement
Before you start, gather the essential tools and replacement parts you’ll need for the handlebar swap. Make sure you have a set of Allen wrenches, screwdrivers, and possibly some bike grease or lubricant.
Check that you have the new handlebars and any necessary accessories to complete the installation smoothly. Having everything ready beforehand will make the process much easier and quicker.
Essential Tools Checklist
To successfully replace your bike’s handlebars, you’ll want to gather all the necessary tools and parts beforehand. Start with a set of Allen wrenches or hex keys, since many handlebars are secured with these.
An adjustable wrench or spanner is also essential for loosening and tightening bolts. You’ll need screwdrivers—both Phillips and flat-head—for handling brake levers and shifters.
A torque wrench is helpful to make sure bolts are tightened to the right specifications. Keep a clean cloth or rag nearby for wiping down components.
If you’re replacing grips or handlebar tape, have those ready too. Finally, having a bike stand or a stable work surface will make the process much easier.
Having these tools on hand will help streamline your handlebar replacement and prevent interruptions.
Required Replacement Parts
Gathering the right replacement parts is essential to guarantee a smooth handlebar swap. First, identify the type of handlebar you want to install—flat, riser, or drop bars—and verify you have the correct size and diameter for your bike’s stem.
You’ll need new handlebar grips or tape if your current ones are worn or incompatible. Check if your brake and gear shifters are integrated or separate, and make certain you have compatible replacements if needed.
Don’t forget to gather necessary bolts, clamps, or adapters that fit your new handlebar. Finally, confirm that your brake and gear cables are long enough or plan to replace them.
Having all these parts ready before starting makes the process smoother and prevents delays.
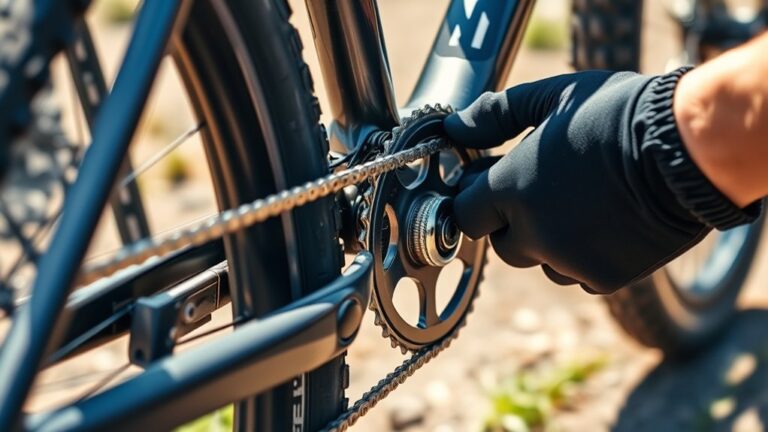
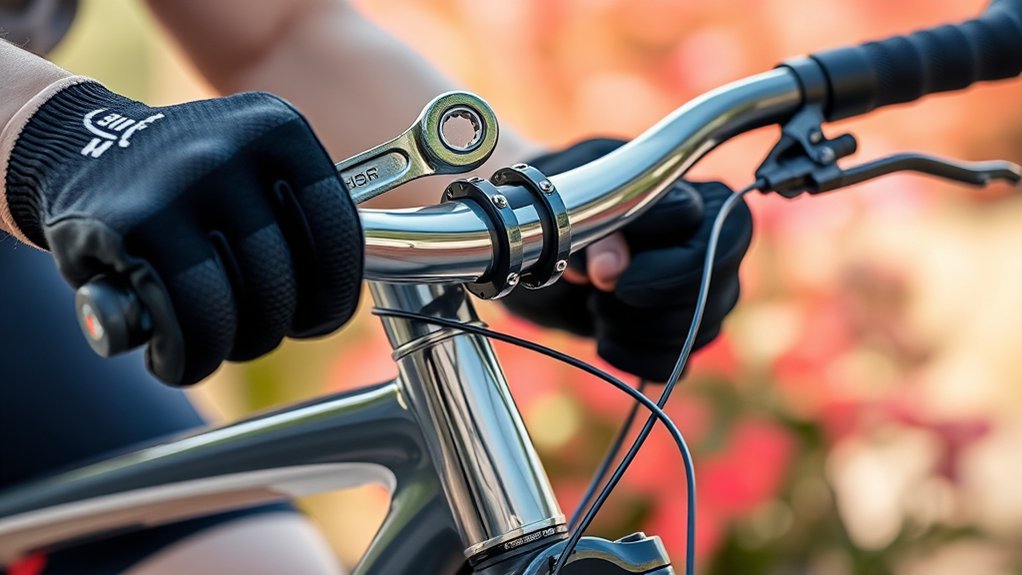
Remove Your Old Handlebar Safely and Effectively
Start by loosening the bolts holding the handlebar in place with the correct-sized Allen wrench or screwdriver. Once they’re loose, gently lift the handlebar away from the stem.
Be cautious—your bike’s components can be fragile, and pulling too hard might cause damage. If the handlebar is stuck, wiggle it slightly to loosen any rust or debris.
Prepare Your New Handlebar: Attach Accessories and Check Compatibility
Before attaching accessories, make sure they are compatible with your new handlebar.
Check that the handlebar fits your bike properly and that all attachments are secure.
Securing your accessories correctly is key to staying safe and ensuring they work well during your rides.
Select Compatible Accessories
To ensure your new handlebar works properly, choose accessories that match its size and mounting options. Check the diameter and shape of your handlebar to see which accessories will fit securely.
For example, if you have a standard 31.8mm handlebar, make sure grips, lights, and bells are designed for that size. Think about the type of mounting brackets or clamps you’ll need, especially if your handlebar has unique features or shapes.
Avoid accessories that are incompatible in size or mounting method. They might not hold securely or could damage your handlebar. Also, consider the weight capacity of your accessories to prevent overload.
Choosing the right accessories will improve your riding experience without risking safety or comfort.
Verify Handlebar Fit
Once you’ve picked out your new handlebar, it’s important to check if everything fits properly before you ride. Make sure the handlebar works well with your bike’s stem and accessories.
Check the width, diameter, and rise to see if they match your riding style and comfort. Measure the handlebar and compare it to your previous one or the specs you have.
Also, verify that brake and gear cables have enough slack or can be easily adjusted. Use the table below to guide your fit check:
| Aspect | What to Check | Why It Matters |
|---|---|---|
| Handlebar Width | Matches shoulder width | Ensures comfort and control |
| Diameter | Fits stem clamp securely | Prevents slipping or rotation |
| Rise or Drop | Fits your riding position | Keeps your posture ergonomic |
| Brake Compatibility | Proper cable routing | Ensures smooth operation |
| Accessories Fit | Proper attachment points | Securely mount accessories |
Secure Attachments Properly
Start by gathering all the accessories you plan to install on your new handlebar, like lights, bells, or GPS mounts. Before attaching, check that each piece is compatible with your handlebar’s diameter and mounting points.
Secure each accessory tightly, but avoid overtightening, which can damage components. Use the appropriate tools, like Allen wrenches or screwdrivers, to ensure a firm fit.
Double-check that everything is aligned correctly and doesn’t interfere with your grip or brake levers. Properly secured accessories prevent rattling, slipping, or falling off during your ride, keeping you safe and organized.
- Use the right tools for each attachment
- Tighten accessories firmly without overtightening
- Confirm proper alignment and clearance
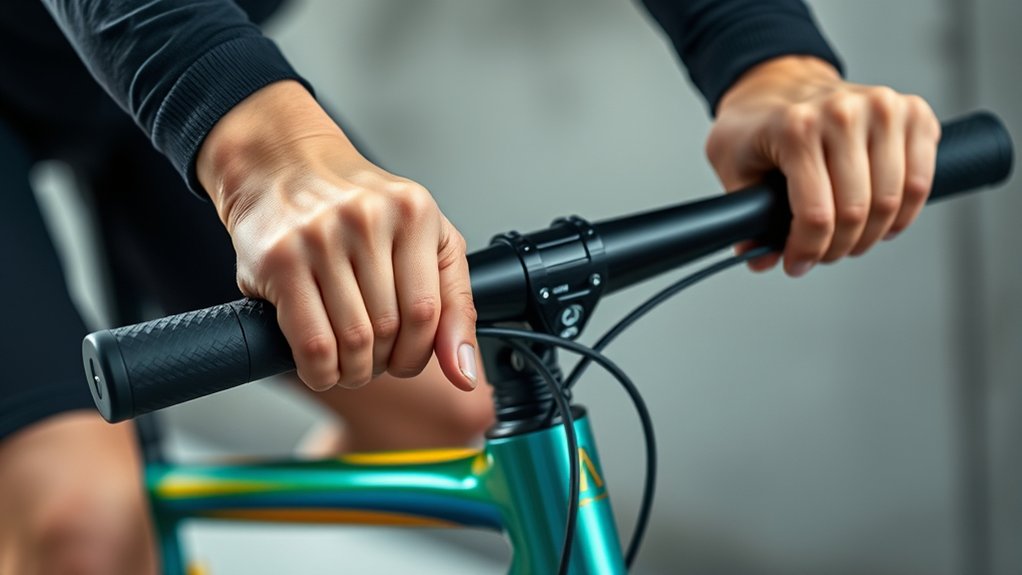
Install the New Handlebar Step-by-Step
Lifting the new handlebar into position requires careful alignment with the stem and proper orientation. Make sure the handlebar is centered and straight before tightening.
First, slide the handlebar onto the stem, aligning it with your preferred angle. Use your hands to stabilize it, then tighten the clamp bolts gradually in a cross pattern for even pressure.
Check that the handlebar is level and verify that your grip feels comfortable. To help, here’s a quick guide:
| Step | Action | Tips |
|---|---|---|
| Position handlebar | Align with stem | Keep centered and straight |
| Tighten bolts | Gradually tighten in pattern | Avoid over-tightening |
| Check alignment | Confirm handlebar is level | Adjust as needed |
| Final verify | Test grip and steering | Make adjustments if needed |
Follow these steps for a secure, comfortable fit.
Reattach Your Brake and Gear Levers Correctly
When reattaching your brake and gear levers, make sure they’re properly aligned for smooth operation and safety.
Tighten the mounts securely to prevent any wobbling or slipping during your rides.
Paying close attention to these details helps ensure your bike works perfectly and stays safe on the road.
Proper Lever Alignment
To guarantee your brake and gear levers function smoothly and safely, it’s essential to reattach them with proper alignment. Misaligned levers can make shifting or braking difficult.
To achieve correct alignment, verify the levers are parallel to the handlebars for a comfortable reach. Check that they are at the same height so your fingers can access them easily.
Test the levers after tightening to make sure they don’t wobble or stick. Proper alignment not only improves control but also reduces strain on your hands.
Take your time adjusting each lever, making small tweaks until they sit comfortably and operate smoothly. Well-aligned levers make riding safer and more enjoyable.
Secure Mounting Techniques
Securely mounting your brake and gear levers is essential for safe and reliable riding. First, position the levers where they feel comfortable and within easy reach on your handlebars.
Tighten the mounting bolts gradually, alternating sides to keep even pressure. If you have a torque wrench, use it and follow the manufacturer’s recommended torque specs to avoid over-tightening or damaging parts.
Make sure the levers move smoothly and don’t shift when you apply pressure. After tightening, test your brake and gear functions to ensure everything works properly.
Properly secured levers prevent slips or malfunctions during your ride, keeping you safe. Take your time to get a firm, secure fit that boosts your control and confidence on the bike.
Align and Adjust Your Handlebar for Comfort and Safety
Before you start riding, it’s important to check that your handlebar is properly aligned and adjusted for comfort and safety. Misaligned handlebars can cause discomfort and make controlling your bike harder.
Make sure the handlebar is centered with the front wheel and securely tightened. Then, adjust the angle so it feels natural and comfortable for your riding posture.
You might also want to tweak the height or tilt to get the best handling and reduce strain on your hands and arms.
- Confirm the handlebar is centered with the front wheel
- Adjust the angle for a comfortable grip and posture
- Tighten all bolts securely to prevent slipping
Test Your Setup Before Hitting the Road
Once you’ve adjusted your handlebars, it’s important to test your setup thoroughly to make sure everything is working properly. Start by gently applying pressure to the handlebars to check for stability and tightness.
Sit on your bike and take a few short rides in a safe, flat area. Pay attention to how the handlebars feel—are they comfortable and responsive? Make sure your brakes engage properly and don’t feel loose.
Test the steering by turning the handlebars smoothly from side to side, making sure there’s no wobbling or unusual play. Listen for any strange noises or vibrations. If something feels off, stop immediately and double-check your adjustments.
Properly testing your setup helps ensure safe riding and can prevent accidents caused by loose or misaligned handlebars.
Troubleshoot Common Handlebar Replacement Problems
Even with careful installation, you might run into some common issues after replacing your handlebars. One of the most frequent problems is loose handlebars that wobble or shift while you’re riding. Make sure to tighten the stem bolts evenly, but be careful not to overtighten, as that can damage other parts.
Another issue you might notice is controls or brakes that aren’t aligned properly, making them hard to operate smoothly. Double-check that all clamps and cables are connected and aligned correctly.
Finally, if your steering feels stiff or unresponsive, it could be that the headset or stem wasn’t installed correctly, or the headset bearings are misadjusted. Verify that the headset adjustment is proper for smooth steering.
- Confirm stem bolts are evenly tightened and secure
- Check cable routing and control alignment
- Verify proper headset adjustment for smooth steering
Fine-Tune Handlebar Position for Maximum Comfort
Adjusting your handlebar position for maximum comfort is key to a smooth and enjoyable ride. Start by loosening the bolts just enough so you can move the handlebars freely.
Position them at a height and angle that feels natural, reducing strain on your wrists, shoulders, and neck. Keep your elbows slightly bent and your hands comfortably on the grips.
Make small adjustments and then take a test ride to see how it feels. If you experience discomfort or fatigue, tweak the position until it supports a relaxed posture.
When to Seek Professional Help for Handlebar Replacement
While replacing handlebars might seem straightforward, there are certain signs that indicate it’s time to seek professional help. If you notice persistent steering issues, uneven handlebar alignment, or difficulty tightening components securely, it’s best to consult a bike shop.
Struggling to remove or install handlebars without proper tools or expertise is another red flag. If your handlebars are damaged, bent, or cracked, getting a professional assessment ensures your safety.
Ignoring these signs can compromise your ride’s stability and safety.
- Handlebar feels loose or wobbly despite adjustments
- Visible damage, cracks, or bends in the handlebars
- Persistent steering or control issues that don’t improve with basic adjustments
Frequently Asked Questions
Can I Switch Between Drop Bars and Flat Bars on My Hybrid Bike?
Yes, you can switch between drop bars and flat bars on your hybrid bike, but it depends on your bike’s compatibility. You’ll need to check if the handlebars fit the stem and if the brake and gear levers work with the new bars.
You might also need new cables or adapters to make everything fit and work smoothly. If you’re unsure about any of this, it’s a good idea to visit a bike shop. They can help ensure you get a proper fit and safe installation.
How Do I Prevent Handlebar Slippage After Installation?
To prevent handlebar slippage after installation, make sure everything fits tightly. Start by cleaning the stem and handlebars to remove any grease or debris.
Tighten the bolts gradually in a star pattern, and avoid over-tightening since that can damage the parts. If the handlebars still slip, try using carbon assembly paste for a better grip or replace any worn components.
It’s also a good idea to regularly check and retighten the bolts to keep your handlebars secure on every ride.
Are There Specific Handlebar Sizes Compatible With All Hybrid Bikes?
Not all handlebar sizes fit all hybrid bikes. Most hybrid bikes use either 25.4mm, 31.8mm, or 35mm diameter handlebars.
To make sure you get the right fit, measure your current handlebars or check your bike’s specifications. When shopping for a replacement, match the diameter exactly and think about whether you want a riser or flat style.
If you’re unsure, it’s a good idea to ask your bike’s manufacturer or visit a professional bike shop for advice.
How Often Should I Replace or Upgrade My Bike Handlebars?
Think of your handlebars as the guiding compass of your ride. You should replace or upgrade them when they show signs of wear, damage, or if they no longer feel comfortable.
Regularly inspect for cracks, rust, or bent parts. If you’ve upgraded your bike or changed your riding style, it’s also a good time to consider new handlebars.
Prioritize comfort and safety to keep your journey smooth and enjoyable.
What Safety Precautions Should I Follow During Handlebar Replacement?
You should always wear gloves and eye protection to avoid injury during handlebar replacement. Confirm your bike is stable by placing it on a stand or leaning it securely.
Use the correct tools and follow manufacturer instructions to avoid damaging parts. Double-check all bolts and connections before riding.
Test the handlebars carefully for stability and comfort. Taking these precautions keeps you safe and helps prevent accidents while replacing handlebars.
Conclusion
So, there you have it—changing your hybrid bike’s handlebar isn’t rocket science, just a bit of patience and the right tools. Who knew that swapping a part could be so satisfying?
Just remember, if you end up with a handlebar that’s too comfortable or too tricky to control, you might wish you’d left it to the pros. But hey, at least you’ll have a cool story and a handlebar that’s all your own!
And when it comes to customizing your hybrid bike’s handlebar, a little effort can go a long way. It’s a fun way to make your ride feel more like you.