How to Measure a Road Bike in 10 Easy Steps
Many cycling enthusiasts know the challenge of finding the perfect road bike fit. It can feel overwhelming trying to get everything just right, especially if you’re new to biking. You’re not alone—many people struggle with measuring and choosing the right size.
But don’t worry, with a few simple steps, you can confidently find your ideal ride.
To measure a road bike in 10 easy steps, start by taking your inseam measurement barefoot, using a book to simulate the saddle. Then, calculate your ideal frame size by multiplying your inseam by 0.67.
Measure the seat tube and top tube lengths on the bike to match your body.
Check your handlebar width based on shoulder width and adjust the stem length for comfort and posture.
Finally, use a size chart and fine-tune fit for the best ride. Keep going to get the full fit details.
Key Takeaways
– Measure your inseam length accurately by standing barefoot with a book between your legs. This helps you get a precise measurement.
Use this number to calculate your ideal frame size.
Determine your frame size by multiplying your inseam length (in cm) by 0.67. Then, compare this result with the manufacturer’s size charts to find the best fit.
Next, measure the top tube length from the center of the seat tube to the center of the head tube.
Check the standover height to ensure you have 1-2 inches of clearance.
This way, you’ll know if the frame size feels comfortable when you’re standing over the bike.
For handlebar selection, measure your shoulder width.
Choose a handlebar width that matches your shoulder span for better control and comfort.
Finally, adjust the stem length to optimize your reach and posture.
Fine-tune your saddle and handlebar positions to make sure your ride feels comfortable and natural.
How To Take Your Inseam Measurement For Bike Sizing
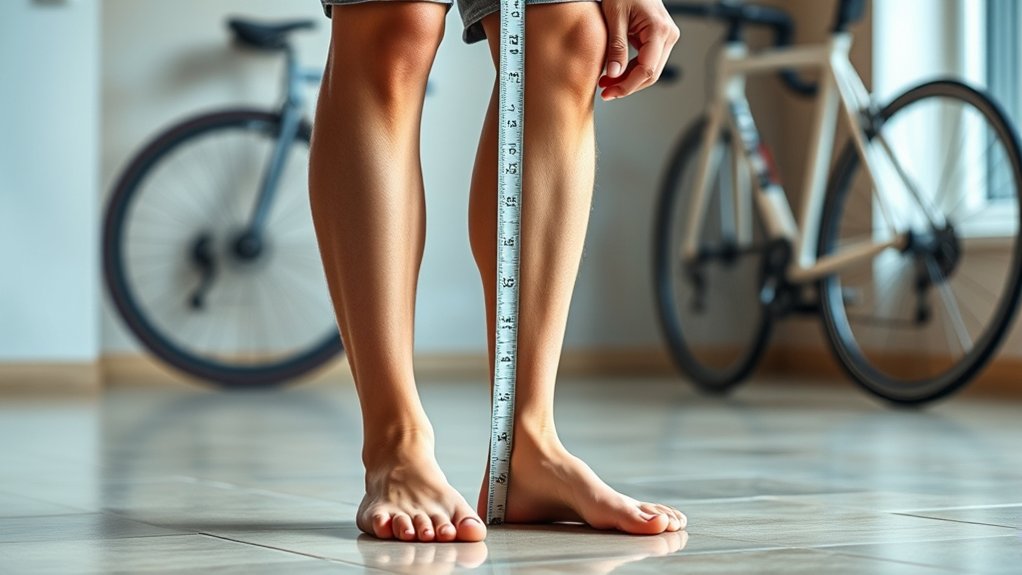
How do you accurately measure your inseam for bike sizing? Start by standing barefoot with your back against a wall and your feet about six inches apart.
Place a book or similar flat object snugly between your legs, mimicking the bike seat’s position. Make sure it’s pressed firmly upward, just like a saddle would be.
Use a book pressed firmly between your legs, simulating the bike saddle’s position for accurate inseam measurement.
Have someone measure from the floor up to the top edge of the book. This gives you your inseam length.
This measurement helps you determine the ideal frame size and seat height, which are really important for comfort and efficiency.
It’s best to avoid measuring alone if you can, as a helper ensures the measurement is accurate.
With your inseam measurement in hand, you’re ready to match it to bike sizing charts confidently.
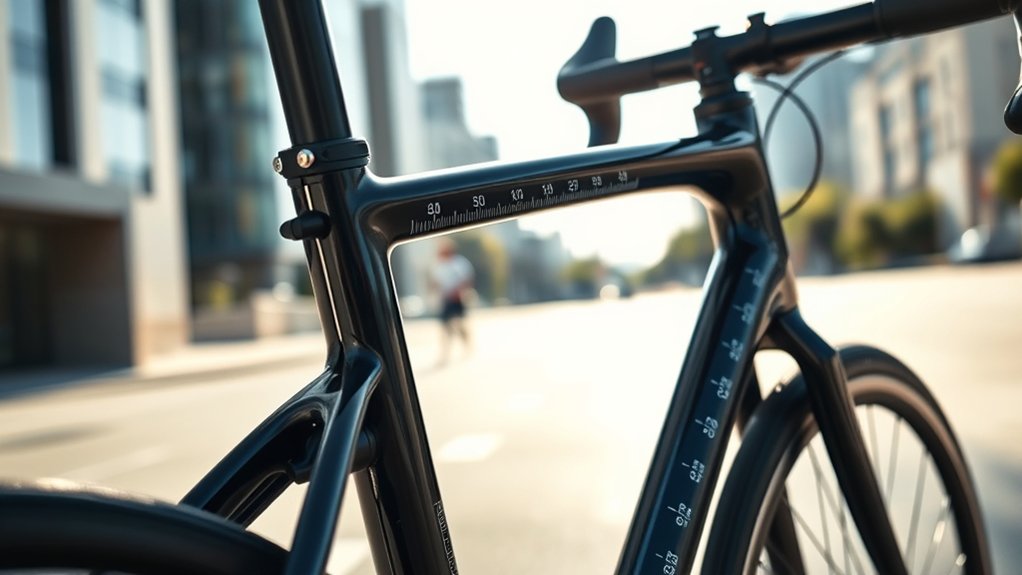
Measure Top Tube Length On Your Road Bike
To measure the top tube length on your road bike, find the top tube between the seat post and the handlebars.
Grab a tape measure or a ruler to get an accurate reading.
Measure straight from the center of the seat tube to the center of the head tube for the correct length.
Identify Top Tube Position
Start by locating the top tube, which runs horizontally from the seat post to the handlebars. To identify its exact position, stand beside your bike and look straight at the frame.
The top tube is usually the uppermost horizontal bar connecting the seat tube and head tube. On some road bikes, this tube may slope downward slightly; that’s normal.
Make sure you focus on the main structural tube, not any cables or accessories running along the frame. Once you’ve pinpointed the top tube, note where it starts at the seat post and where it ends near the handlebars.
This will help you measure the top tube length accurately and understand your bike’s geometry better. Identifying this position is key before taking any measurements.
Use Proper Measuring Tools
Selecting the right measuring tools really makes a difference when you’re measuring the top tube length on your road bike. Using precise tools ensures your measurement is accurate, saving you time and preventing mistakes.
Here’s what you’ll need:
- A rigid tape measure or folding ruler for straight, consistent readings.
- A digital caliper for precise measurements on smaller parts.
- A level or straightedge to keep the tape or ruler perfectly horizontal.
- A marker or sticky tape to clearly mark measurement points.
With these tools, you’ll avoid common errors like bending the tape or misreading angles. Preparing properly helps you capture the exact top tube length and makes your bike fit assessment reliable and straightforward.
Measure From Center Points
Because accurate bike measurements depend on precise reference points, you’ll want to measure the top tube length from the center of the head tube to the center of the seat tube. This method ensures consistency and helps you compare frame sizes accurately.
To do this, locate the center points by visually identifying the midpoint of each tube’s circular cross-section. Use a tape measure or ruler, keeping it straight and parallel to the ground, to get an exact reading.
| Step | Action |
|---|---|
| Identify Centers | Find the midpoint of each tube |
| Align Measuring Tool | Place tape measure between centers |
| Record Length | Note the measurement in centimeters |
This approach gives you a reliable top tube length for fitting or buying a bike.
Measure The Seat Tube Length To Match Your Height
To find the right seat tube length, you’ll need to evaluate your height carefully. This measurement helps ensure your bike frame fits you comfortably and efficiently. Here’s how to measure the seat tube length to match your height:
- Stand against a wall barefoot, with your feet about 6-8 inches apart.
- Measure from the floor up to your crotch using a tape measure.
- Use that number as a starting point — your seat tube length is usually between 0.65 and 0.70 times this inseam measurement.
- Compare this calculated seat tube length with the bike frame’s seat tube measurement, which runs from the center of the bottom bracket to the top of the seat tube.
Matching these numbers helps you pick a frame that fits your height perfectly.
Calculate Your Frame Size From Body Measurements
Start by measuring your inseam length accurately, since it’s key to finding the right frame size. Then, use a frame size chart to match your measurements with the best bike frame.
Finally, adjust your choice based on your riding style for the most comfort and performance.
Measure Your Inseam Length
Although it might seem straightforward, measuring your inseam length accurately is key to finding the right road bike frame size. Here’s how you can do it:
- Stand barefoot with your back against a wall, feet about 6 to 8 inches apart.
- Place a book or a flat object snugly between your legs, pushing it upward as if it were a bike saddle.
- Mark the wall where the top edge of the book touches.
- Measure the distance from the floor to that mark—this is your inseam length.
Knowing your inseam helps you choose the perfect frame size, ensuring a comfortable and efficient ride. Take your time to measure carefully, and don’t hesitate to measure twice if needed.
Determine Frame Size Chart
Once you know your inseam length, you can use it to find the ideal frame size for your road bike. Typically, multiply your inseam measurement (in centimeters) by 0.67 to get the frame size in centimeters.
For example, if your inseam is 80 cm, your frame size should be roughly 54 cm. Most road bike size charts use this formula as a starting point, but sizes can vary slightly between brands.
Frame sizes are usually measured from the center of the bottom bracket to the top of the seat tube. Compare your calculated size with the manufacturer’s chart to find the best fit.
This method helps you find a frame that fits your body, making riding more comfortable and giving you better control.
Adjust for Riding Style
Because your riding style affects comfort and performance, you’ll need to adjust your frame size accordingly. If you prefer a more aggressive, aerodynamic position, you might want a slightly smaller frame to allow for greater maneuverability and reach. Conversely, if you ride casually or prioritize comfort, a larger frame with a more upright posture will suit you better.
Here’s how to adjust based on your style:
- Racing: Choose a frame 1-2 cm smaller than your standard size for a lower, stretched-out position.
- Endurance: Stick close to your measured size for balanced comfort and efficiency.
- Touring: Opt for 1-2 cm larger for stability and a relaxed posture.
- Commuting: Prioritize comfort with a taller frame for easier handling.
Adjust your frame size to match how you ride for the best experience.
Measure Road Bike Handlebar Width For Control
When choosing the right handlebar width for your road bike, focus on control and comfort. The width should generally match your shoulder width to improve handling and reduce fatigue.
Use a tape measure to find the distance between the bony points on your shoulders, from acromion to acromion. This measurement helps you pick a handlebar that balances stability and aerodynamics.
| Shoulder Width (cm) | Handlebar Width (cm) | Control Level |
|---|---|---|
| 36-38 | 38 | Excellent for narrow riders |
| 39-41 | 40 | Balanced control and comfort |
| 42-44 | 42 | Better advantage and stability |
| 45+ | 44+ | Maximum control for wide riders |
Choose a handlebar width that fits your shoulder measurement for the best control.
Measure Standover Height Safely
After choosing the right handlebar width for control, it’s also important to check your bike’s standover height for a safe and comfortable fit. Standover height is the distance from the ground to the top tube of your bike frame.
To measure it safely, stand with your feet shoulder-width apart on level ground and straddle the top tube with both feet flat. Then, look at the clearance between your crotch and the top tube.
Ideally, you want about 1 to 2 inches (2.5 to 5 cm) of space. If the clearance feels too tight, consider a smaller frame to prevent discomfort or injury when stopping.
Measuring your standover height correctly helps you ride confidently and safely.
Measure Stem Length To Adjust Your Riding Position
Adjusting your stem length is key to finding a comfortable and efficient riding position on your road bike. The stem connects your handlebars to the fork steerer tube and affects your reach and control.
To measure stem length, use a ruler or tape measure to record the distance from the center of the steerer tube clamp to the center of the handlebar clamp. This measurement is usually in millimeters.
If your current stem feels too long or short, changing its length can improve your posture and handling. A shorter stem brings the handlebars closer for a more upright, comfortable ride.
A longer stem stretches you out, which can help with aerodynamics and speed. Always note your bike’s current stem length before making adjustments to ensure you choose the right size for your riding style.
Use A Road Bike Size Chart To Match Measurements
Although you’ve taken precise measurements, you won’t get the best fit unless you compare them to a reliable road bike size chart. These charts help you match your body dimensions to the frame size that suits you best. Here’s how to use one effectively:
- Find your inseam length and torso measurement from your earlier steps.
- Look for these numbers on the size chart provided by the bike manufacturer or a trusted cycling source.
- Find the recommended frame size, usually given in centimeters or inches.
- Cross-check your reach and stack measurements with the chart to see if the bike’s geometry fits your riding style.
Using a size chart makes your selection easier, preventing guesswork and helping you find maximum comfort and performance.
Test Your Measurements By Sitting On The Bike Properly
Now that you’ve matched your measurements, sit on the bike to check your fit.
Make sure your seat height lets you have a slight bend in your knee when the pedal is at its lowest point.
Adjust the handlebar reach so you can hold the bars comfortably without straining your back or shoulders.
Proper Seat Height
Finding the proper seat height is key for comfort and efficiency when riding your road bike. To get it just right, follow these simple steps:
Sit on the saddle and place your heel on the pedal at its lowest point. Your leg should be fully extended but not locked at the knee.
Next, rotate the pedal with your foot in a normal riding position. Your knee should have a slight bend of about 25-35 degrees.
Make sure your hips stay level and don’t rock side to side while pedaling. This helps ensure proper positioning.
Adjust the seat height by loosening the seat post clamp. Raise or lower the saddle as needed, then tighten it securely.
Having the right seat height reduces strain and boosts power transfer. This makes every ride smoother and more enjoyable.
Handlebar Reach Adjustment
When you sit on your bike to adjust the handlebar reach, make sure your arms are comfortably extended without locking your elbows. This position helps you stay in control and reduces fatigue during rides.
Start by gripping the handlebars in your normal riding posture. If you feel stretched out or cramped, try adjusting the stem length or moving the handlebars closer or farther as needed.
Your torso should lean forward naturally without straining your back or neck. Check that your shoulders stay relaxed and your wrists aren’t bent sharply.
After making adjustments, pedal a few strokes to see if it feels right. Proper handlebar reach improves comfort, efficiency, and handling, so take your time to get it just right before hitting the road.
Fine-Tune Your Fit With Adjustments And Accessories
Adjusting your road bike’s fit goes beyond the basics. It’s about making small changes that really boost comfort and performance. After measuring, you can fine-tune your setup by tweaking different parts and adding accessories that suit your needs.
Fine-tuning your road bike fit with small adjustments enhances comfort, performance, and overall riding experience.
- Saddle Tilt and Position: Slightly adjust the angle and fore-aft placement to reduce pressure and improve pedaling efficiency.
- Handlebar Height: Raise or lower it to ease neck strain and make your ride more aerodynamic.
- Stem Length and Angle: Swap or rotate the stem to get your reach just right without losing control.
- Footwear and Pedals: Pick clipless pedals and matching shoes for better power transfer and foot stability.
These subtle tweaks help you ride longer, faster, and more comfortably.
Frequently Asked Questions
What Type of Tires Are Best for Road Bike Measurements?
You’ll want to use road bike tires labeled 700c, as they’re the standard size for most road bikes. These tires usually range from 23mm to 28mm in width, depending on your preference for speed or comfort.
When measuring, make sure you pick tires that fit your rim and frame clearance. Using the right tire size helps you get accurate measurements and guarantees a smooth ride without any rubbing or fitting issues.
How Often Should I Re-Measure My Bike Fit?
You should re-measure your bike fit at least once a year or whenever you feel discomfort while riding. If your riding style has changed, you’ve gained or lost weight, or upgraded your components, it’s a good idea to check your fit sooner.
Regular updates to your fit can help prevent injuries and keep you comfortable and efficient on the road. Don’t wait for pain—making small adjustments can make a big difference in how your ride feels.
Can I Use These Measurements for Mountain Bikes Too?
You can use some measurements from road bikes for mountain bikes, but not all will apply perfectly. Mountain bikes have different geometry and fit needs because of the varied terrain and riding style.
You’ll still want to measure things like frame size and standover height. But you should also consider suspension and handlebar width.
What Tools Do I Need for Bike Measurement?
To get started, you’ll need a few simple tools for bike measurement: a tape measure or ruler, a level to ensure accuracy, and a flat surface for consistent results.
A pencil and paper are handy for quickly jotting down your measurements.
Optional but useful is a digital caliper for more precise measurements.
With these tools, you’ll be able to measure frame size, top tube length, and standover height like a pro in no time.
How Does Weather Affect Bike Sizing and Fit?
Weather affects bike sizing and fit because your body and clothing change with the temperature. When it’s cold, you’ll wear thicker layers, which need extra space on your bike.
In warmer weather, you’ll wear lighter gear, so a snug fit feels better. Also, your body might swell slightly in heat, affecting comfort.
Conclusion
If you skip measuring your road bike properly, you might as well try riding a unicycle on a tightrope—impossible and painful. Getting these measurements right isn’t just a nice-to-have; it’s the secret to turning every ride into pure joy.
Follow these steps, and you’ll feel like you’re pedaling on clouds. Trust me, your knees and back will thank you endlessly for that perfect fit.
Don’t settle—measure up and ride like a pro with a well-fitted road bike. Proper measurements make all the difference for comfort, efficiency, and fun on your rides.