Adjust Your Mountain Bike Derailleur in 8 Easy Steps
Are you tired of dealing with slipping gears or inconsistent shifting on your mountain bike? You’re not alone—many riders struggle with derailleur adjustments, especially when trying to fine-tune their bikes for the perfect ride.
The good news is, adjusting your mountain bike derailleur is easier than it seems, and with a few simple steps, you can get back to smooth, reliable shifting.
To adjust your mountain bike derailleur in 8 easy steps, start by identifying common issues like slipping or skipping.
Gather essential tools including screwdrivers and Allen wrenches. Align the derailleur hanger to prevent misalignment problems, then set your limit screws carefully.
Adjust cable tension using the barrel adjuster for smooth shifting, and fine-tune by testing all gears.
Keep your derailleur clean and lubricated for reliable performance. Follow these steps, and you’ll reveal expert tips for a flawless ride.
Key Takeaways
- First, check for common derailleur issues like slipping, skipping, misalignment, and noise before you start making any adjustments.
- Grab the essential tools you’ll need, like screwdrivers, Allen wrenches, and pliers. These will help you tune the derailleur precisely.
- Make sure the derailleur hanger is aligned correctly. Then, set the high and low limit screws to prevent the chain from dropping off.
- Adjust the cable tension using the barrel adjuster. Once done, test shifting across all gears to ensure smooth transitions.
- Don’t forget to perform regular maintenance. Cleaning, lubricating, and inspecting the components will keep your derailleur working reliably.
Identify Common Derailleur Problems Like Slipping and Skipping
Before you start adjusting your mountain bike derailleur, it’s important to recognize common issues like slipping and skipping.
If you notice your chain suddenly jumping to a different gear without shifting, that’s slipping. Skipping happens when the chain hesitates or jumps under load, especially on climbs.
Both can indicate misalignment or cable tension problems. You might also feel rough or delayed shifting, meaning the derailleur isn’t tracking the gears accurately.
Misalignment or cable tension issues cause rough, delayed shifting and poor derailleur gear tracking.
Pay attention to any noise or grinding sounds during shifts. They often hint at derailleur hanger bends or dirty components. Spotting these problems early saves you from bigger issues later.
Once you’ve identified what’s wrong, you can adjust your derailleur to restore smooth, reliable shifting. This makes your rides safer and more enjoyable.
Gather Tools for Derailleur Adjustment
You’ll need a few essential tools to adjust your mountain bike derailleur effectively. First, grab a Phillips or flat-head screwdriver; it’s vital for tuning the limit screws that control the derailleur’s range.
Next, a set of Allen wrenches (usually 4mm or 5mm) will help you loosen and tighten bolts securing the derailleur. A bike stand or a way to prop your bike up makes the process easier but isn’t mandatory.
Moreover, having a pair of needle-nose pliers can assist in adjusting the cable tension if needed. Finally, keep a clean rag handy to wipe off grease or dirt.
With these tools ready, you’ll be well-prepared to fine-tune your derailleur for smooth shifting.
Align the Derailleur Hanger Before Adjusting
Before you start adjusting the derailleur, make sure the hanger is properly aligned. This is important to prevent shifting issues later on.
You’ll need a derailleur hanger alignment tool to straighten it accurately. Double-check the alignment to ensure smooth and reliable gear changes.
Importance of Proper Alignment
Because even a tiny misalignment can cause poor shifting and chain drops, you need to make sure the derailleur hanger is perfectly straight before making any adjustments. Proper alignment ensures smooth, accurate gear changes and helps reduce wear on your drivetrain parts.
If the hanger is bent, your derailleur won’t move correctly with the shifter, which can lead to missed gears or chain slipping. This not only makes your ride frustrating but can also be unsafe.
Taking the time to check and fix the hanger position helps you avoid constant readjustments and extends the life of your bike’s components. Remember, no matter how well you tune the derailleur, a misaligned hanger will always undermine your efforts and hurt performance.
Tools for Hanger Straightening
Three essential tools help you straighten a derailleur hanger accurately: a derailleur hanger alignment gauge, a hex wrench set, and a truing stand or bike repair stand.
The alignment gauge lets you measure how far the hanger is bent by comparing its position relative to the rim. You’ll use the hex wrench set to loosen and adjust bolts holding the hanger in place.
A truing stand or repair stand holds your bike steady, giving you better control and visibility during the process. These tools work together to guarantee you can carefully realign the hanger without causing damage.
Having them ready before you start makes the job smoother and increases the chances of precise adjustments, setting you up for a well-functioning derailleur.
Checking Alignment Accuracy
Although you’ve gathered the right tools, you’ll want to make sure the derailleur hanger is perfectly aligned before making any adjustments. Misalignment can cause shifting problems and lead to faster wear.
Use a derailleur hanger alignment gauge to check accuracy by comparing the hanger to the rim at different points. Spin the wheel slowly and measure the distances to spot bends or twists.
Here’s a quick reference to help you check alignment:
| Position on Rim | Distance to Hanger (mm) | Adjustment Needed |
|---|---|---|
| 12 o’clock | 10 | Slight bend left |
| 3 o’clock | 10 | Perfect alignment |
| 6 o’clock | 11 | Slight bend right |
| 9 o’clock | 10 | Perfect alignment |
Ensuring proper alignment helps your derailleur function smoothly.
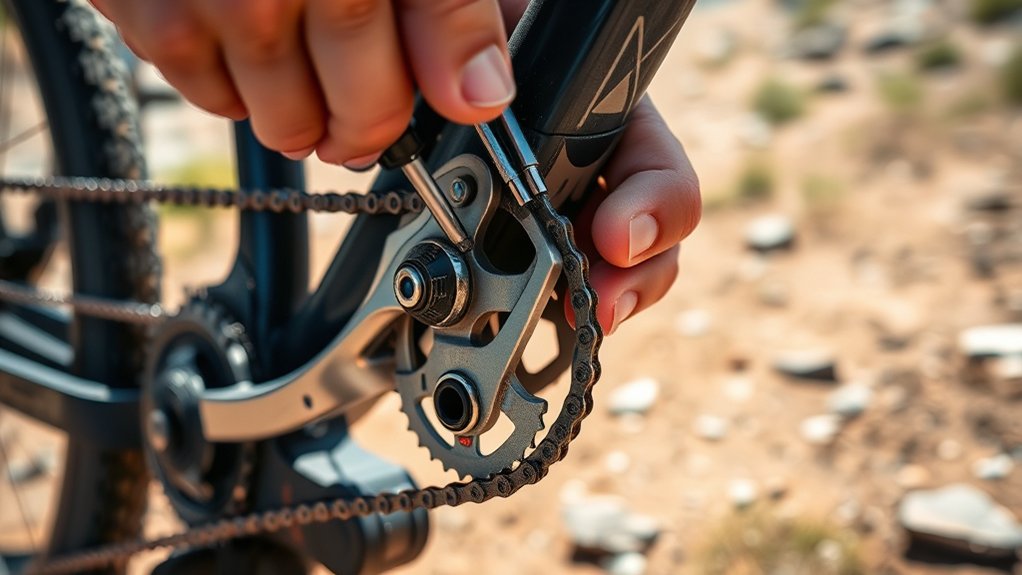
Set Your Limit Screws Right
To guarantee smooth shifting and protect your bike’s drivetrain, you’ll need to set your derailleur’s limit screws accurately. These screws control how far your derailleur moves, preventing the chain from slipping off the gears. Here’s how to get them right:
Locate the two limit screws, usually marked “H” (high) and “L” (low). Adjust the “L” screw to stop the derailleur from pushing the chain beyond the smallest chainring. Adjust the “H” screw to stop the derailleur from pushing the chain past the largest chainring.
Turn the screws in small increments and test shifting after each adjustment. Setting these screws precisely guarantees your chain stays on track and avoids damage or dropped chains during rides.
Adjust Cable Tension for Smooth Shifting
If your gears aren’t shifting smoothly, the cable tension might be off. You’ll need a few basic tools like a screwdriver and an Allen wrench to make precise adjustments.
Follow these simple steps to fine-tune the tension and get your bike shifting perfectly.
Identifying Cable Tension Issues
Anyone who rides a mountain bike knows how frustrating it is when your gears don’t shift smoothly. Identifying cable tension issues is key to fixing this. You’ll notice problems when shifting feels sluggish, skips gears, or the chain drops.
To spot cable tension problems, check for:
- Delayed or rough gear changes despite shifting effort
- Excess slack in the cable, causing poor derailleur response
- A chain that jumps or doesn’t settle on the intended gear
If any of these signs sound familiar, your cable tension likely needs adjustment. Catching these issues early keeps your ride smooth and prevents further drivetrain wear. Next, you’ll learn how to adjust the cable tension properly for seamless shifting.
Tools Needed For Adjustment
Getting your mountain bike’s derailleur dialed in starts with having the right tools on hand. You’ll need a few essentials to adjust cable tension properly and guarantee smooth shifting.
First, grab a set of Allen wrenches, usually 4mm or 5mm, to loosen or tighten the derailleur clamp bolt. Next, a Phillips or flathead screwdriver is vital for fine-tuning the limit screws.
Don’t forget a bike stand or a way to raise your rear wheel so you can pedal freely while adjusting. Needle-nose pliers help to grip and pull the cable tight before securing it.
Finally, having a clean rag and some lubricant is handy to keep the derailleur and cable running smoothly during your adjustments. With these tools ready, you’re set to proceed confidently.
Step-by-Step Tension Adjustment
With your tools ready and the bike securely positioned, you can focus on adjusting the cable tension to ensure smooth shifting. Start by shifting to the smallest rear cog.
Next, loosen the cable anchor bolt so the cable can move freely. Use the barrel adjuster to fine-tune the tension. Turning it counterclockwise tightens the cable, which helps with upshifts.
Turning the barrel adjuster clockwise loosens the cable for better downshifts. Shift through the gears and make small tweaks to the barrel adjuster until each shift feels crisp and precise.
Fine-Tune the Barrel Adjuster
The barrel adjuster is key to fine-tuning your mountain bike’s derailleur by managing cable tension. After setting the basic tension, use the barrel adjuster for small tweaks that improve shifting.
Turning it counterclockwise increases cable tension, helping the derailleur move the chain to larger cogs. Turning it clockwise decreases tension, making it easier to shift to smaller cogs.
Make these adjustments in quarter-turns and check how the derailleur responds after each one. If the chain hesitates to shift up, add tension by turning the adjuster out.
If shifting down is tricky, reduce tension by turning it in. Keep fine-tuning until the derailleur shifts smoothly without skipping or hesitation.
This will ensure reliable performance on your rides.
Test Your Derailleur Shifting on All Gears
After fine-tuning the barrel adjuster, it’s time to test your derailleur across all the gears to make sure everything shifts smoothly. Shift through each gear slowly, paying close attention to how the chain moves and listening for any skipping or hesitation.
Focus on a few key things: see if the chain moves crisply from one gear to the next without delay, listen for any unusual noises that might mean misalignment or tension problems, and watch whether the derailleur cage lines up properly with each sprocket.
If you notice any issues, don’t hesitate to make small adjustments with the barrel adjuster or revisit the limit screw settings. Doing a thorough test helps ensure your bike performs reliably on all kinds of terrain, giving you confidence during every ride.
Keep Your Derailleur Running Smoothly
Because regular maintenance keeps your derailleur in top shape, you should clean and lubricate it frequently to prevent dirt buildup and wear. Use a soft brush or cloth to remove mud, dust, and grime from the derailleur and chain.
Regularly clean and lubricate your derailleur to prevent dirt buildup and ensure smooth, reliable shifting.
Avoid using high-pressure water, which can force debris into bearings. After cleaning, apply a suitable bike lubricant to the moving parts, including the jockey wheels and pivot points.
Wipe off any excess lubricant to avoid attracting more dirt. Regularly inspect the derailleur hanger for bends and the cables for fraying or rust.
Replace or adjust these components as needed to maintain smooth shifting. By staying on top of these simple tasks, you’ll extend your derailleur’s lifespan and enjoy consistent, reliable performance on every ride.
Frequently Asked Questions
How Often Should I Replace My Mountain Bike Derailleur?
You should replace your mountain bike derailleur when it shows signs of wear or damage. Usually, this is every 2 to 4 years depending on how often and hard you ride.
If shifting becomes consistently inaccurate or the derailleur is bent or broken, it’s time for a replacement. Regular maintenance can help extend its life, but don’t wait too long.
Riding with a faulty derailleur can damage other components and affect your bike’s performance. So, keep an eye on it and replace it when needed.
Can I Upgrade My Derailleur for Better Performance?
Yes, you can upgrade your derailleur for better performance. Choosing a higher-quality derailleur can improve shifting precision, durability, and your overall ride experience.
Just make sure the new derailleur is compatible with your bike’s drivetrain and shifters. Upgrading to a lighter or more advanced model can also reduce weight and boost responsiveness.
Before you install, double-check compatibility to avoid any issues with gear range or mounting.
What Type of Lubricant Is Best for Derailleur Maintenance?
You’ll want to use a light, wet lubricant for your derailleur since it handles moisture and dirt well. Wet lubes stick better in muddy or rainy conditions, keeping your derailleur running smoothly.
Avoid heavy greases or dry lubes here because they can attract grime or wear off too quickly. Apply sparingly to the pivot points and moving parts, then wipe off any excess to keep your shifting crisp and reliable.
How Do I Know if My Derailleur Hanger Is Bent?
You’ll know your derailleur hanger is bent if your gears skip, shift poorly, or the derailleur looks misaligned with the cassette.
Spin your rear wheel and watch the derailleur; if it wobbles side to side or rubs the cassette, that’s a clear sign.
You can also use a derailleur hanger alignment tool to check it more precisely.
If you spot any bend, it’s best to straighten or replace it to keep shifting smooth.
Are There Specific Derailleur Brands Recommended for Beginners?
If you want a derailleur so smooth it feels like it reads your mind, Shimano and SRAM are the go-to brands for beginners. They make shifting as easy as pie, even if you’ve never touched a bike before.
These brands offer reliable, affordable options that won’t leave you struggling on the trail. You’ll love how effortlessly your gears change, making your rides way more fun and less frustrating.
Conclusion
Now that you’ve given your derailleur a little tune-up, your bike will shift smoothly across every gear like a well-rehearsed ballet.
Remember, a gentle touch and regular care keep the shifting as graceful as a mountain breeze. Staying attentive to those small adjustments makes all the difference.
You’re not just maintaining your bike—you’re nurturing a ride that effortlessly glides over trails. Every journey becomes a seamless, joyful adventure.
Keep pedaling with confidence and enjoy the ride!