How to Put a Chain on a Mountain Bike in 7 Easy Steps
Are you tired of struggling with your mountain bike’s chain, especially when it keeps slipping or getting stuck? You’re not alone—many riders find it tricky to install or maintain their chains properly.
Luckily, with a little know-how, you can easily get your bike running smoothly again.
To put a chain on your mountain bike, first verify it’s compatible with your gears and drivetrain. Clean your bike’s drivetrain and the new chain before starting.
Next, adjust the chain length by wrapping it around the largest chainring and cog, adding two links, and trimming excess.
Thread the chain carefully through the derailleur and gears, then connect the ends with a master link or pin.
Test shifting and movement to make sure everything runs smoothly.
Regularly maintain your chain for a smoother ride.
Investigate these steps in detail to master the process.
Key Takeaways
- Check if the chain matches your bike’s gears, chain width, and brand. It’s important to make sure everything lines up before you start.
- Clean all the drivetrain parts and the new chain really well. This helps remove dirt, grime, and any factory oils that might cause issues later.
- To get the right chain length, wrap the chain around the biggest chainring and the largest cog. Then, remove any excess links so it’s not too tight or too loose.
- Thread the chain through the derailleur’s jockey wheels and gears carefully. Make sure there are no twists or overlaps so it shifts smoothly.
- Connect the chain ends using a master link or chain pin. Once it’s connected, test the shifting to see if everything runs smoothly.
- If needed, adjust your derailleur settings for perfect shifting. A little fine-tuning can make a big difference in performance.
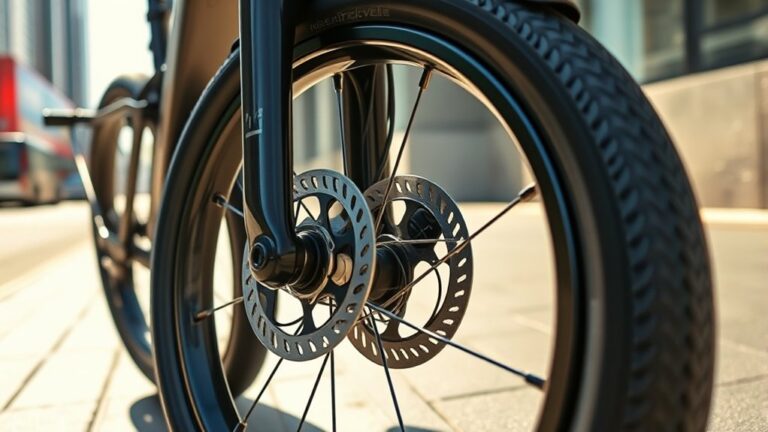
Check Your Mountain Bike Chain Compatibility
Before you put a new chain on your mountain bike, you need to make sure it’s compatible with your bike’s drivetrain. Check the number of gears on your cassette or freewheel because chains are designed to match specific gear counts. For example, an 11-speed chain won’t work properly on a 9-speed drivetrain.
Look for the chain width, which varies with speed; narrower chains fit more gears. Also, verify the chain type—some bikes use standard chains, while others might require special chains for brands like SRAM or Shimano.
Don’t forget to confirm the chain length range your bike needs. Using an incompatible chain can cause poor shifting, excessive wear, or even damage. So, take a moment to match your new chain precisely with your mountain bike’s drivetrain.
Clean and Ready Your Bike and Chain for Installation
Once you’ve confirmed your new chain matches your bike’s drivetrain, it’s time to clean and prepare both the bike and the chain for installation. Start by wiping down the drivetrain components—chainrings, cassette, and derailleur pulleys—to remove dirt and old grease. Use a degreaser and a brush for stubborn grime, then rinse and dry thoroughly.
Next, inspect the new chain for any factory residue or protective oil. If you find any, clean it gently with a rag soaked in degreaser. This helps the lubricant stick properly once applied. Preparing your bike and chain this way prevents premature wear and promotes smooth shifting.
Taking these steps will give your bike a clean foundation, making installation easier and extending your chain’s lifespan.
Adjust Chain Length Before Installing Your Chain
Although your new chain might seem ready to install, you’ll need to adjust its length to fit your bike’s drivetrain perfectly.
Start by wrapping the chain around the largest front chainring and the largest rear cog, bypassing the derailleur. Pull the chain tight and add two full links for proper tension and derailleur movement.
Use a chain tool to remove any excess links carefully. Make sure the chain isn’t too tight or too loose; either can cause shifting problems or chain drop.
Double-check the length by comparing it to your old chain if you have one. Taking your time to get it right ensures smooth shifting and prevents damage.
Once the length is set, you can proceed to thread the chain through your derailleur and gears.
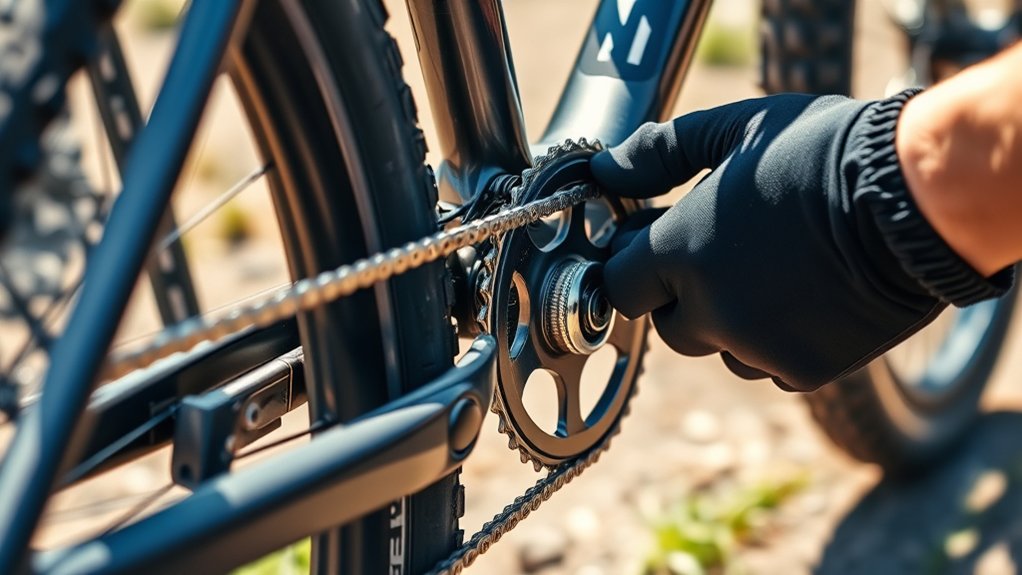
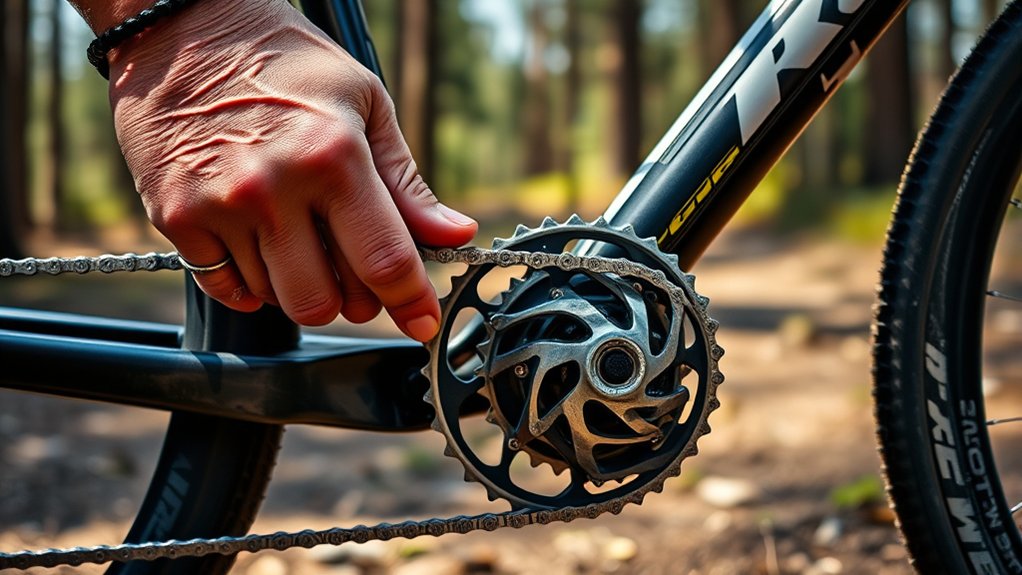
Thread Your Mountain Bike Chain Through Derailleur and Gears
Now that your chain is the right length, start by finding the correct path it needs to follow through the derailleur and gears.
Make sure the chain lines up smoothly with each gear to prevent any tension or slipping.
Finally, secure the chain through the derailleur, ensuring it moves freely and stays in place during your rides.
Identify Chain Path
Start by carefully threading your mountain bike chain through the derailleur and around the gears, following the specific path designed for smooth shifting. The chain must pass through the derailleur’s jockey wheels, first the upper guide wheel, then the lower tension wheel, to keep proper tension and alignment.
Next, loop the chain around the smallest rear cog, then guide it forward toward the front chainrings. Make sure the chain runs cleanly over and under the components without twisting or overlapping.
Identifying this path correctly helps prevent chain slipping and ensures efficient pedaling. Pay attention to how the chain interacts with the derailleur’s springs and pivots; it should move freely without binding.
Following this path carefully sets you up for a well-functioning drivetrain ready for your ride.
Align Chain With Gears
After threading your chain through the derailleur’s jockey wheels and around the gears, you’ll want to align it precisely with each cog and chainring. Start by positioning the chain on the smallest rear cog and the smallest front chainring if your bike has multiple rings.
This alignment guarantees the chain runs smoothly without binding or slipping. Check that the chain sits flat against each gear tooth and isn’t twisted or rubbing against the derailleur cage.
Gently pull the chain taut to remove slack, making sure it moves easily over the gears as you manually rotate the pedals. Proper alignment reduces wear and improves shifting performance, so take your time adjusting the chain’s path until it runs cleanly along all gears.
Secure Chain Through Derailleur
Thread your mountain bike chain carefully through the derailleur to make sure it engages properly with the jockey wheels and gears. Start by feeding the chain over the top jockey wheel, making sure it sits smoothly around it.
Next, guide the chain down and around the bottom jockey wheel, keeping it taut but not too tight. Ensure the chain follows the correct path through the derailleur cage without twisting or crossing.
Check that the chain runs cleanly over the teeth of each jockey wheel, so the derailleur can maintain proper tension. Once threaded, pull the chain to confirm smooth movement through the derailleur and gears.
This step is crucial for good shifting performance, so take your time and double-check everything before moving on.
Connect Chain Ends Using a Master Link or Pin
Once you’ve aligned the chain ends, you’ll need to connect them securely using either a master link or a chain pin.
If your chain uses a master link, insert both halves of the link into the open ends, then snap them together until they click firmly. You might need to squeeze the link with pliers or pedal backward to lock it fully.
For chains requiring a pin, insert the new chain pin through the aligned chain ends using a chain tool. Push the pin in until it’s flush with the outer plate, then break off any excess sticking out.
Make sure the connection is tight and the link pivots smoothly without stiffness. This guarantees a safe, reliable connection before moving on.
Test Chain Movement and Shifting
Spin the pedals and watch how the chain moves across the gears to make sure everything runs smoothly.
Shift through all the gears, both on the front chainrings and rear cassette, to look for any skipping or hesitation. If the chain struggles to shift or slips under pressure, it might be too tight or too loose.
Pay attention to the derailleur’s response—each gear change should be crisp and precise. Also, listen for unusual noises like grinding or clicking, which can mean improper chain length or alignment issues.
If you notice problems, adjust the derailleur limit screws and cable tension as needed. Testing your chain movement thoroughly helps ensure a reliable ride and prevents damage to your drivetrain before hitting the trails.
Keep Your Chain Clean and Smooth for Longer Rides
To keep your chain running smoothly on long rides, you should clean it regularly and apply the right lubricant. It’s all about removing dirt and grime without damaging the links.
Focus on cleaning thoroughly but gently, so you don’t harm the chain’s integrity. Once it’s clean, applying proper lubrication helps reduce friction.
This not only makes pedaling easier but also extends your chain’s lifespan, so you can enjoy more miles without worries.
Chain Cleaning Techniques
Keeping your mountain bike chain clean is essential for smooth rides and a longer chain life. Start by using a degreaser made specifically for bike chains. Apply it generously while spinning the pedals backward to reach every link.
Next, scrub the chain with a stiff-bristled brush or a chain cleaning tool to get rid of dirt and grime. Don’t forget to clean the cassette and chainrings too, as dirt there can transfer back to the chain.
After scrubbing, rinse the chain thoroughly with water to remove any remaining degreaser. Make sure no residue is left behind. Finally, dry your chain completely with a clean rag or let it air dry in a well-ventilated spot.
Regular cleaning keeps your chain running smoothly and prevents premature wear. Make it part of your maintenance routine for the best results.
Lubrication Tips and Tricks
Although cleaning your chain is essential, regular lubrication is what truly keeps it running smoothly and extends its lifespan. You want to apply lubricant after every few rides or whenever the chain starts to sound dry or gritty.
Use a bike-specific lubricant and avoid over-lubricating, as this can attract dirt. After applying, wipe off any excess to prevent grime buildup.
Here are some lubrication tips and tricks to keep in mind:
Apply lube to the inside of the chain while slowly turning the pedals backward for even coverage.
Choose wet lube for rainy conditions and dry lube for dusty trails to maximize efficiency.
Regularly inspect your chain for rust or stiffness and reapply lube as needed to keep shifting smooth.
With these steps, your chain will stay clean, smooth, and ready for longer rides.
Frequently Asked Questions
How Often Should I Replace My Mountain Bike Chain?
You should replace your mountain bike chain every 2,000 to 3,000 miles, but it really depends on how you ride and the conditions you ride in.
If you’re often riding in mud, rain, or rough trails, you might need to change it sooner. Check for chain stretch regularly using a tool or just by measuring.
If your gears start slipping or shifting gets poor, it’s probably time to swap out the chain. Doing this keeps your bike running smoothly and helps prevent damage to other parts.
What Tools Do I Need to Remove an Old Chain?
You’ll need a chain breaker tool to remove an old mountain bike chain easily. This tool pushes out the pins holding the links together.
If your chain has a quick link, you might also want quick link pliers to open it. Having a pair of gloves can keep your hands clean too.
With these tools, you can safely and efficiently remove the chain without damaging other bike parts.
Can I Use a Road Bike Chain on a Mountain Bike?
You generally shouldn’t use a road bike chain on a mountain bike because they’re designed differently. Mountain bike chains are built to handle rougher terrain, wider gears, and more stress.
Using a road bike chain might cause shifting problems or wear out faster. It’s best to pick a chain that matches your mountain bike’s drivetrain specifications, like the number of speeds and brand compatibility, to keep everything running smoothly and safely.
How Do I Fix a Broken Chain While Riding?
If your chain breaks while riding, stop safely and get off the bike. Use a chain tool or quick link pliers from your repair kit to remove the damaged link.
If you have a quick link, reconnect the chain by snapping it back together. If not, use the chain tool to rejoin the chain.
Always carry a multi-tool and spare quick links to fix breaks quickly and keep riding without hassle.
What Are Signs of a Worn-Out Mountain Bike Chain?
You’ll spot a worn-out mountain bike chain when it starts stretching like it’s trying to escape your bike!
If your chain slips while pedaling or makes clicking noises, that’s a red flag. Also, check for rust, stiff links, or if the chain feels loose.
Measure chain wear with a tool or ruler. If it’s stretched beyond 0.5%, it’s time for a replacement to avoid damaging your gears.
Conclusion
Putting a chain on your mountain bike is like weaving the thread that connects you to the trail’s heartbeat. Each link you join gets you closer to freedom, powering your ride through rocky paths and winding forests.
Keep your chain clean and smooth, and it’ll glide like a river over stones, making your ride effortless. With these steps, you’re not just fixing a chain—you’re unlocking the wild adventure waiting just beyond the next bend.
And that’s how you put a chain on your mountain bike, making sure it’s ready for your next epic ride.