How to Bleed Mountain Bike Brakes in 8 Easy Steps
Are your mountain bike brakes feeling spongy or unresponsive? You’re not alone—many riders struggle with maintaining their brake performance, especially when air gets trapped in the system.
Bleeding your mountain bike brakes can seem intimidating, but with the right steps, it’s pretty straightforward.
To bleed your mountain bike brakes in eight easy steps, start by gathering the right tools and brake fluid for your system. Prepare a clean, stable workspace and remove the brake pads carefully.
Attach the bleed kit securely to the bleed port, then open it to flush out old fluid while pumping the brake lever to release trapped air.
Refill the reservoir without letting air in, close the port, and reinstall your pads. You’ll soon have firm, responsive brakes—keep following to master the full process.
Key Takeaways
- Gather a brake bleed kit, the correct brake fluid, and some cleaning supplies before you get started.
- Secure your bike on a stable stand. Carefully remove the brake pads so you can access the caliper.
- Attach the bleed hose to the caliper’s bleed port and open it to let out the old brake fluid.
- Slowly pump the brake lever while refilling the fluid. This helps push out any air bubbles and keeps the fluid flowing smoothly.
- Once done, reinstall the brake pads, check for leaks, and test the brake responsiveness.
- Take your bike for a quick test ride to make sure everything is working safely.
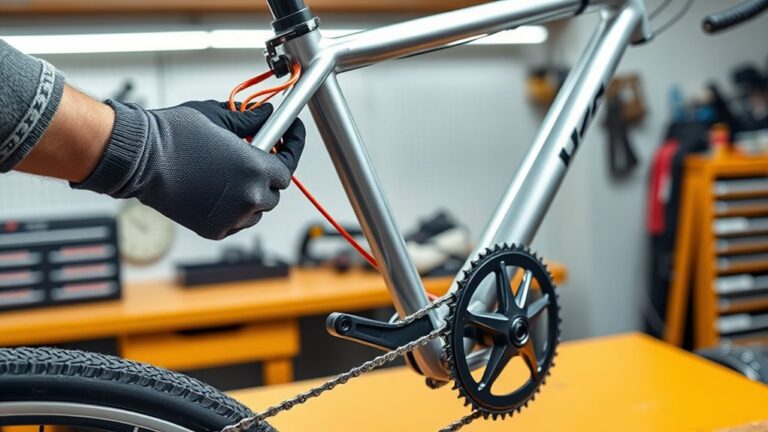
Gather Tools and Supplies to Bleed Mountain Bike Brakes
Before you start bleeding your mountain bike brakes, make sure you have all the tools and supplies you need. You’ll want a brake bleed kit compatible with your brake brand, which includes syringes, hoses, and bleed blocks.
Grab the right brake fluid—either mineral oil or DOT fluid—based on what your manufacturer recommends. Don’t forget clean rags and isopropyl alcohol to wipe up spills and keep everything tidy.
A small screwdriver or Allen keys are handy for opening bleed ports. You might also want disposable gloves to protect your hands from brake fluid.
Having a container to catch old fluid helps prevent messes. Gathering everything beforehand makes the process smoother and saves you from interruptions or frustration.
Being prepared not only saves time but also protects your bike’s components during the bleed.
Prepare Your Bike and Workspace for Bleeding
Before you start bleeding your brakes, make sure you have all the tools ready and within reach.
Set up a clean, well-lit workspace to keep dirt and debris away from your bike’s components.
This preparation will help you work efficiently and avoid contamination.
Gather Necessary Tools
Gathering the right tools is key for a smooth and effective brake bleeding process. You’ll want the specific bleed kit made for your brake brand, which usually includes syringes, hoses, and bleed blocks.
Don’t forget the correct brake fluid—either DOT or mineral oil, depending on your brakes. Keep a clean rag or paper towels nearby to wipe up spills quickly.
You might need a small flathead screwdriver or Allen keys to open the bleed ports. Gloves will protect your hands from brake fluid, which can harm your skin and paint.
Finally, have a container ready to catch the old fluid. Having all these tools set before you start saves time and keeps things running smoothly.
Set Up Clean Area
A clean, organized workspace helps you work efficiently and prevents contamination during the brake bleeding process. Start by clearing a flat surface near good lighting where you can set your bike securely on a stand or stable surface.
Lay down paper towels or a disposable mat to catch any spilled brake fluid. Keep all your tools and supplies within easy reach so you don’t have to move around unnecessarily.
Make sure you wear gloves to protect your skin from brake fluid and have some isopropyl alcohol and clean rags handy for quick cleanups. Remove any dirt or grime from the brake components with a clean cloth before starting.
Remove Brake Pads From Your Mountain Bike
Before you start bleeding your brakes, you’ll need to carefully remove the brake pads to avoid contamination. Grab the right tools, like a pad removal tool or needle-nose pliers, to make the job easier.
Follow the proper steps to take the pads out without damaging them or the caliper. Taking your time will help keep everything in good shape and make the process smoother.
Tools Needed
You’ll need a few essential tools to remove the brake pads from your mountain bike efficiently. Start with a set of Allen wrenches, usually 2.5mm or 3mm, to loosen the pad retaining bolts or pins.
A flathead screwdriver or a plastic tire lever can help gently pry the pads apart if they’re stuck. Have needle-nose pliers ready to handle small clips or pins securing the pads.
It’s also smart to use a clean rag or paper towels to keep the area tidy and prevent contamination. Finally, wear disposable gloves to protect your hands and avoid getting grease or brake fluid on the pads.
Having these tools on hand will make the pad removal process smoother and protect your brake components.
Proper Pad Removal
Start by securing your bike in a stable position so it doesn’t move while you work. Removing the brake pads properly is key to avoiding contamination with brake fluid. First, find the retaining pin or bolt holding the pads in place.
Carefully remove this with the right tool. Once the pads are free, gently slide them out without touching the friction surface.
Keep these tips in mind: use gloves to prevent oil or dirt from transferring onto the pads. Avoid compressing the brake lever after removing the pads. Store the pads in a clean, dry place to keep them effective.
Following these steps helps keep your pads clean and ready for reinstallation after bleeding, ensuring your brakes stay responsive and safe.
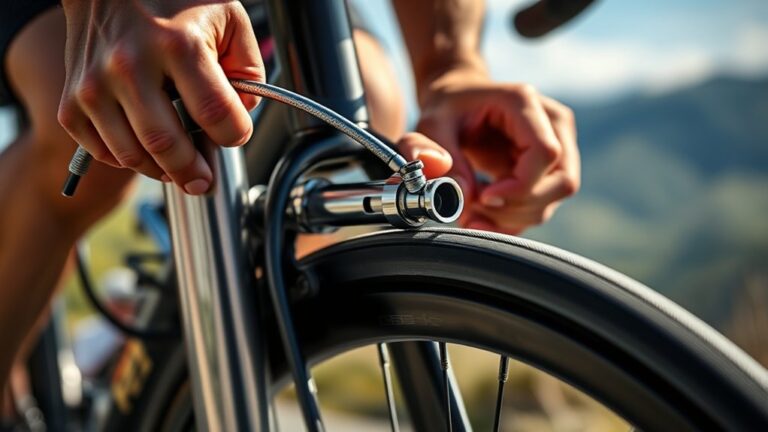
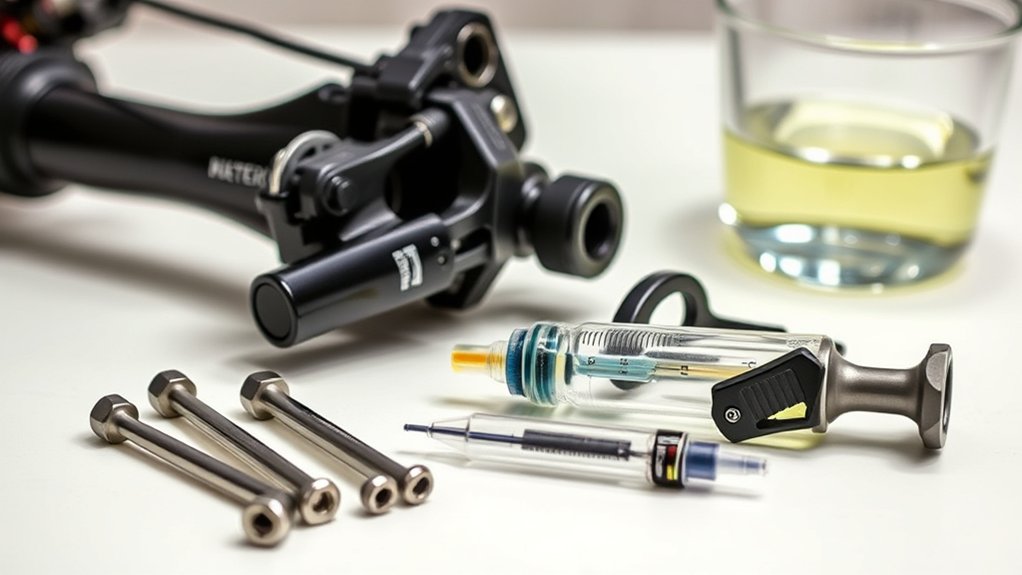
Attach the Bleed Kit to Your Brake System
Once you have all your tools ready, attach the bleed kit securely to your brake system’s bleed port. Make sure the connection is tight to prevent leaks and keep contaminants out. Check the syringe or reservoir on the bleed kit to ensure it’s clean and ready to go.
Proper attachment is really important for a successful brake bleed. Follow this quick checklist:
| Step | Action | Tip |
|---|---|---|
| 1. Identify Port | Find the bleed port | Usually on the caliper |
| 2. Attach Kit | Connect the bleed hose firmly | Avoid cross-threading |
| 3. Secure Seal | Make sure no air can enter | Use clamps if needed |
Open the Mountain Bike Brake Bleed Port and Flush Old Fluid
After securing the bleed kit to your brake system, loosen the bleed port to let the old brake fluid escape. This step helps clear out contaminated fluid and keeps your brakes working smoothly. Use a wrench to carefully open the port without stripping it.
Secure the bleed kit, then carefully loosen the bleed port to release old, contaminated brake fluid.
As the old fluid drains, keep an eye on the syringe or container attached to the bleed kit to catch it. While flushing the fluid, remember to gently open the bleed port to maintain a steady flow.
Make sure connections stay tight to avoid introducing air bubbles. Dispose of the old brake fluid safely because it’s hazardous.
Flushing out the old fluid thoroughly prepares your brake system for fresh fluid, which improves braking performance and safety.
Pump the Brake Lever to Release Trapped Air
Pump the brake lever slowly and steadily to help push any trapped air bubbles out of the system. As you work the lever, watch for bubbles rising through the fluid in the reservoir or bleed port.
This action forces air toward the highest points, making it easier to expel. Keep a firm but gentle grip to avoid introducing new air or damaging the lever.
You might notice the lever feeling spongy at first. This means air is still present. Continue pumping until the lever feels firm and consistent.
If you see bubbles stop appearing, it’s a good sign that most of the air has been removed. Take your time here; rushing can trap air and reduce braking performance.
Once the lever feels solid, you’re ready to move on to refilling the reservoir.
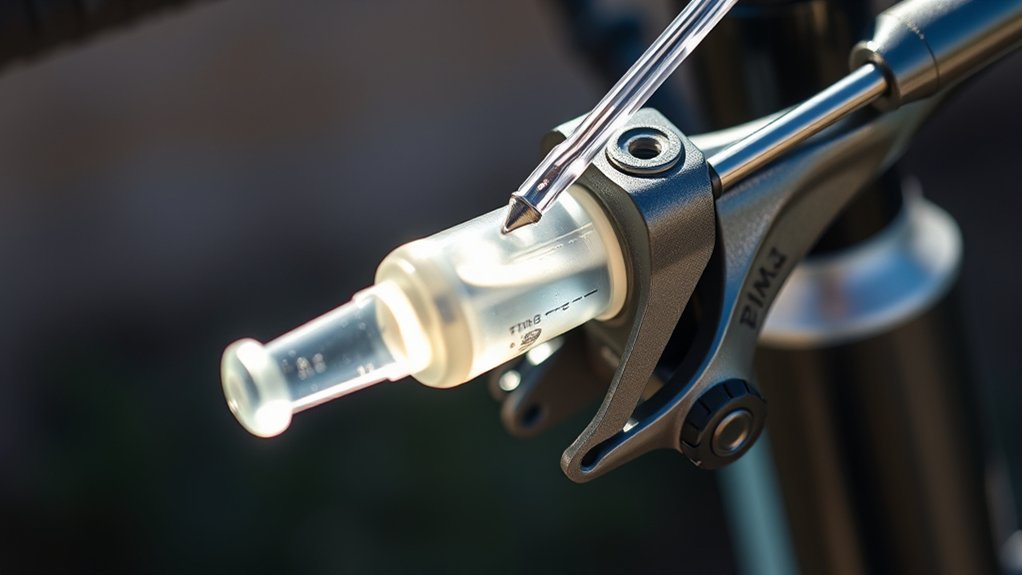
Refill Brake Fluid Reservoir Without Introducing Air
Two key steps help you refill the brake fluid reservoir without introducing air: maintaining a steady flow of fluid and keeping the reservoir angled correctly. Start by slowly pouring the fresh brake fluid into the reservoir, making sure it never runs dry or bubbles form.
Tilt the reservoir slightly so the fluid covers the opening completely. This helps prevent air from entering and keeps the hydraulic pressure steady.
Keep these tips in mind: pour fluid steadily to avoid splashing or bubbles, keep the reservoir angled so the fluid covers the inlet, and monitor the fluid level closely, topping up as needed.
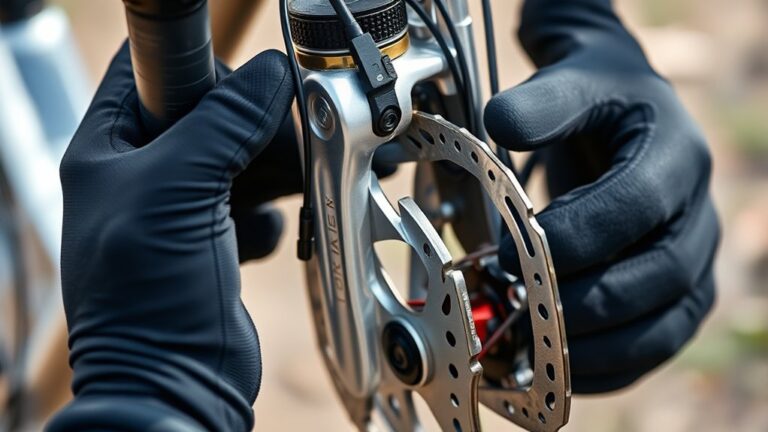
Close Bleed Port, Reinstall Pads, and Test Brakes
Secure the bleed port by tightening it carefully to prevent any fluid leaks. Once it’s sealed, wipe away any spilled brake fluid to protect your bike’s components.
Next, reinstall the brake pads into the caliper, making sure they sit properly and don’t touch the rotor. Compress the pistons gently if needed to create enough clearance for the pads.
Carefully reinstall brake pads and gently compress pistons to ensure proper fit without rotor contact.
Reattach the wheel and secure it firmly. Now, test the brakes by squeezing the lever several times; it should feel firm and responsive without any sponginess.
If the lever feels soft or sinks to the handlebar, you may need to repeat the bleeding process. Finally, check for leaks around the bleed port and caliper.
Properly closing and testing guarantees your brakes work safely and efficiently.
Frequently Asked Questions
How Often Should I Bleed My Mountain Bike Brakes?
You should bleed your mountain bike brakes about once a year or whenever you notice sponginess or reduced stopping power.
If you ride often in muddy or wet conditions, you might need to do it more frequently.
Don’t wait for the brakes to completely fail—regular maintenance helps keep them responsive and safe.
Also, if you feel inconsistent brake lever pressure or see air bubbles, that’s a good sign you should bleed them sooner.
What Type of Brake Fluid Is Best for My Bike?
You should always use the brake fluid specified by your bike’s manufacturer. Most mountain bikes with hydraulic brakes use either DOT fluid, like DOT 4 or DOT 5.1, or mineral oil.
Don’t mix these fluids because they’re not compatible. Check your brake lever or caliper for a label, or just consult your manual.
Using the right fluid keeps your brakes working well and prevents damage to seals and other parts. Always stick to the recommended type to keep everything in good shape.
Can I Use Automotive Brake Fluid for My Bike Brakes?
No, you shouldn’t use automotive brake fluid for your bike brakes. Most mountain bike brakes use mineral oil, which is different from the DOT fluid found in cars.
Using the wrong fluid can damage seals and cause brake failure. Always check your brake manufacturer’s recommendations and use the specified fluid.
Sticking to the right fluid keeps your brakes performing safely and smoothly, so don’t take shortcuts with automotive brake fluids.
What Are Signs That My Brakes Need Bleeding?
You’ll know your brakes need bleeding if they feel spongy or soft when you squeeze the lever.
If your brake lever pulls too close to the handlebar without much resistance, it’s a sign air’s trapped in the system.
You might also notice reduced stopping power or inconsistent braking performance.
If your brakes drag or feel sluggish, bleeding can help restore their responsiveness and safety.
Don’t ignore these signs!
Is It Necessary to Wear Gloves When Bleeding Brakes?
Yes, you should wear gloves when bleeding brakes. Brake fluid can be corrosive and irritate your skin, so gloves protect your hands from harmful chemicals. Plus, it keeps things clean and prevents contamination of your brake system.
Nitrile gloves work best since they resist brake fluid better than latex. Wearing gloves also makes cleanup easier, so you can focus on getting your brakes bled properly without worrying about mess or skin damage.
Conclusion
Bleeding your mountain bike brakes is just as important as tuning a guitar—both require precision to work perfectly.
By following these steps, you’ll ensure your brakes feel smooth and responsive, ready for any trail.
Keep your tools handy and don’t skip routine maintenance. A well-bleed brake system means safer, more confident rides every time you hit the dirt.
Now, get out there and enjoy the ride with brakes that work like a charm!