How to Raise Handlebars on a Mountain Bike in 10 Easy Steps
Are your mountain bike handlebars feeling too low or awkward? You’re not alone—many riders struggle to find that perfect, comfortable riding position. Luckily, raising your handlebars is a quick fix that can make a big difference in your riding experience.
To raise your mountain bike handlebars, first gather your tools and clear a workspace. Loosen the stem bolts evenly, then remove the stem and top cap to access the handlebars. Move spacers from below to above the stem, then reinstall and align the stem with the front wheel.
Next, adjust the brake and shifter cable tension, test the new height for comfort, and fine-tune the handlebar angle and grips. Keeping bolts tight and grips fresh guarantees control and comfort—there’s more to perfect your setup.
Key Takeaways
- Loosen the stem bolts evenly using an Allen wrench, but don’t fully remove them yet. This will prepare you for adjusting the handlebar height.
- Next, remove the top cap bolt. This relieves the headset compression. Carefully slide the stem off the steerer tube.
- Now, you can rearrange the spacers. Move them from below the stem to above it. This is what will raise the handlebar height.
- Reinstall the stem over the steerer tube. Make sure the handlebars are aligned with the front wheel.
- Tighten the bolts to the torque specification. This keeps everything secure and safe.
- Adjust the cable tension if needed. Test the handlebar height for comfort.
- Ensure that brakes and shifters are easily accessible before you finish up. Once everything feels right, you’re all set!
Gather Your Tools and Clear Your Workspace
Before you start raising your mountain bike’s handlebars, gather all the tools you’ll need and clear your workspace. Usually, you’ll want an Allen wrench set, a torque wrench, and maybe a screwdriver, depending on your bike model.
Make sure your area is well-lit and spacious enough to move comfortably around your bike. Clear away any clutter that might get in your way or cause you to lose small parts.
Ensure your workspace is bright, roomy, and free of clutter to keep small parts safe and accessible.
Having a clean, organized space helps you focus and prevents accidental damage. Lay down a mat or towel to protect your bike’s frame and catch any dropped bolts.
Preparing everything in advance will save you from interruptions and make the handlebar adjustment smoother and more efficient.
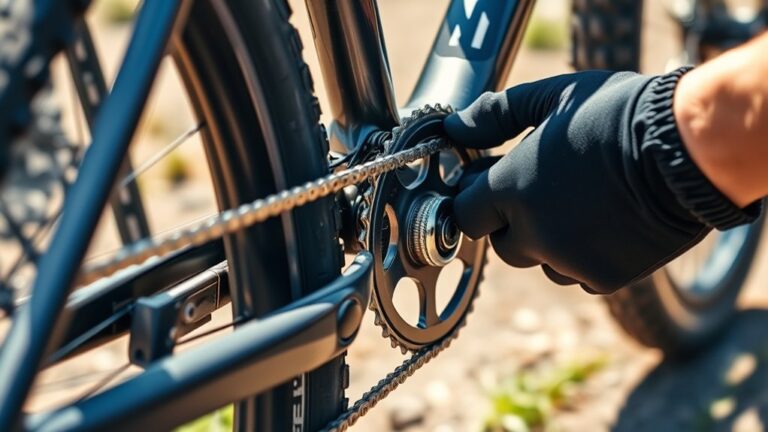
Loosen Stem Bolts
With your tools ready and workspace organized, you can start loosening the stem bolts that hold your handlebars in place. These bolts secure the stem to the steerer tube and need to be loosened carefully to adjust handlebar height.
Follow these steps:
- Find the stem bolts, usually two or four, on the side or front of the stem.
- Use the right size Allen wrench to turn each bolt counterclockwise. Loosen them evenly, switching between bolts to prevent uneven pressure.
- Loosen the bolts just enough so the stem can move freely. Don’t remove them completely, as this could cause parts to fall or misalign.
Once the stem bolts are loose, your handlebars will be ready for the next adjustment step.
Remove Stem and Top Cap to Access Handlebars
You’ll need an Allen wrench and possibly a torque wrench to remove the stem and top cap. Start by loosening the top cap bolt.
Then, carefully slide the stem off the steerer tube. Follow these steps to access your handlebars safely and avoid damaging any parts.
Tools Needed
A few essential tools will help you remove the stem and top cap to access your mountain bike’s handlebars. Having the right tools makes the process smoother and helps prevent damage to your bike components.
Here are the three main tools you’ll need:
- Allen Wrenches (Hex Keys) – Usually, a 4mm or 5mm size fits most stem bolts and top cap bolts. These let you loosen and remove the bolts securely.
- Torque Wrench – This tool ensures you tighten bolts to the manufacturer’s specifications when reassembling. It helps prevent over-tightening or stripping threads.
- Grease – Applying a thin layer on bolts before reinstallation helps prevent corrosion and makes future adjustments easier.
Be sure to gather these tools before you start. This keeps your workspace efficient and organized.
Step-by-Step Removal
Start by loosening the two stem bolts with an appropriate Allen wrench, usually 4mm or 5mm. Turn the bolts counterclockwise to loosen them.
Next, remove the top cap bolt by turning it counterclockwise. This relieves the compression on the headset, making it easier to slide the stem off the steerer tube.
Keep all bolts and parts organized so you don’t lose anything. Once the stem is off, you can access the handlebars for adjustments.
| Step | Tool Needed | Action |
|---|---|---|
| Loosen stem bolts | 4mm or 5mm Allen wrench | Turn bolts counterclockwise |
| Remove top cap | 4mm Allen wrench | Unscrew top cap bolt |
| Slide off stem | None | Pull stem from steerer tube |
Adjust Spacers to Raise Handlebar Height
Although it might seem technical at first, adjusting the spacers on your mountain bike’s fork steerer tube is a quick way to raise your handlebar height. Spacers are small rings on the steerer tube, and moving them around can give you more comfort without changing any parts.
Adjusting spacers on your bike’s steerer tube is an easy way to raise handlebars for better comfort.
Here’s how to do it:
- Loosen the stem bolts: Use an Allen wrench to loosen the bolts holding your stem, so you can slide it off the steerer tube.
- Rearrange the spacers: Move the spacers from below the stem to above it. This raises the stem and the handlebars together.
- Check steerer tube length: Make sure there’s enough steerer tube above the new spacer stack to safely reinstall the stem and top cap.
This simple adjustment can make your ride more comfortable and give you better control with minimal effort.
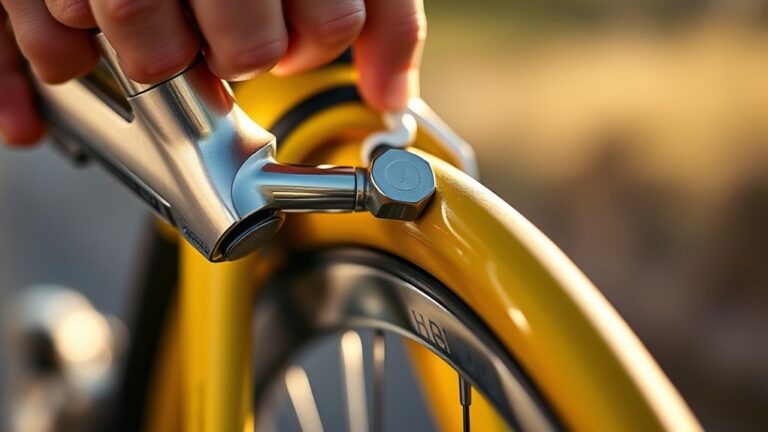
Reinstall Stem and Align Handlebars
Slide the stem back onto the steerer tube carefully, making sure it sits firmly over the spacers you’ve repositioned. Once it’s in place, it’s time to align the handlebars.
Stand in front of the bike and center the handlebars with the front wheel. Check that the handlebars are perpendicular to the fork for proper control and comfort.
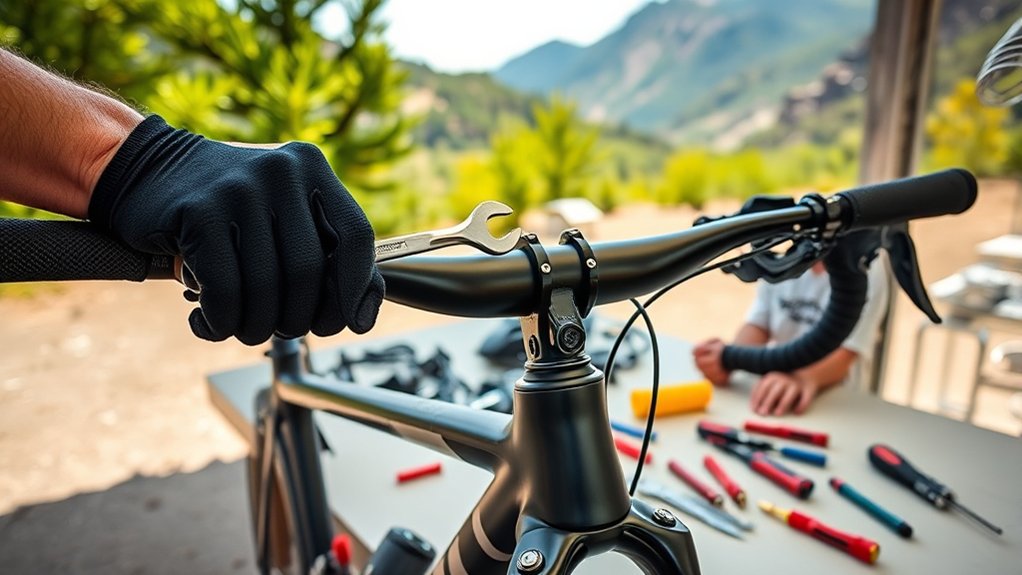
Tighten Stem Bolts to Secure Handlebars
Now that your handlebars are aligned, it’s important to tighten the stem bolts correctly to keep them secure. Use the proper torque specifications and follow the recommended bolt tightening sequence to avoid uneven pressure.
Double-check the handlebar alignment one last time before you finish tightening. This way, everything stays in place and feels just right.
Proper Torque Specifications
Two key stem bolts require careful tightening to secure your handlebars properly. Using the correct torque guarantees safety and prevents damage to your bike’s components. Over-tightening can strip threads or crush parts, while under-tightening risks handlebar movement.
Follow these torque guidelines:
- Check your stem manufacturer’s specifications, which are usually between 4-6 Nm for most mountain bike stems.
- Use a calibrated torque wrench to apply even pressure, avoiding guesswork.
- Tighten bolts incrementally, alternating between them to keep everything aligned and ensure a consistent clamping force.
Bolt Tightening Sequence
Although it might seem straightforward, following the correct bolt tightening sequence is key to securely fastening your handlebars without causing damage. Start by lightly tightening the stem bolts in a crisscross pattern if there are four bolts, or alternate evenly if there are two.
This helps ensure even pressure distribution and prevents warping or misalignment. Gradually increase the torque in small steps, checking each bolt as you go. Avoid fully tightening one bolt before the others, as this can cause uneven stress or damage.
Use a torque wrench to reach the manufacturer’s recommended tightness accurately. Once all bolts are snug and evenly tightened, your handlebar setup will be secure and ready for safe riding.
Checking Handlebar Alignment
Once you’ve loosely tightened the stem bolts, check the handlebar alignment carefully before fully tightening them. Proper alignment helps with control and comfort while riding. Here’s how to do it:
- Center the Handlebars: Stand in front of your bike and visually align the handlebars with the front wheel. Make sure they’re straight and not tilted.
- Check the Angle: Sit on the bike and grip the handlebars. Adjust their angle until they feel natural and comfortable for your riding style.
- Tighten Evenly: Gradually tighten the stem bolts in a crisscross pattern, checking the alignment as you go. This prevents uneven pressure and keeps everything secure.
Following these steps will help keep your handlebars aligned and stable on every ride.
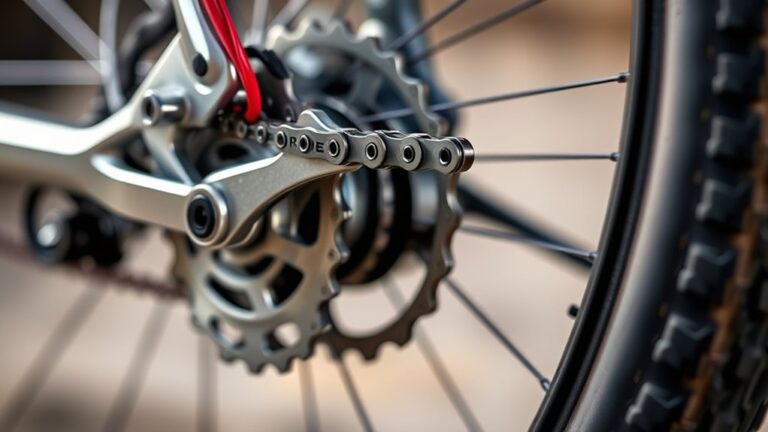
Adjust Brake and Shifter Cable Tension
Start by checking the tension in your brake and shifter cables after raising the handlebars. When you lift the bars, the cables can loosen or tighten, which can affect how your bike feels.
Squeeze your brake levers and shift through the gears to see if they feel responsive. If the brakes feel spongy or the shifting is sluggish, it’s time to adjust the cable tension.
Use the barrel adjusters near the brake levers or shifters. Turn them clockwise to tighten and counterclockwise to loosen. Make small adjustments and test often.
Keep testing until the brakes engage firmly and the gears shift smoothly. If your cables are too slack or overly tight, it can cause poor control or even damage.
Proper cable tension is key for safe and reliable bike handling after raising the handlebars.
Test Handlebar Height for Comfort and Control
How do you know if your handlebars are at the right height? It’s all about comfort and control when you’re riding. After raising your handlebars, take your bike for a short test ride and pay attention to how your body feels.
Here’s what to check:
- Comfort: Your back and shoulders shouldn’t feel strained or overly stretched. If you feel tense, the bars might be too low or high.
- Control: You should easily reach the brakes and shifters without overextending your arms. If you struggle, adjust accordingly.
- Handling: The bike should respond smoothly to your movements without feeling awkward or unstable.
If anything feels off, tweak the height slightly and test again until it feels just right.
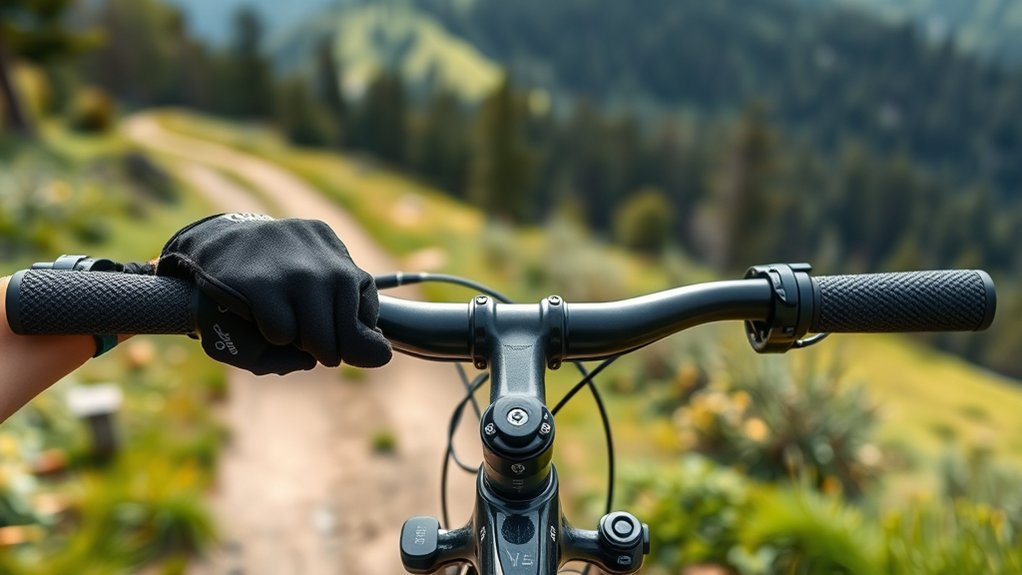
Fine-Tune Handlebar Angle and Grip Position
After settling on the right handlebar height, you’ll want to adjust the angle and grip position to match your riding style and comfort. Loosen the stem bolts slightly so you can rotate the handlebars forward or backward.
Aim for a slight upward tilt if you prefer a more upright posture or a flatter angle for aggressive riding. Next, adjust your grips by twisting them to a natural position that aligns with your wrists when you hold the bars.
This helps prevent strain and improves control. Make small adjustments, then test ride to see how it feels. Repeat until your wrists are relaxed and your hands rest comfortably.
Fine-tuning these details guarantees better handling and reduces fatigue during long rides, making your mountain biking more enjoyable.
Maintain Handlebar Bolts and Grips for Comfort
You’ll want to check your handlebar bolts regularly to make sure they’re tight and secure.
Choosing grips that feel comfortable can make a big difference on long rides.
Don’t wait to replace worn grips because they can reduce your control and comfort.
Checking Bolt Tightness Regularly
Regularly checking the tightness of your handlebar bolts is key to ensuring a safe and comfortable ride. Loose bolts can cause the handlebars to shift unexpectedly, which can be dangerous.
To keep everything stable, follow these simple steps:
- Use a torque wrench to make sure each bolt is tightened to the manufacturer’s recommended setting.
- Check all bolts evenly because uneven tightening can cause handlebar damage or slipping.
- Inspect bolt tightness before each ride, especially after rough trails or impacts.
Choosing Comfortable Handlebar Grips
A comfortable set of handlebar grips can make a huge difference in your riding experience. When choosing grips, focus on materials that offer good cushioning and shock absorption, like silicone or gel. These help reduce hand fatigue and give you better control on rough terrain.
Think about the grip size too—too thick or too thin can cause discomfort during long rides. Look for textured surfaces that provide reliable traction without causing blisters. Don’t forget to check that your grips fit securely on your handlebars to prevent slipping.
Keeping both the bolts and grips in good shape ensures everything stays firmly in place. This boosts your comfort and safety while riding. By picking grips that match your hand size and riding style, you’ll enjoy better handling and a more enjoyable ride overall.
Replacing Worn Grips Timely
When your grips start feeling slippery or worn, it’s time to replace them to keep control and comfort. Worn grips can weaken your grip and cause hand fatigue, especially on rough trails.
Replacing them on time keeps your ride safe and enjoyable. Here’s how to do it effectively:
- Remove old grips: Use rubbing alcohol or grip-specific adhesive remover to loosen them without damaging the handlebars.
- Clean the handlebars: Wipe off any residue to ensure the new grips stick well.
- Install new grips: Slide them on while slightly damp with rubbing alcohol; it evaporates, leaving a secure hold. Make sure they are aligned comfortably before the alcohol dries.
Regularly checking and replacing your grips helps you maintain maximum control and comfort on every ride.
Frequently Asked Questions
Can Raising Handlebars Improve My Riding Posture?
Yes, raising your handlebars can definitely improve your riding posture. When you lift them, you reduce strain on your back, neck, and wrists, making your position more upright and comfortable.
This adjustment helps you avoid hunching over, which often causes fatigue during longer rides. You’ll also gain better control and visibility, making your ride safer and more enjoyable.
Just make sure the height feels natural and doesn’t compromise your handling.
Will Higher Handlebars Affect Bike Handling or Speed?
Raising your handlebars gives your ride a more relaxed vibe, but it can gently nudge your bike’s handling and speed.
You might notice a tad less aerodynamic position, making you slightly slower on fast, flat stretches. Handling may feel a bit more mellow, with less aggressive steering.
However, this trade-off often means more comfort and control, especially on rough trails. So, it’s all about balancing your style and performance preferences.
What Are Common Signs My Handlebars Are Too Low?
You’ll notice your handlebars are too low if you feel constant wrist or back pain during rides.
You might also experience numbness or tingling in your hands, which means you’re putting too much pressure on them.
If you find yourself leaning too far forward or feeling uncomfortable after short rides, that’s another sign.
Your riding posture should feel natural. If it doesn’t, consider raising those bars for better comfort and control.
Can I Raise Handlebars Without Changing Spacers?
Yes, you can raise your handlebars without changing spacers by adjusting the stem angle if it’s an adjustable one. Some stems let you flip or tilt them upward, which gives you a higher handlebar position.
But if your stem isn’t adjustable, you’ll probably need to move or add spacers below it to raise the bars safely. Just make sure the stem is tightly secured after any adjustment for safe riding.
How Often Should I Adjust My Handlebar Height?
You should adjust your handlebar height whenever you feel discomfort, like wrist pain or back strain, or notice handling issues.
It’s smart to check every few months, especially if you ride often or change terrain.
After any adjustment, take a test ride to see if it feels comfortable and gives you good control.
Don’t hesitate to tweak it until it feels just right. Your bike should fit your body and riding style perfectly for the best experience.
Conclusion
Now that you’ve gently lifted your handlebars like coaxing a flower toward the sun, you’re ready for a smoother, more comfortable ride. Each adjustment helps your mountain bike better suit the trails ahead.
Keep an eye on those bolts and grips—they’re quietly keeping everything in place and ensuring your comfort. Regular checks will make sure your handlebars stay in the perfect position.
Ride confidently, knowing your bike’s posture matches your spirit. With your handlebars raised just right, you’re all set to conquer every trail with ease and grace.