
How to Measure Mountain Bike Frame Size in 8 Easy Steps
Are you tired of feeling uncomfortable or unsure when riding your mountain bike? You’re not alone—many riders struggle with finding the perfect fit, which can impact your confidence and control on the trail.
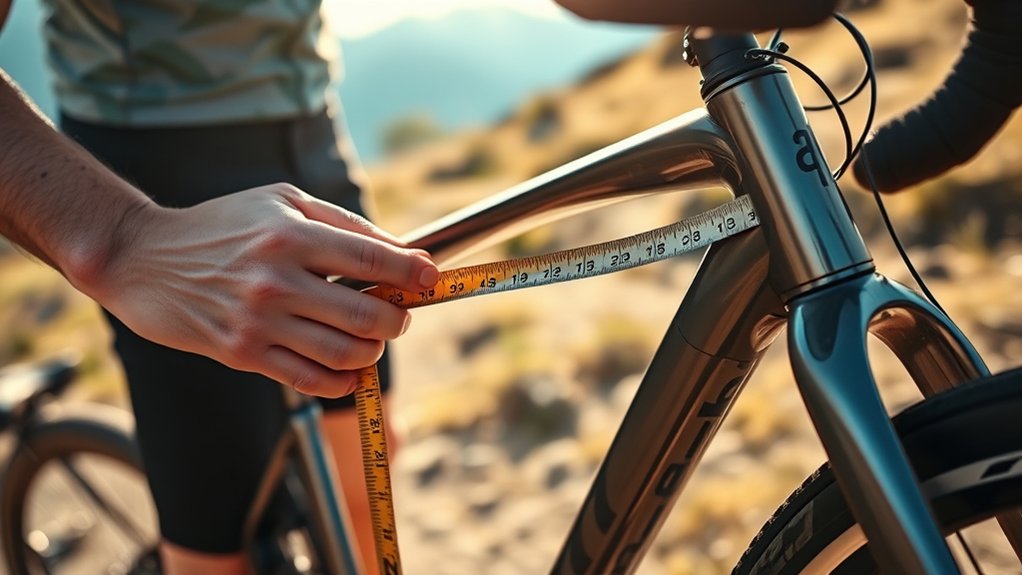
To measure your mountain bike frame size, start by gathering a tape measure, a flat surface, and a marker. Measure the seat tube length from the bottom bracket center to the top, avoiding the seat post.
Check the top tube length to gauge reach, and make certain the standover height leaves 1 to 2 inches of clearance for comfort and safety.
Adjust saddle and handlebar positions to fit your riding style.
Keep following for tips on perfecting your fit and boosting control.
Key Takeaways
- Measure the seat tube length from the bottom bracket center to the top of the seat tube to determine the primary frame size.
- Make sure the bike is on a flat, stable surface. Use a tape measure for precise, straight measurements along the centerline of the tube.
- Check the standover height by measuring the space between the top tube and your crotch. Aim for about 1 to 2 inches of clearance for comfort and safety.
- Adjust the saddle height and handlebar position to suit your riding style. This helps optimize your reach and control on the bike.
- Take the bike for a test ride after making these adjustments. Confirm that your posture feels comfortable and that the bike handles well before finalizing the fit.
Why Frame Size Matters for Mountain Biking
Because your mountain bike frame size directly impacts your comfort and control, choosing the right fit is essential. When your frame fits well, you’ll stay balanced and handle rough terrain more easily.
A frame that’s too big can make maneuvering tough, while one that’s too small might cause discomfort and reduce efficiency. Proper sizing helps prevent fatigue and injury, so you can ride longer and stronger.
A poorly sized frame hampers control, causes discomfort, and increases fatigue, limiting your riding performance and enjoyment.
It also boosts your posture, helping avoid strain on your back and shoulders. Picking the right frame size makes the most of your mountain biking experience, increasing confidence and safety on trails.
Taking this step seriously makes every ride more enjoyable and less stressful for your body.
What You Need to Measure Your Frame
To get your mountain bike frame measurements right, you’ll want a few basic tools like a tape measure or ruler and a level.
Make sure your workspace is flat, well-lit, and free of clutter. This helps you take accurate measurements without any hassle.
Having everything ready beforehand will make the process quick and straightforward.
Essential Measuring Tools
Three essential tools will make measuring your mountain bike frame accurate and straightforward. First, grab a tape measure or a ruler with clear metric markings—you’ll need precise length readings for the frame’s key dimensions.
A carpenter’s square or a small level helps guarantee you measure perpendicular distances correctly, especially when checking the seat tube or top tube angles.
Finally, a marker or masking tape is useful to mark measurement points on the frame without causing damage. These tools are easy to find and simple to use, but they’re crucial for avoiding errors in your measurements.
Having them ready before you start saves time and guarantees your frame size calculations are spot-on, setting you up for a comfortable and efficient ride.
Preparing Your Workspace
With your measuring tools ready, the next step is setting up a workspace where you can measure your mountain bike frame accurately and comfortably.
Choose a flat, stable surface like a workbench or sturdy table to place your bike without wobbling.
Make sure the area is well-lit so you can see measurement marks clearly.
Clear away any clutter to avoid distractions or mistakes.
Have a chair or stool nearby if you prefer sitting while measuring.
Keep a notebook or device handy to record your measurements immediately.
If possible, position your bike so it stands upright, either with a bike stand or by leaning it securely against a wall.
This setup helps ensure precise measurements and makes the process smoother.
Where to Measure Your Mountain Bike Frame
Although measuring your mountain bike frame might seem straightforward, it’s important to know exactly where to take your measurements for accuracy. Focus on key points of the frame to get the most reliable size.
Start by identifying the main triangle of the frame, which includes the top tube, down tube, and seat tube. Avoid measuring the handlebars, forks, or wheels, as these don’t reflect frame size.
The most common spot to measure is the seat tube, but you’ll also want to note the top tube length for a complete understanding of fit. Make sure your bike is on a flat, stable surface to prevent any angle distortions when measuring.
Accurate measurement points are the foundation for choosing the right frame size.
Measure the Seat Tube Length Accurately
To get the right seat tube length, you’ll need to measure from the center of the bottom bracket to the top of the seat tube accurately.
Be careful not to include the seat post or miss the frame’s actual measurement points.
Avoid common mistakes like measuring at an angle or using inconsistent starting points to guarantee your size is spot on.
Seat Tube Measurement Techniques
Accurately measuring the seat tube length is key to finding a mountain bike frame that fits you well. To do this, place your bike on a level surface and grab a tape measure.
Start measuring from the center of the bottom bracket—the point where the pedal cranks meet—up to the top of the seat tube where the seat post inserts. Make sure your tape runs straight along the tube without bending for an accurate reading.
If the seat tube is curved or has an unusual shape, measure along its centerline to get a precise measurement. Double-check your measurement by repeating the process.
This method ensures you get an exact seat tube length, helping you choose a frame that’s comfortable and performs well on your rides.
Common Measurement Mistakes
Measuring the seat tube length might seem simple, but small mistakes can throw off your entire frame size.
One common mistake is not measuring from the correct points. Always measure from the center of the bottom bracket to the top of the seat tube, not the seat post.
Another error is including the seat post or clamp in your measurement, which inflates the length and can mislead your sizing.
Make sure the bike is on a level surface and the seat tube is vertical to avoid skewed results.
Using a flexible tape instead of a rigid ruler can also cause inaccuracies.
Taking your time, double-checking measurements, and understanding exactly where to start and stop will help you get an accurate seat tube length every time.
Measure the Top Tube Length for Fit and Reach
Since the top tube length affects your reach and overall comfort, it’s important to get this measurement right. To do it, place your bike on a level surface.
Use a tape measure to find the horizontal distance from the center of the head tube (where the handlebars attach) to the center of the seat tube (where the seat post inserts). Make sure the tape is straight and parallel to the ground for accuracy.
This length determines how far you stretch forward when riding. If it’s too long, you’ll feel cramped; if it’s too short, you might feel cramped or off-balance.
Knowing your ideal top tube length helps you pick a frame that fits your body and riding style, improving control and reducing fatigue on the trail.
Check Mountain Bike Frame Standover Height
After choosing the right top tube length, it’s important to check the standover height. This helps ensure the bike feels comfortable and safe when you stop.
Stand over the bike with your feet flat on the ground. Measure the space between the top tube and your crotch. Ideally, there should be 1 to 2 inches of clearance for a mountain bike.
This gap helps prevent discomfort and reduces the risk of injury during sudden stops. Use this table as a quick guide to see if your standover height matches your body:
| Height (inches) | Recommended Clearance (inches) |
|---|---|
| Under 5’4” | 1 to 1.5 |
| 5’4” – 5’8” | 1.5 to 2 |
| 5’8” – 6’1” | 2 to 2.5 |
| Over 6’1” | 2.5 to 3 |
Use this table to verify your standover height fits well with your body.
Compare Your Measurements to a Size Chart
One essential step to finding the perfect mountain bike frame is matching your measurements to a size chart. Once you’ve measured your inseam and checked the standover height, use these numbers to identify your ideal frame size.
Size charts usually list frame sizes in inches or centimeters, based on rider height and inseam length. Look for a chart provided by the bike manufacturer because sizing can vary between brands and models.
Frame sizes in inches or centimeters vary by brand, so always consult the manufacturer’s sizing chart.
Compare your inseam measurement with the recommended frame size range, making sure your standover height fits comfortably within the suggested limits. This helps you avoid frames that are too big or too small, which can affect control and comfort on the trail.
Taking this step seriously sets you up for a great riding experience.
Adjust Your Mountain Bike Frame Fit for Riding Style
Tailor your mountain bike frame fit to match how you ride for better control and comfort. If you like aggressive downhill rides, choose a slightly larger frame to stay stable at high speeds.
For cross-country or trail riding, a medium frame that balances maneuverability and comfort is ideal. Adjust your saddle height and handlebar position accordingly.
Lower handlebars improve aerodynamics for racing, while higher handlebars give you better control on technical trails. Don’t forget to fine-tune your reach—the distance from saddle to handlebars—to keep a comfortable posture without strain.
Matching your frame fit to your riding style will boost your performance and help reduce fatigue. Always take a test ride after making adjustments to make sure your setup feels right before heading out on the trail.
Frequently Asked Questions
How Often Should I Recheck My Mountain Bike Frame Size?
You should recheck your mountain bike frame size whenever you feel discomfort or notice changes in your riding posture. It’s especially important after big growth spurts, weight changes, or if you switch to different types of riding.
Also, give it a look if you upgrade components that affect fit, like handlebars or seat posts. Regularly reassessing helps you stay comfortable and efficient on the trails, preventing strain or injury.
Can Frame Size Affect Bike Suspension Performance?
Yes, frame size can affect your bike’s suspension performance. When your frame fits well, the suspension works efficiently, absorbing shocks as intended.
If it’s too big or small, your riding position changes, which can affect how the suspension compresses and rebounds. That might make the ride less smooth or responsive.
Getting the right frame size helps you get the most out of your suspension and improves overall control and comfort on the trail.
Is Frame Size Different for Men and Women’s Mountain Bikes?
Imagine slipping into a tailored jacket. It fits just right.
Frame size for men’s and women’s mountain bikes often differs because women usually have shorter torsos and longer legs proportionally.
You’ll find women’s frames designed with adjusted geometry for comfort and control. But the best fit really depends on your body, not just your gender.
Trust your measurements and how the bike feels when you ride. Labels aren’t the whole story.
How Does Frame Material Impact Bike Weight and Ride?
Frame material directly affects your bike’s weight and ride quality. Aluminum frames are lighter and stiff, giving you a responsive feel but a rougher ride.
Steel frames add weight but absorb shocks better, offering a smoother ride. Carbon fiber frames are the lightest and provide excellent vibration dampening, making your ride comfortable and fast.
Titanium balances weight and comfort but comes at a higher price. Choose based on your riding style and budget.
Can I Use the Same Frame Size for Road and Mountain Bikes?
You can’t fit a square peg in a round hole, and the same goes for bike frames. While it might seem convenient to use the same frame size for both road and mountain bikes, they’re built differently.
Mountain bikes need a slightly smaller frame for better control and maneuverability on rough trails. Road bikes, on the other hand, favor longer frames for speed and efficiency.
Conclusion
You might think measuring your mountain bike frame is just a quick task, but it’s the key to unlocking your best ride yet. When your frame fits just right, every trail becomes an adventure you’re excited to conquer.
So, take those measurements seriously because getting the right size isn’t just about numbers. It’s about feeling confident, comfortable, and ready for whatever the mountain throws at you.
Your perfect ride is waiting, and measuring your mountain bike frame size is the first step to making that happen.