7 Easy Steps to Change Pedals on Your Road Bike
Are you tired of struggling with your road bike pedals and unsure how to change them? You’re not alone—many cyclists find this task confusing or frustrating, especially if you’re new to bike maintenance.
But don’t worry, changing your road bike pedals is actually pretty straightforward once you know the steps.
Changing your road bike pedals is simple if you follow these steps. First, gather the right tools like an Allen key or pedal wrench.
Then, place your bike on a stable surface and loosen the pedals—turn the right pedal counterclockwise and the left clockwise.
Next, prepare your new pedals by greasing threads and installing them carefully.
Tighten everything securely, check for proper function, and maintain regularly for smooth rides.
Keep going to get all the details!
Key Takeaways
- Secure the bike on a stable surface or stand to prevent it from moving while you’re working on the pedals.
- Grab the right tools, like a wrench or Allen key. Loosen the pedals by turning the right pedal counterclockwise and the left pedal clockwise.
- Once loosened, remove the pedals completely by hand. This helps prevent any damage to the threads.
- Before installing the new pedals, apply some grease to the threads. Then, screw the right pedal in clockwise and the left pedal in counterclockwise.
- Tighten the pedals firmly with your wrench, making sure they’re secure. Just be careful not to overtighten.
Why Is Changing Your Road Bike Pedals Important?

Changing your road bike pedals is important because they directly affect your comfort, efficiency, and safety while riding. Worn-out or damaged pedals can make pedaling less smooth, leading to fatigue and discomfort.
If your pedals don’t grip well or feel loose, you risk losing control—especially during quick turns or climbs. Upgrading or replacing old pedals can boost your power transfer, helping you ride more efficiently and with less effort.
Loose or slipping pedals can compromise control—upgrading them improves grip, efficiency, and safety on every ride.
Proper pedals also help prevent injuries by providing better support and stability. Over time, pedals wear out from regular use, dirt, and moisture, which can compromise how well they work.
Regularly updating your pedals ensures you stay at peak performance and ride safely. This makes every ride more enjoyable and confident.
Tools Needed for Replacing Pedals
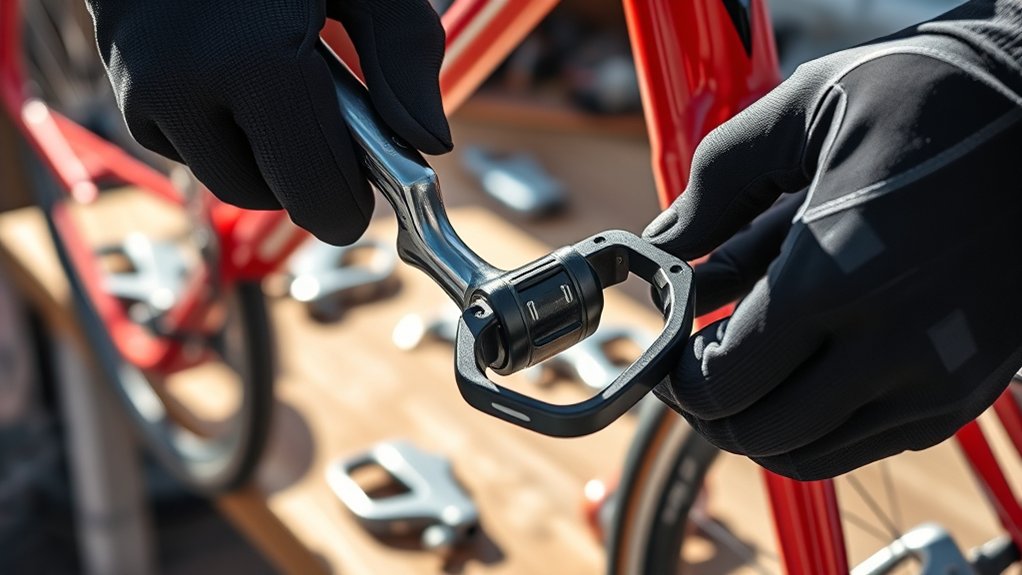
Before you start replacing your road bike pedals, it’s important to gather the right tools to guarantee the job goes smoothly. First, you’ll need a pedal wrench or an Allen key (usually 8mm or 9mm) to loosen and tighten the pedals.
A pedal wrench provides better assistance and makes removal easier, especially if your pedals are stubborn. Some pedals also require a 15mm spanner, so check your pedal type beforehand.
If you want extra grip, consider wearing gloves or using a rag to prevent slipping. Having a clean rag or cloth nearby is helpful for wiping down threads and preventing dirt from entering the crank arm.
With these tools ready, you’ll be set to replace your pedals efficiently and safely.
How to Remove Road Bike Pedals Safely
To remove your road bike pedals safely, start by placing your bike on a stable surface or using a bike stand to keep it steady.
Next, find the right wrench size for your pedals, usually an Allen key or a pedal wrench. Turn the wrench counterclockwise to loosen the right (drive) side pedal and clockwise for the left (non-drive) side pedal.
Apply steady, even pressure and avoid sudden jerks to prevent stripping the threads. If the pedals are tight or stuck, gently wiggle the wrench or use penetrating oil to loosen them.
Always double-check you’re turning the correct side to avoid damage. Once loosened, unscrew the pedals completely by hand before removing them. This helps keep the threads intact and your fingers safe.
Preparing Your New Pedals for Installation
Having your new pedals ready for installation means inspecting them carefully to make sure they fit your bike’s crank arms. Check the pedal threads to see if they match your bike’s crankset. The right pedal usually has right-hand threads, and the left pedal has left-hand threads.
Next, apply a small amount of grease to the pedal threads. This makes installing them easier and helps prevent seizing later on. Also, double-check that the pedal type (clipless or flat) fits your riding style.
How to Install and Tighten Your New Pedals Correctly
Start by threading each pedal into its respective crank arm. Turn the right pedal clockwise and the left pedal counterclockwise.
Once threaded, use a pedal wrench or Allen key to tighten each one. Turn the right pedal clockwise and the left pedal counterclockwise.
Tighten each pedal firmly but be careful not to overtighten, as that can damage the threads.
After tightening, give each pedal a quick check to make sure there’s no looseness.
Checking Pedal Tightness and Function Before Riding
Before hitting the road, take a moment to check that your pedals are tight and secure. Spin the cranks to see if they rotate smoothly and listen for any strange noises.
Addressing these points helps prevent issues and keeps your ride safe. It’s a quick step that can make a big difference in your cycling experience.
Inspect Pedal Tightness
To make sure your pedals are secure and working well, give each one a firm grip and gently wiggle them. This quick check can help spot loose pedals that might come undone during your ride.
If you notice any play or movement, it’s time to tighten or adjust. Focus on these steps:
- Check pedal tightness: Use a pedal wrench or your hand to make sure each pedal is snug against the crank arm.
- Inspect for movement: Wiggle the pedals back and forth; too much movement means they need tightening.
- Look for damage: Examine the pedal body and spindle for cracks or wear that could affect performance.
Doing this helps prevent accidents and keeps your ride smooth.
Test Pedal Smoothness
Checking that your pedals spin smoothly is key for a safe and efficient ride. Before you head out, turn each pedal by hand to see how it moves. If you notice resistance or wobbling, it could mean loose or damaged parts.
Test how the pedal moves by applying gentle pressure. It should turn freely without sticking. Tighten any loose pedals to prevent them from coming off while riding.
Use the table below to quickly check your pedal’s condition:
| Checkpoint | What to Look For |
|---|---|
| Smooth rotation | Pedal spins without resistance |
| Wobbling or looseness | Pedal feels unstable or wobbly |
| Resistance or sticking | Pedal doesn’t turn smoothly |
| Proper tightness | Pedal is securely attached |
| Unusual noises | No creaking or grinding sounds |
This quick check helps ensure safe, smooth pedaling every time.
Check for Unusual Sounds
Unusual sounds coming from your pedals can mean loose or damaged parts that might affect your safety. Before you ride, listen carefully as you pedal. If you hear creaking, clicking, or grinding noises, it’s time to check things out.
First, make sure the pedals are tightly threaded into the crank arms. Use a wrench if they feel loose. Next, spin the pedals to see if they turn smoothly without resistance or wobbling.
Also, look for cracks, rust, or worn-out bearings that could cause noise. If you find any damage, address it right away. Tighten loose pedals, clean and lubricate moving parts, or replace broken components.
Checking for these sounds helps you stay safe and makes your pedals last longer.
Tips for Maintaining Your Pedals for Long-Term Performance
To keep your pedals performing their best, regular cleaning is key to removing dirt and grime that can cause wear. A quick wipe after each ride can make a big difference.
Proper lubrication is just as important. It helps prevent squeaks and ensures smooth rotation over time.
Regular Cleaning Practices
Regular cleaning is essential for keeping your bike pedals in top condition and guaranteeing smooth performance over time. Dirt, mud, and grime can cause corrosion and hinder pedal movement.
To keep your pedals in shape, follow these simple steps:
- Remove loose debris with a brush or cloth to prevent buildup.
- Use a degreaser or mild soap mixed with water to scrub away stubborn dirt.
- Rinse thoroughly and dry completely to prevent rust and corrosion.
Regular cleaning prevents unnecessary wear and makes inspecting for damage easier. This way, you can catch issues early.
Make it a habit to clean your pedals after rides, especially in muddy or wet conditions. Doing so helps extend their lifespan and ensures a smooth, safe ride every time.
Proper Lubrication Techniques
Proper lubrication is crucial for keeping your bike pedals functioning smoothly and preventing premature wear. First, remove any dirt or grime from the pedal’s moving parts with a clean cloth.
Apply a few drops of bike-specific lubricant to the pedal’s spindle and pivot points, focusing on areas with visible friction. Avoid over-lubricating, as excess can attract dirt and cause buildup.
After applying, rotate the pedal back and forth to distribute the lubricant evenly. Wipe away any excess to prevent dirt accumulation.
Regular lubrication reduces friction, extends pedal life, and guarantees smooth rotation. Check your pedals periodically and re-lubricate as needed, especially after cleaning or riding in wet conditions.
Proper lubrication keeps your pedals in top shape and improves your overall riding experience.
Frequently Asked Questions
Can I Change Pedals Without Removing the Crank Arms?
Yes, you can change pedals without removing the crank arms. You just need a pedal wrench or an Allen key, depending on your bike’s pedals.
Position the wrench on the pedal’s flats or hex socket, then turn counterclockwise for the left pedal and clockwise for the right.
Keep steady pressure, and your pedals will come off without needing to remove the crank arms.
What Types of Pedals Are Compatible With My Bike?
You need to know your bike’s pedal thread type to check compatibility. Most road bikes use standard 9/16-inch threads, but some older models might have 1/2-inch threads. Look at your current pedals or check your bike’s specifications to find out.
Look for clipless, toe-clip, or flat pedals, and pick ones that suit your riding style. Make sure to confirm the thread type before buying to avoid any compatibility issues.
How Often Should I Replace or Service Bike Pedals?
You should replace or service your bike pedals every 6 to 12 months, depending on how often you ride and the conditions you’re riding in.
Make sure to regularly check for looseness, strange noises, or damage like worn-out bearings or cracked clips. If you notice your pedals aren’t performing as well or clipping in has become difficult, it’s probably time for maintenance or a replacement.
Taking good care of your pedals keeps them smooth, safe, and efficient, which makes your whole riding experience better.
Do I Need Special Tools for Different Pedal Brands?
You don’t necessarily need special tools for different pedal brands, but having the right ones makes the job smoother. Many pedals require a standard Allen wrench or pedal wrench, which are common in toolkits.
Some high-end or specialty pedals might need specific tools or adapters. It’s a good idea to check your pedal’s instructions or the manufacturer’s website before you start.
That way, you’ll have the right tools on hand and can avoid any unnecessary frustration.
How Do I Identify the Correct Pedal Threading?
To identify the correct pedal threading, start by checking the side of each pedal. The right pedal usually has right-hand (standard) threading, and the left pedal has left-hand threading.
Look for markings like “R” or “L” on the pedals or crank arms. If you don’t see any markings, remove the pedals and examine the threading.
The right pedal typically threads clockwise, while the left threads counterclockwise. Matching these ensures you install the pedals correctly and avoid cross-threading.
Conclusion
Changing your road bike pedals is a simple upgrade that can boost your riding experience. Properly maintained pedals can last up to five years, saving you money and improving safety.
By following these easy steps, you’ll keep your pedals secure and performing at their best. Regularly check pedal tightness and condition to stay on top of maintenance.
Your bike will thank you with smoother rides and better efficiency every time you hit the road. Remember, changing your road bike pedals is a quick way to enhance your cycling adventures.