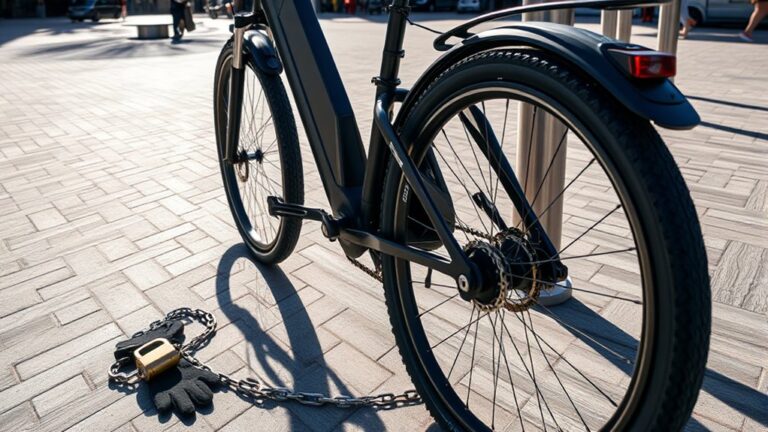
Tighten Road Bike Brakes in 10 Easy Steps
Many road cyclists know the frustration of brake issues, whether it’s squeaking, uneven contact, or just not stopping as quickly as they’d like. You’re not alone—getting your brakes dialed in can seem tricky, but it’s totally doable with a few simple steps.
To tighten your road bike brakes, start by securing your bike and inspecting the brake system.
Loosen the caliper bolts, then adjust the brake pads so they contact the rim evenly.
Tighten the calipers and adjust the cable tension with the barrel adjuster until the brake lever feels firm.
Make sure all bolts are tight, then test ride to confirm proper function.
If you follow these steps, you’ll improve your brakes’ performance and safety.
Keep going to learn more details.
Key Takeaways
- Loosen the brake caliper bolts just a bit so you can move the calipers into the right position over the rim.
- Make sure the brake pads are aligned properly. They should sit evenly and squarely against the rim surface.
- Once everything looks good, tighten the caliper mounting bolts securely to keep the calipers in place.
- Use the barrel adjuster to fine-tune the cable tension. This will give you a firm and responsive brake lever feel.
- Now, test the brakes by squeezing the lever. Check that the pads engage smoothly and don’t rub against the rim.
Gather Tools and Prepare Your Road Bike
Before you start tightening your road bike brakes, make sure you’ve got the right tools and your bike is ready to go.
You’ll need Allen wrenches, usually 5mm or 6mm, to adjust the brake calipers and pads. A Phillips or flat-head screwdriver might come in handy for some brake types.
Keep a clean cloth or rag nearby to wipe away dirt and grease. Make sure your bike is on a stable surface, like flipped upside down or on a bike stand, so you can easily access the brakes.
Keep a cloth nearby and secure your bike for easy brake access.
Check that your brake cables aren’t frayed or damaged, and have replacement cables ready if needed.
Taking these steps helps you stay prepared, making the tightening process smooth and hassle-free.
Understand How Your Road Bike Brakes Work
Understanding how your road bike brakes work is key to tightening them properly. Your brakes usually have brake levers, cables, and calipers.
When you squeeze the brake lever, it pulls the cable, which pushes the calipers to press brake pads against the wheel rim. This friction slows down or stops your bike.
Knowing this, you see that proper cable tension is really important for effective braking. If the cable is too loose, your brakes won’t engage well. If it’s too tight, they might rub constantly.
Regularly checking your brakes helps spot signs of wear or loose cables. By understanding these parts and what they do, you’ll be better at making precise adjustments.
This ensures your brakes work efficiently and keep you safe while riding.
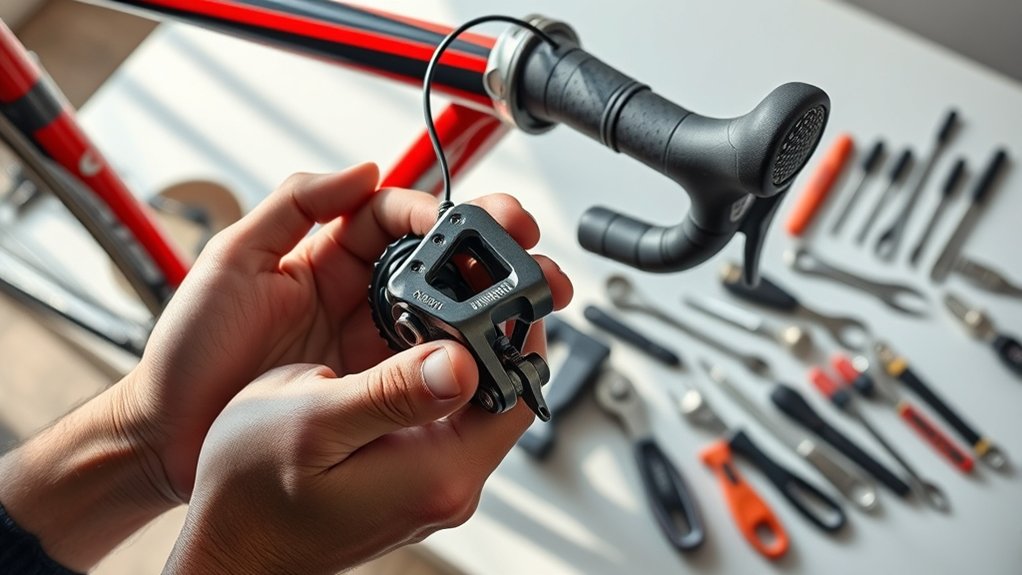
Loosen the Brake Calipers for Adjustment
Loosening the brake calipers is the first step to making precise adjustments to your road bike’s brakes. Start by locating the bolts that hold the calipers in place, usually on either side of the fork or frame.
Use an Allen wrench or the appropriate tool to gently turn these bolts counterclockwise. Don’t remove them completely; just loosen enough so the calipers can move freely.
This allows you to adjust the calipers without resistance, ensuring proper alignment later. Keep the bolts handy so you can tighten them securely once your adjustments are done.
Loosening the calipers gives you the flexibility to reposition and fine-tune their placement, which is essential for effective braking performance.
Align and Adjust the Brake Pads
Once the calipers are loosened, you can start aligning and adjusting the brake pads to make sure they hit the rim evenly and effectively.
Check that each pad contacts the rim squarely, not the tire or sidewall. If needed, loosen the small bolt holding the pad and move it so it touches the rim fully, without touching the tire.
Make sure the pad’s surface is parallel to the rim for smooth braking. Tighten the bolt securely once the pad is properly aligned.
Repeat this process on both sides, making sure the pads are close to the rim but don’t drag when the wheel spins. Proper alignment helps ensure smooth, effective braking and reduces wear.
Adjust as needed until the pads sit correctly and contact the rim evenly.
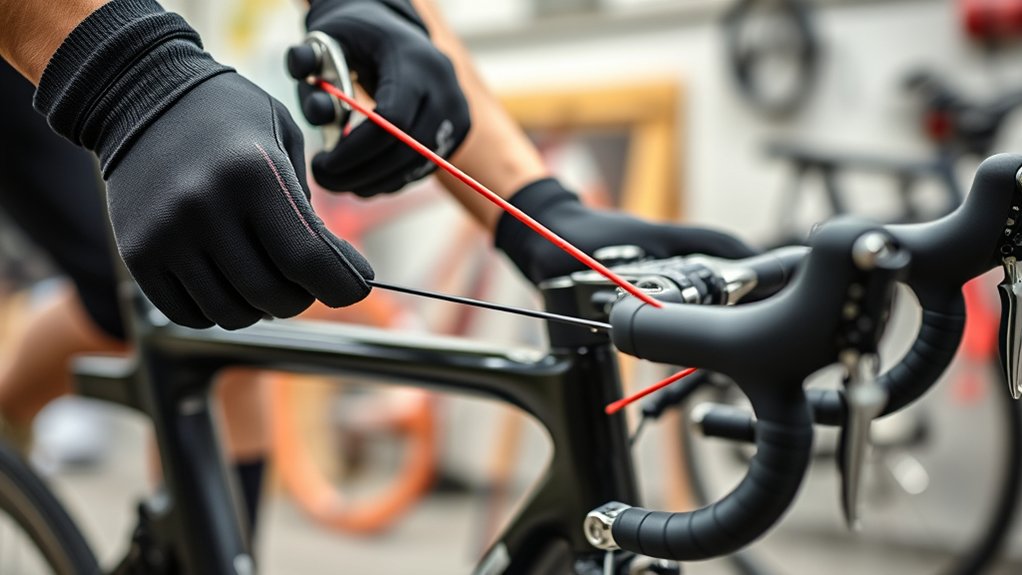
Tighten the Brake Cable and Set Proper Tension
Start by checking how your brake lever feels. If it’s too soft or too tight, you’ll need to adjust the cable tension.
Turn the barrel adjuster or cable anchor bolt until the brake engages smoothly without too much lever movement.
Finally, test your brakes to make sure they respond quickly and stop effectively, making any further tweaks if needed.
Check Brake Lever Feel
Before adjusting the brake cable, check the brake lever feel to make sure it responds properly. Squeeze the lever firmly; it should engage smoothly without too much travel or sponginess. If it feels soft or sinks too far, the cable might need tightening.
A firm, responsive lever indicates the brake system is correctly tensioned. Pay attention to how much force it takes to activate the brakes—make sure it’s comfortable yet effective. Also, confirm the lever returns smoothly to its resting position.
Check for any unusual resistance or sticking points when you squeeze the lever. It should feel consistent on both sides, with no signs of sticking or uneven movement. Notice if the lever gets close to the handlebar when pulled.
Finally, verify there’s no excessive slack or slackness in the system. Everything should feel tight and responsive, ensuring safe and reliable braking.
Adjust Cable Tension Properly
If the brake lever feels soft or travels too far before engaging, it’s time to tighten the cable and set proper tension. Start by locating the barrel adjuster near the brake lever or caliper.
Turn it clockwise to tighten the cable, making small adjustments and testing the brake after each turn. If your bike has a quick-release cable, loosen the bolt, pull the cable slightly to remove slack, then re-tighten securely.
Confirm there’s slight resistance when pulling the brake lever. This indicates the cable is taut enough. Avoid overtightening, which can cause brake pads to rub or reduce braking power.
Adjust until the lever feels firm and responsive, with just a little travel. Proper tension ensures your brakes engage smoothly and efficiently.
Test Brake Response
How can you be confident your brakes are properly adjusted? You need to test the brake response. Squeeze the brake lever firmly and watch how quickly the brake pads contact the rim. It should feel smooth and immediate, with no excessive lever travel.
If the brakes feel spongy or the lever goes too far before stopping, you probably need to tighten the cable a bit. Check that the brake pads engage the rim evenly on both sides, and make sure the lever feels firm without too much travel.
Also, ensure there’s no rubbing when you release the brakes, and the pads are close enough to the rim for quick response. Finally, verify the brake cable is secure and free of frays.
Perform these checks after each adjustment to make sure your brakes work at their best.
Center the Brake Calipers for Even Pad Clearance
Start by checking if the calipers are properly aligned with the rim, making sure they sit straight and centered.
Next, adjust the center screws to fine-tune the caliper position until both pads are equally distant from the rim.
Finally, check that the brake pads have even clearance on both sides for smooth, effective braking.
Check Caliper Alignment
To make sure your brake calipers are aligned correctly, start by checking that they are centered over the rim. Look at the distance between the brake pads and the rim on each side. If one pad is closer or farther from the rim than the other, your calipers aren’t centered.
Next, loosen the caliper mounting bolts just a bit. Then, squeeze the brake lever to realign the calipers automatically. While holding the brake lever, tighten the bolts. Make sure the pads are equally spaced from the rim on both sides before fully tightening.
You can also verify the clearance visually to see if the pads are evenly spaced. For more accuracy, use a ruler or caliper to measure the gap precisely. Check that the calipers don’t rub against the rim when the brake is released.
After adjusting the brake pads, double-check the alignment. Finally, test your brakes to ensure they respond properly and the calipers stay centered.
Adjust Centering Screws
Adjusting the centering screws is a simple way to fine-tune your brake calipers and check that the pad clearance is even on both sides. Turn each screw slowly, and keep an eye on how the pads sit relative to the rim.
Make sure the pads are a similar distance from the rim on both sides. Properly centered brakes reduce noise, improve stopping power, and help prevent uneven wear.
To see this in action, consider these common issues:
| Symptom | Fix |
|---|---|
| Uneven pad gaps | Adjust the left or right centering screw |
| Squealing brakes | Check that calipers are centered and pads are even |
| Excessive rim wear | Make sure pads are equally close to the rim |
| Calipers wobbling | Tighten screws and center calipers properly |
| Reduced braking power | Re-center calipers for balanced contact |
Centering your calipers helps you ride confidently, knowing your brakes are precise and reliable.
Verify Pad Clearance
Verifying pad clearance ensures that both brake pads sit evenly close to the rim, which helps provide smooth and consistent braking. Proper clearance also makes sure the pads make good contact without causing squealing or uneven wear.
To check this, spin your wheel and look at the pad positions relative to the rim. If one pad is closer than the other, adjust the calipers so they sit evenly. Use a ruler or feeler gauge for precise measurement.
Make sure the pads don’t rub against the rim when the brake is released. Regularly checking the clearance keeps your braking working well and helps extend the life of your pads and rims.
Ensure the pads are equidistant from the rim, and look out for any debris or obstructions. Confirm that the calipers are centered properly before adjusting.
Use accurate measurement tools to get the right gap. After adjusting, test the brakes to ensure they operate smoothly and quietly.
Test Brake Lever Feel and Fine-Tune Adjustments
Before tightening your brake bolts, it’s important to test the lever feel to make sure everything is working properly. Squeeze the brake lever firmly and pay attention to how far it travels before the brakes engage.
The lever should feel firm with minimal travel, which means your braking is strong and responsive. If it feels spongy or sinks too far, you’ll need to make some adjustments.
Fine-tune the brake cable tension by turning the barrel adjuster or tightening the cable at the caliper. After making adjustments, test the lever again to see if it feels crisp and responsive.
You want the lever to have just the right amount of resistance—no excessive movement. Proper feel is key for safe and effective braking.
Repeat this process until the lever feels solid, engages consistently, and the brakes respond immediately when you pull.
Check and Secure All Bolts and Nuts
You should regularly check all the bolts on your bike to make sure they haven’t come loose.
If you find any loose bolts, tighten them securely to prevent parts from shifting or falling off.
Keeping these fasteners tight helps ensure your brakes work safely and reliably.
Inspect Bolts Regularly
Regularly inspecting all bolts and nuts on your road bike brakes helps ensure they stay secure and work properly. Over time, vibrations and riding conditions can cause these fasteners to loosen, which could lead to brake failure.
To prevent this, visually check each bolt and nut for tightness and signs of wear. Use a torque wrench if you can to confirm they’re tightened according to the manufacturer’s specs.
Pay close attention to the caliper mounting bolts, pad retention bolts, and cable anchor nuts. Regular checks can catch issues early, saving you from costly repairs and unsafe riding conditions.
Verify bolt and nut tightness with a torque wrench. Look for corrosion or rust around the fasteners. Check for any visible cracks or damage.
Make sure all fasteners sit flush and are secure. If you notice worn or damaged fasteners, replace them promptly to keep your brakes safe and reliable.
Tighten Securely
Making sure all bolts and nuts are tightened securely is key for reliable brake performance. Start by checking each bolt, including those holding brake calipers, levers, and cable anchors. Use the right tools, like a wrench or Allen key, and be careful not to over-tighten, which could damage parts.
Make sure nuts are snug but not stripped, and that bolts aren’t loose or wobbling. Pay special attention to the brake caliper mounting bolts, since loose ones can cause uneven braking. After tightening, manually test each component to feel for firm, stable connections.
Properly secured bolts prevent brake slippage and ensure consistent responsiveness. Regularly check these fasteners to keep your braking system safe and working well. This gives you confidence on every ride.
Test Ride and Confirm Your Brakes Are Working Properly
Before hitting the road, give your brakes a quick test to make sure they’re working properly. Sit on your bike, hold the handlebars firmly, and squeeze the brake levers. Make sure the brakes engage smoothly and stop the wheel with just a little effort.
Check that the brake pads contact the rim evenly, and the wheel doesn’t turn freely when you apply the brakes. Listen for any squeaking or grinding sounds—that’s a sign something might need attention.
Make sure the brake response feels firm and responsive. If it feels spongy or requires a lot of lever pull, make small adjustments and test again until everything feels right.
Verify that the brake pad contact is even across the rim. Ensure the brake levers feel firm and responsive, and check for smooth, squeak-free operation.
Finally, test your brakes at different speeds to see if they perform consistently and stop reliably every time.
Troubleshoot Common Brake Problems and Maintenance Tips
If your brakes aren’t responding smoothly or you notice weird sounds or sensations, it’s time to troubleshoot common issues. Start by checking if the brake pads are worn out—they might need replacing. If the calipers are rubbing unevenly, they might need realignment.
Next, inspect the brake cables for fraying or slack. Tighten or replace them if needed. Also, clean the rims and brake pads to remove dirt and debris, which can make braking less effective.
Here’s a quick guide:
| Problem | Solution |
|---|---|
| Squealing or squeaking | Clean pads and rims or replace worn pads |
| Brake lever feels soft | Tighten or replace cables, bleed hydraulic brakes |
| Poor stopping power | Check alignment and clean components |
Regular maintenance helps keep your brakes responsive and safe.
Frequently Asked Questions
How Often Should I Inspect My Bike Brakes for Wear?
You should check your bike brakes at least once a month, especially if you ride often or in tough conditions. Look for worn brake pads, frayed cables, or any signs of damage.
If you notice less stopping power, squealing, or uneven pad wear, give them a quick look right away. Regular inspections help make sure your brakes work properly and keep you safe.
Don’t wait until braking feels off—stay proactive with maintenance to enjoy safe, smooth rides.
Can I Replace Brake Pads Myself or Should I Seek Professional Help?
Yes, you can replace brake pads yourself if you’re comfortable with bike maintenance. Start by removing the wheel, then take out the old pads, and install the new ones, making sure they’re properly aligned.
However, if you’re unsure or feel uneasy about doing it yourself, it’s best to seek professional help. That way, you can be confident your brakes will work correctly and safely.
Proper installation is key for peak braking performance and safety during your rides.
What Signs Indicate My Brake Cable Needs Replacing?
You’ll know your brake cable needs replacing if the brakes feel loose or require excessive pull to engage.
Other signs include inconsistent braking power, frayed or rusted cables, or if the brake lever feels stiff and doesn’t return smoothly.
If you see visible damage or corrosion, it’s time to replace the cable to keep your bike’s braking performance safe and reliable.
Are There Different Brake Types Requiring Specific Adjustment Techniques?
Yes, different brake types require unique adjustments, kind of like tuning different instruments in an orchestra. Rim brakes, V-brakes, and disc brakes each have their own mechanisms, so you need to follow specific steps for each.
Rim brakes mainly need cable tension tweaks to work smoothly. V-brakes, on the other hand, require proper alignment to prevent squeaking or uneven stopping. Disc brakes involve caliper adjustments to ensure even braking power.
Knowing these differences helps you fine-tune your bike’s performance. That way, you get smooth, responsive stops every time you hit the road.
How Do I Prevent Brake Squeal After Adjustment?
To prevent brake squeal after adjustment, start by cleaning your brake pads and rims with rubbing alcohol to remove debris and oil.
Make sure your brake pads are aligned properly and aren’t rubbing the tire or rim excessively.
Applying a thin layer of disc brake lubricant to the pad backing can help reduce noise.
Finally, gently bed in your brakes by applying steady pressure during rides to smooth out pad contact.
Conclusion
Now that your brakes are tight and responsive, you can ride with confidence and control. Imagine the thrill of effortless stops and smooth descents, knowing you’ve mastered your bike’s maintenance.
But remember, neglecting these steps can turn a joyful ride into a dangerous struggle. Keep your brakes in top shape so every ride is safe and exhilarating.
Tightening your road bike brakes is a small effort for a lifetime of freedom on the road. Stay on top of your maintenance, and enjoy every ride to the fullest.