How to Tailwhip a Mountain Bike in 7 Easy Steps
Are you eager to take your mountain biking skills to the next level but feel stuck on mastering tricks like the tailwhip? You’re not alone—many riders struggle with executing this flashy move confidently.
Luckily, with a bit of practice and the right guidance, you can learn to tailwhip smoothly and safely.
To tailwhip your mountain bike, start by ensuring you’re comfortable with basic jumps and have proper gear for safety.
Approach with enough speed, then shift your body slightly to the side as you lift off.
Pull up on the handlebars while kicking your legs out to initiate the spin.
Keep relaxed, focus on timing, and aim to land smoothly with control.
If you want to master the trick, continuing will guide you through essential techniques and drills.
Key Takeaways
- Make sure you’re comfortable with basic jumps, bunny hops, and spins before trying a tailwhip.
- Wear the right safety gear and set up your bike properly, like adjusting the seat height and checking your tire pressure.
- When approaching the jump, keep your speed controlled. Shift your weight slightly back and get ready to kick out.
- Pull up on the handlebars and kick your legs out to start the spin smoothly.
- Stay relaxed, keep your eyes on your landing, and practice slow-motion tailwhips to get the timing right.
What You Need to Know Before Trying a Tailwhip

Before attempting a tailwhip, it’s important to understand the risks and skills involved. This trick requires good bike control, timing, and confidence in your jumps.
You should be comfortable with basic tricks like bunny hops and spins before trying a tailwhip. It involves swinging your bike around your body while in mid-air, which can increase the chance of falls if not done properly.
Make sure your surroundings are safe—check that the landing area is clear and practice in a safe environment. Building strength and coordination gradually will help prevent injuries.
Don’t rush into trying a tailwhip without mastering foundational skills. Always prioritize safety to avoid unnecessary risks or setbacks.
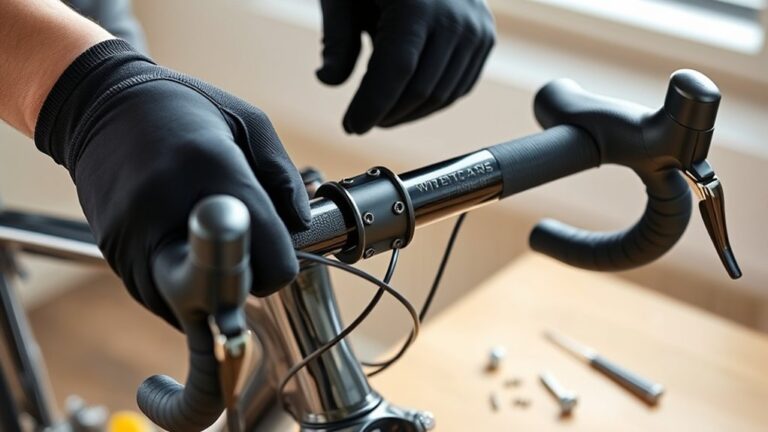
Gear and Bike Setup Essentials for Safe Practice
Having the right gear and bike setup can really make a difference in your safety and confidence when practicing a tailwhip. Proper equipment ensures you’re protected and your bike handles well.
Wear a well-fitting helmet, gloves, and body armor for safety. Adjust your seat height so your pedals are level when at the bottom of the stroke to give you better control.
Check your tire pressure; lower pressure improves grip and absorbs impacts. Here’s a quick setup guide:
| Gear & Setup | Purpose |
|---|---|
| Helmet & Pads | Protects from falls |
| Correct Seat Height | Maintains control during tricks |
| Proper Tire Pressure | Guarantees grip and shock absorption |
Getting these essentials right boosts your confidence and helps reduce the risk of injury.
Mastering Basic Jumps and Bunny Hops
Mastering basic jumps and bunny hops is key to building the skills you’ll need for more advanced tricks like tailwhips. These foundational moves help you develop control, timing, and confidence on your bike.
To get started, practice lifting your front wheel by shifting your weight back and pulling up on the handlebars. Once you feel comfortable, work on lifting both wheels at the same time with a smooth, controlled motion. Keep your body centered and your eyes focused ahead.
Here are some key tips: start small with flat ground jumps. Use your legs to absorb the impact when you land. Always keep your eyes on your landing spot. And remember, practicing regularly helps build muscle memory.
Mastering these basics will make tackling more complex tricks easier and safer.
How to Initiate and Spin Your Bike for a Tailwhip
To start a tailwhip, you need to initiate the spin by carving your bike into a controlled whip motion. Approach the jump with enough speed, then shift your body slightly to the side as you lift off.
As you leave the lip, pull up on the bars while kicking your legs out to the side. This motion begins the rotation of your bike beneath you. Keep your arms and legs relaxed to allow smooth movement.
Use your shoulders to guide the bike’s spin and focus on keeping your eyes on the landing spot. The key is to generate enough rotational force without over-rotating.
Practice this controlled carve and pull, and you’ll build the foundation for a successful tailwhip.
Tips for Landing Smoothly and Keeping Control
Landing smoothly and maintaining control after a tailwhip takes focus and proper technique. You want to absorb the impact evenly and stay balanced to avoid wobbling or falling.
Keep your arms and legs slightly bent to act as shock absorbers, and look ahead to stay centered over your bike. Practice your timing to land with your wheels aligned, avoiding sudden shifts that can destabilize you.
Staying relaxed helps you react quickly if something feels off. Engage your core for stability and keep your eyes on the landing spot.
Use subtle body movements to adjust your balance, and practice controlled landings on flat ground first.
Common Mistakes Beginners Make When Learning to Tailwhip
Many beginners struggle with poor timing and coordination, which can throw off the entire tailwhip.
Incorrect body positioning or not maintaining the right stance often leads to instability in the air.
Trying to learn without proper equipment can make the trick more difficult and increase the risk of injury.
Poor Timing and Coordination
Poor timing and coordination are some of the most common mistakes beginners make when trying a tailwhip. If you don’t time your movements right, the bike won’t spin smoothly, making it harder to land safely.
Coordination is crucial—you need to sync your hop, flick, and catch smoothly. Without this, your tailwhip can feel awkward or incomplete. Focus on practicing these basics separately before putting them together.
Jump at the right moment, not too early or late. Flick the bike with your feet as you lift, and keep your eyes on the landing spot, not the bike.
Practicing slow-motion tailwhips can really help you develop better timing and control. Take your time to master each step, and the full move will come together more naturally.
Inadequate Body Positioning
Inadequate body positioning can throw off your tailwhip and make the trick much harder to land smoothly. If you don’t keep your body centered and balanced, controlling the bike during the rotation becomes tougher.
Make sure your shoulders are aligned with the handlebars and stay relaxed. Leaning too far back or forward will cause you to lose stability and momentum.
Keep your knees slightly bent to absorb impacts and maintain control. When you pop the tailwhip, your body should stay steady, not sway or twist abruptly.
Proper positioning helps you generate the right pop and pivot smoothly. Without this balance, your tailwhip can become unpredictable, increasing the risk of falls or incomplete rotations.
Focus on maintaining a balanced stance throughout the trick for better control and consistency.
Lack of Proper Equipment
Using the right equipment is essential when learning to tailwhip, as the wrong gear can make the trick much more difficult or even unsafe. Without proper equipment, your chances of injury increase, and progress slows.
Make sure you have a well-fitted helmet, gloves, and protective pads. Using a suitable bike setup is vital—consider a bike with a sturdy frame and appropriate suspension.
Poorly maintained or incompatible gear can hinder your control and confidence. Use a helmet that fits snugly and offers full head protection, gloves for better grip and hand safety, a properly tuned bike with the right suspension and frame size, and durable riding shoes with good grip and support.
Practice Drills to Build Confidence and Improve Your Tailwhip
Practicing specific drills regularly can really boost your confidence and improve your tailwhip technique. Start with stationary drills, like spinning the handlebars and practicing your foot placement, to build muscle memory.
Once you’re comfortable, move on to small jumps. Focus on controlled, consistent tailwhips over obstacles. Using a trampoline or foam pit, if you have one, is a great way to practice the motion safely and get familiar with it.
Break down each step: start the whip with your hips, then follow through with your shoulders and arms. Repeating these drills regularly helps you improve your balance and timing.
As you get more confident, gradually increase the difficulty and height of your jumps. These focused exercises will help you execute smoother, more controlled tailwhips when you’re riding.
Frequently Asked Questions
How Long Does It Typically Take to Learn a Tailwhip?
It usually takes anywhere from a few weeks to several months to learn a tailwhip, depending on your experience level and dedication.
If you’re already comfortable with basic tricks and have good bike control, you might pick it up faster. Consistent practice is key—spend time focusing on timing, flicking the bike, and landing smoothly.
Don’t rush, stay patient, and celebrate small progress along the way.
Can I Practice Tailwhips on Any Mountain Bike?
Sure, you can practice tailwhips on any mountain bike—if you’re okay with a little chaos. But honestly, not all bikes are ideal for this stunt.
Lightweight, responsive bikes with sturdy frames make it easier, while heavier or less nimble bikes turn your trick into a clumsy circus act. So, pick the right tool for the job. Otherwise, you might just end up practicing your faceplant skills.
What Safety Gear Should I Always Wear?
You should always wear a helmet to protect your head in case of falls or crashes.
Furthermore, gloves can improve your grip and prevent blisters, while knee and elbow pads shield your joints from impacts.
Consider wearing sturdy shoes with good grip and long sleeves or protective clothing to reduce scrapes.
Prioritize safety gear to minimize injuries and build confidence as you practice tricks like tailwhips on your mountain bike.
How Do I Prevent Bike Damage During Practice?
To prevent bike damage during practice, treat your bike like a fragile treasure because even a tiny mistake can turn it into a mangled mess. Regularly check for loose bolts, worn-out parts, and cracks.
Use protective tape on vulnerable areas and avoid rough, unpredictable terrain until you’re confident. Proper maintenance and cautious riding keep your bike in top shape and ready for those epic tricks.
Are There Specific Conditioning Exercises to Improve Tailwhip Skills?
Yes, certain conditioning exercises can boost your tailwhip skills. Focus on core strength with planks and leg workouts like squats and lunges to improve stability and power.
Practice balance with one-legged rides and hop drills. Incorporate plyometrics to develop explosive movement, and do bike-specific drills to build muscle memory.
Consistent training improves your coordination, control, and confidence, making tailwhips easier and safer to land.
Conclusion
Learning to tailwhip can really boost your mountain biking skills. With consistent practice, you’ll start feeling more confident and in control.
Did you know that 78% of riders improve their tricks faster by breaking them into manageable steps? Focus on mastering each part, stay patient, and keep practicing regularly.
Before long, you’ll be landing tailwhips smoothly and impressing everyone on the trails. Remember, persistence is key so keep pushing your limits safely!