How Can You Change Tires on a Hybrid Bike in 10 Easy Steps?
Changing a tire on your hybrid bike can seem like a daunting task, especially if you’re new to bike maintenance. Many people struggle with this simple repair, feeling overwhelmed by the tools and steps involved.
But don’t worry—you’re not alone, and with a little guidance, you’ll be able to do it in no time.
To change your hybrid bike tire in 10 simple steps, start by gathering tools like tire levers, a pump, and a new inner tube or patch kit.
Inspect the tire for damage and remove the wheel from your bike. Use levers to pry off the old tire and take out the inner tube.
Prepare the new tire and tube, then carefully mount everything back onto the wheel, making sure the bead is aligned.
Inflate the tire properly, reattach the wheel, and test. For detailed guidance, keep going to learn all the tips.
Key Takeaways
- Remove the wheel by releasing the brakes and loosening the quick-release or thru-axle mechanisms.
- Deflate the tire completely and detach the old tire and inner tube using tire levers. Take your time and be gentle to avoid damaging the rim.
- Inspect the inner tube for any punctures or damage. If it’s damaged, go ahead and replace it with a new one.
- Mount the new tire onto the rim, making sure the bead is properly aligned on both sides. Double-check that it’s seated correctly.
- Inflate the tire to the recommended pressure, which you can usually find on the sidewall of the tire.
- Once inflated, reattach the wheel to your bike and tighten all the mechanisms securely.
- Make sure the brakes are re-engaged and functioning properly before you hit the road.
- Give everything a quick check to ensure the tire is seated well and the wheel spins smoothly.
- That’s it! You’re ready to ride again with your newly changed tire.
What Tools and Supplies Do You Need to Change a Hybrid Bike Tire?
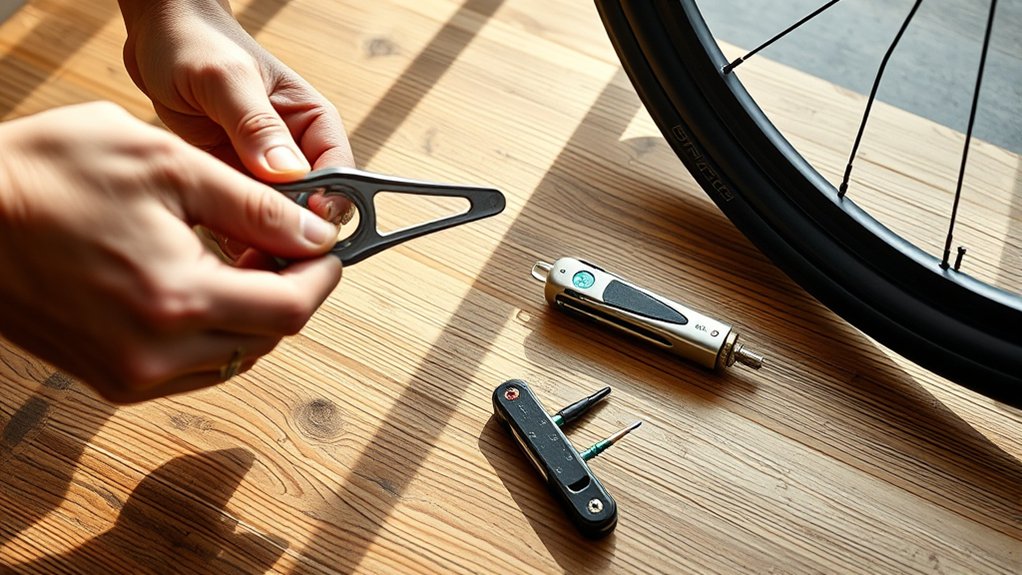
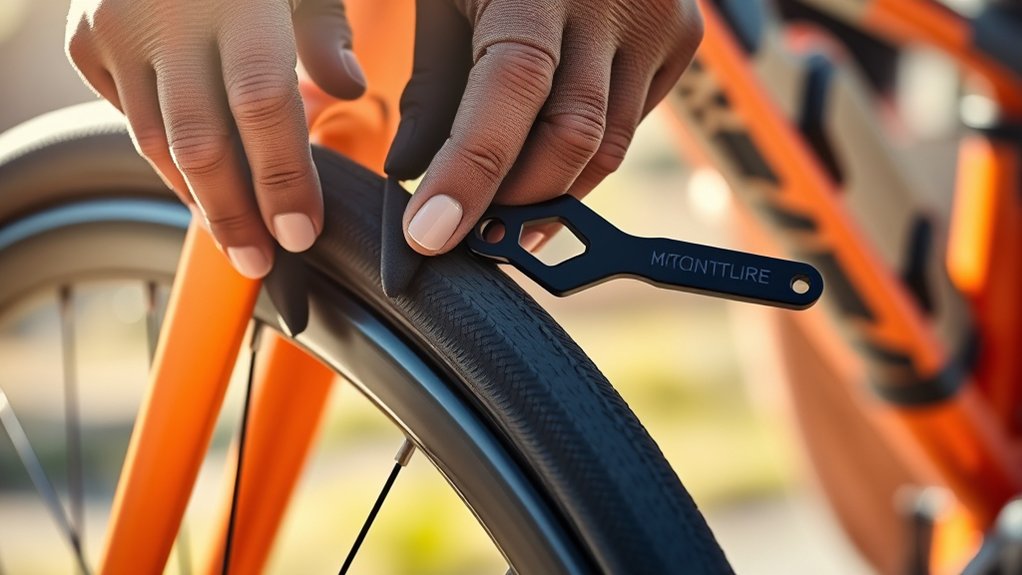
To change a hybrid bike tire, you’ll need a few essential tools and supplies. First, grab a tire lever or two to pry the tire away from the rim easily.
Gather tire levers, a pump, and a new tube to quickly replace your hybrid bike tire.
A pump is vital for reinflating the tire once it’s replaced. You’ll also need a new inner tube if the old one is punctured or damaged.
A patch kit can be handy if you want to repair the existing tube instead. Keep a set of gloves to keep your hands clean and a rag or cloth for wiping dirt from the rim and tire.
Finally, having a bike stand or a secure place to flip your bike over makes the process smoother. With these tools, you’re ready to tackle changing your hybrid bike tire efficiently.
How to Inspect Your Flat Tire and Identify the Cause
Start by examining the tire surface for cuts, punctures, or embedded debris. Then, carefully inspect the inner tube for any punctures or damage.
Finally, look for sharp objects or debris that might have caused the flat and could still be lodged in the tire.
Check Tire Surface for Damage
Your tire surface can reveal important clues about what caused the flat. Carefully inspect the tread and sidewalls for any visible damage. Look for cuts, embedded glass, or sharp objects lodged in the rubber.
Check for bulges or worn spots, which may indicate weak areas or excessive wear. Sometimes, the damage is subtle but still causes flats, like small cracks or thin spots.
To help identify common issues, consider this table:
| Damage Type | Possible Cause |
|---|---|
| Embedded objects | Puncture from glass or thorns |
| Cuts or gouges | Sharp debris or rough terrain |
| Bulges or cracks | Impact damage or aging rubber |
| Worn tread or thin spots | Long-term wear or excessive use |
Examine Inner Tube for Punctures
Carefully removing the inner tube from the tire is the key step in inspecting for punctures. Once you’ve taken out the tube, inflate it slightly so you can feel for escaping air.
Listen closely for any hissing sounds or hold the tube near your cheek to detect escaping air. Examine the entire surface carefully, looking for small holes, tears, or punctures.
Run your fingers along the inside of the tube to locate any sharp objects or rough spots that may have caused the puncture. If you find a hole, mark it with chalk or a marker to identify its exact location.
This proper inspection helps you understand what caused the flat and prevents future issues.
Identify Sharp Objects or Debris
Examine the tire’s surface closely, looking for any sharp objects, stones, or debris lodged in the tread or sidewalls. Run your fingers along the surface to feel for embedded objects you might miss visually.
Check both the tread area and the sidewalls, as debris can hide in either. Look for puncture marks or small tears, especially if you notice the tire deflated unevenly.
Remove any debris you find carefully, using tweezers or pliers if necessary. Be thorough—sometimes, a tiny shard or thorn can cause repeated flats.
If you find a sharp object still embedded, it’s a good idea to remove it before re-inflating the tire or fitting a new tube. This step helps prevent future flats and guarantees your ride remains smooth.
How to Remove the Wheel and Release the Tire Bead
Before removing the wheel, loosen the brake or gear to free the wheel.
Next, release the quick-release lever to detach the wheel from the bike frame.
With these steps complete, you’re ready to detach the wheel and release the tire bead.
Loosen Brake or Gear
To remove the wheel, start by loosening the brake or gear mechanisms that hold it in place. This step ensures the wheel can be freed without resistance. Follow these steps:
- Identify the brake type—whether rim or disc—and gather the necessary tools.
- Release the brake calipers or loosen the brake cable to free the wheel from the brake system.
- Shift gears to the smallest sprocket to reduce tension in the derailleur, making it easier to remove the wheel.
- Loosen the gear mechanism or brake mounts if they are secured with bolts or quick-release levers.
Remove Quick-Release Lever
Start by flipping the quick-release lever on the wheel’s axle to the open position. This loosens the connection and makes removal easier. As you do, imagine this:
| Before | After |
|---|---|
| Lever is tightly closed | Lever is fully open |
| Wheel is secured in frame | Wheel feels loose |
| Axle is tight against frame | Axle is freed from frame |
| Tire bead grips rim tightly | Tire bead relaxes and loosens |
With the lever open, the wheel becomes free to shift. You might hear a faint click as it releases from the frame. Keep the lever open and gently pull the wheel away from the fork or rear triangle, preparing for the next step.
Detach the Wheel
With the quick-release lever fully open and the wheel slightly loose, gently pull the wheel away from the fork or rear triangle. If it feels stuck, try rocking it side to side. Once it’s free, follow these steps:
- Release the Tire Bead: Use tire levers to pry the tire bead away from the rim, working around the tire’s edge.
- Loosen the Tire: Carefully lift one side of the tire off the rim, starting at a valve or an edge.
- Remove the Tube: Deflate and pull the tube out, inspecting it for punctures.
- Inspect the Wheel: Check the rim and hub for damage or debris before installing a new tire.
This process makes changing tires quick and straightforward.
How to Take Off the Old Tire and Inner Tube
Lifting the bike slightly off the ground or flipping it onto its side makes it easier to remove the old tire and inner tube.
Start by loosening the tire’s bead from the rim using your hands or tire levers. Work your way around the wheel, prying the tire away from the rim.
Once one side is loose, carefully pull the inner tube out, starting at the valve stem. Make sure the tube is fully deflated if you haven’t done so already.
Remove the tube completely, taking care not to damage the rim or tube. With the inner tube out, fully detach the tire from the rim if needed.
Keep the tire and tube organized for the upcoming inspection and replacement steps. This method guarantees a smooth, damage-free removal process.
How to Inspect and Prepare Your New Tire and Inner Tube
Examine your new tire and inner tube carefully for any damage or defects before installation. Look for cracks, punctures, or deformities on the tire’s sidewalls and tread. Check the inner tube for holes, tears, or weak spots. Once inspected, prepare your tools and workspace to guarantee a smooth process.
Carefully inspect your new tire and inner tube for damage before installation to ensure safe riding.
Here are four key steps:
- Inspect for damages: Verify both tire and tube are free from visible defects.
- Check the valve: Make sure the valve stem is straight and undamaged.
- Match the tire and tube: Confirm the size and type are compatible with your bike.
- Lubricate the bead: Lightly apply soapy water or lubricant around the tire’s edges to ease installation.
How to Install the New Inner Tube Into the Tire
Gently insert the valve of the inner tube through the designated hole in the wheel’s rim, making sure it’s straight and not pinched. Once the valve is through, carefully tuck the rest of the tube into the tire.
Use your hands to evenly distribute the inner tube around the rim, avoiding any twists or folds. As you work, check that the tube isn’t caught between the rim and the tire bead.
Keep gentle pressure on the tube to prevent pinching or puncturing it. If the tube feels tight, don’t force it—try adjusting its position or deflate it slightly and reinsert.
Your goal is to seat the tube smoothly inside the tire, so it’s ready for the next step of mounting the tire back onto the wheel.
How to Mount the Tire Back Onto the Wheel Properly
To mount the tire properly, start by aligning the bead evenly on both sides of the rim. Carefully use tire levers to avoid damaging the tube or bead, making sure not to pinch the inner tube.
Once the bead is seated, double-check that it’s evenly positioned around the wheel before inflating. This helps ensure a smooth ride and prevents any issues down the line.
Align Bead Properly
Before you start mounting the tire back onto the wheel, make sure the bead is properly aligned inside the rim. This step helps ensure a smooth installation and reduces the risk of pinch flats.
To do this effectively, check that the tire bead sits evenly on both sides of the rim, avoiding any overlaps. Make sure the bead is tucked inside the rim’s bead seat all around.
Gently press the bead into place with your hands, starting opposite the valve stem. Then, run your fingers around the edge to confirm the bead is fully seated, feeling for any uneven spots or gaps.
Proper alignment helps the tire seat correctly when inflated, making your ride safer and more comfortable.
Use Tire Levers Carefully
Using tire levers carefully is key to avoiding damage to your tire or rim during installation. Gently insert the lever between the tire and rim, working around the edge without forcing it.
Apply steady pressure to lift the bead over the rim, avoiding pinching or tearing the tire. Take your time to make sure the bead seats evenly, which helps prevent flats or uneven wear.
To understand why technique matters, check out this table:
| Tip | Why It Matters | Result |
|---|---|---|
| Use gentle force | Prevents tire and rim damage | Longer-lasting parts |
| Work around evenly | Ensures proper bead seating | Fewer flats |
| Avoid pinching | Stops punctures and tears | Less repairs needed |
| Check for debris | Keeps tire fitting smoothly | Better grip and safety |
| Patience | Ensures correct installation | Longer tire lifespan |
How to Inflate the Tire to the Correct Pressure and Check for Leaks
Start by removing the valve cap from your tire, then attach a pump or air compressor to the valve, making sure it’s sealed tightly. Once connected, follow these steps:
- Inflate to the recommended pressure (found on the sidewall of your tire) using steady, even strokes.
- Check the pressure with a gauge to make sure it matches the recommended level.
- Listen for hissing sounds, which can indicate leaks, while inflating.
- Inspect the valve and tire for leaks by applying a soapy water solution; bubbles mean air is escaping.
Proper inflation ensures a smooth ride, and catching leaks early helps prevent flats. Keep your tires at the right pressure for the best performance.
How to Reattach the Wheel to Your Hybrid Bike
Once your tire is properly inflated and checked for leaks, it’s time to reattach the wheel to your hybrid bike. First, line up the wheel’s axle with the dropouts on the fork or frame.
If your bike has quick-release levers, open the lever, place the wheel in position, then close the lever firmly until it’s tight and secure. For bikes with thru-axles, insert the axle through the hub and frame, then tighten it evenly on both sides.
Make sure the wheel sits flush in the dropouts and spins freely without wobbling. Double-check that the quick-release or thru-axle is tight enough to prevent shifting or wobbling during your ride.
This ensures your wheel is securely attached for a safe and smooth ride.
How to Test Your Repair and Ensure a Safe Ride
Before hitting the road, it’s important to thoroughly test your repair to make sure everything’s working properly and your bike is safe to ride. Start by giving the wheel a gentle spin to check for smooth movement and listen for any unusual noises.
Next, apply the brakes firmly to make sure they grip well and can stop the wheel effectively. Then, take a slow ride to feel for any wobbling or instability that might indicate an issue.
Finally, check the tire pressure and look for any signs of leaks or damage to ensure your tires are in good shape for the ride.
Frequently Asked Questions
Can I Change a Hybrid Bike Tire Without Removing the Wheel?
Yes, you can change a hybrid bike tire without removing the wheel. First, deflate the tire completely.
Then, use tire levers to pry the bead away from the rim, working around the tire’s circumference. Once the bead is loose, you can pull the tire off one side of the rim.
This technique lets you replace or repair the tube quickly without removing the wheel from your bike.
What Safety Precautions Should I Take During Tire Replacement?
You should wear gloves to protect your hands and work in a well-ventilated area to avoid inhaling dust or debris. Make sure your bike is stable, either on a stand or flipped over securely.
Keep tools organized and handle sharp objects carefully to prevent cuts. Before starting, check for any loose parts or damage.
Finally, double-check your tire and wheel for proper installation before riding.
How Often Should I Check My Tires for Wear and Damage?
A stitch in time saves nine, so you should check your hybrid bike tires every 2-4 weeks, especially before rides. Look for cuts, embedded debris, cracks, or excessive wear on the tread.
Regular inspections help prevent flats and accidents. If you notice any damage or significant wear, replace the tires promptly.
Staying vigilant keeps your ride smooth and safe, saving you time and trouble down the road.
Can I Use a Different Type of Inner Tube for My Hybrid Bike?
Yes, you can use a different type of inner tube for your hybrid bike, but make sure it matches your tire size and valve type.
Check the sidewall of your current tube for specifications, and pick a compatible replacement. If you switch to a different valve type, you’ll need the right pump adapter.
Always verify the tube’s diameter and width to ensure it fits properly and gives you a smooth ride.
What Are Common Mistakes to Avoid When Changing a Hybrid Bike Tire?
You should avoid rushing the process, as it can cause damage to the tube or rim. Take your time to do it carefully.
Make sure to properly deflate the tire before removal. Also, check for any debris or sharp objects that might cause flats later on.
Be cautious when seating the bead to prevent pinching the tube. This small step can save you a lot of hassle.
Finally, tighten the nuts or quick-release skewers securely. Doing this ensures your bike is safe to ride.
Taking your time helps prevent unnecessary mistakes and makes the whole process smoother.
Conclusion
Changing your hybrid bike tire might seem intimidating at first, but with a little patience, you’re turning a flat into a feat of confidence. Think of it as tuning your bike’s heartbeat—each step restoring its rhythm and life.
Before you know it, you’ll be back on the open road, feeling the wind like an old friend. So, welcome the process—your bike’s revival is just a few steps away, ready to carry you on new adventures.
By learning how to change tires on a hybrid bike, you’re gaining a valuable skill. This simple task can save you time and money while keeping you on your ride when you need it most.