How to Remove Road Bike Pedals in 8 Easy Steps
Removing road bike pedals can be tricky, especially if you’re new to bike maintenance. Many people struggle with getting those stubborn pedals off without damaging the threads or messing up the bike. Don’t worry—you’re not alone in this!
To remove road bike pedals, start by gathering your tools like a pedal wrench or adjustable wrench and preparing a stable workspace with good lighting.
Identify the pedal’s thread direction—right pedals turn clockwise to tighten, left pedals counterclockwise—and apply penetrating oil if they’re stubborn.
Use the correct tools to turn the pedals counterclockwise, and troubleshoot if they don’t budge. Inspect for damage, then follow proper reinstallation techniques.
Keep going to learn more tips for safe removal and installation.
Key Takeaways
– Use the right tools, like a pedal wrench or Allen key, to get a good grip.
If the pedals are stubborn, applying some penetrating oil can really help loosen things up.
– Before you start turning, make sure you know which side is left and which is right.
This helps you determine the correct thread direction for removal.
– Spray some oil on the threads and wait about 15 to 30 minutes.
This gives the oil time to loosen any rust or debris that might be stuck around the threads.
– When you’re ready, turn the pedals counterclockwise on the right side or clockwise on the left side.
This will unscrew them safely without forcing anything.
– As you remove the pedals, check for any damage or cross-threading.
Make sure to be gentle so you don’t strip the threads or cause any other damage.
Gather Tools and Prepare Your Workspace
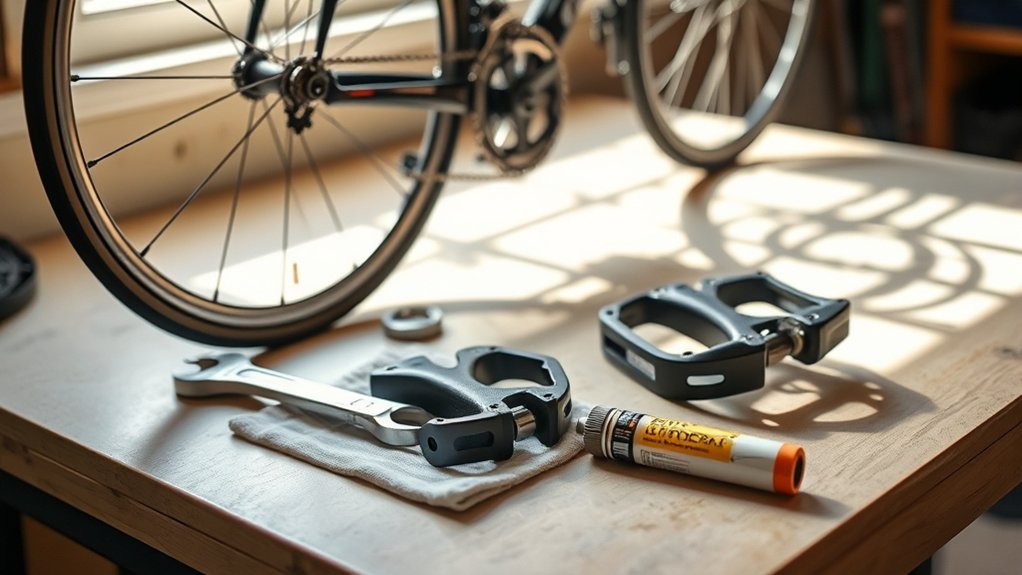
Before you start removing your bike pedals, gather the tools you’ll need and set up a clean, well-lit workspace. You’ll want a pedal wrench or an adjustable wrench, so have those ready to go.
Make sure your bike is stable—using a work stand or flipping it upside down on a soft surface works best. Clear the area of clutter to prevent accidents and keep things organized.
Ensure stability with a work stand or soft surface, and keep your workspace tidy to prevent accidents.
Good lighting is important so you can see the pedal threads clearly, which helps reduce mistakes. Wearing gloves can protect your hands from grease and dirt.
Having everything nearby saves you time and keeps you focused. Preparing your workspace carefully makes the process smoother and helps prevent damage to your bike or losing small parts.
Learn How to Identify Pedal Thread Directions
To remove your bike pedals, you first need to identify the type of pedals you have. Recognizing the thread pattern helps you understand which way to turn to loosen them.
Knowing whether your pedals are standard or reverse-threaded can save you from damaging the threads or stripping the pedal. It’s a simple step that makes the whole process easier.
Determine Pedal Type
Wondering how to tell if your bike pedals are standard or reverse-threaded? Check the side of each pedal for markings—sometimes they’re labeled “L” for left or “R” for right.
Typically, the right pedal has a standard (right-hand) thread, which tightens clockwise and loosens counterclockwise. The left pedal usually has a reverse (left-hand) thread, meaning it tightens counterclockwise and loosens clockwise to prevent loosening during riding.
If no markings are visible, examine how the pedal screws into the crank arm. Turn the pedal counterclockwise for the left side and clockwise for the right side. If it loosens, it’s standard.
If it tightens, it’s a reverse-threaded pedal. Correctly identifying the pedal type helps you choose the proper tools and techniques for removal.
Recognize Thread Patterns
Recognizing the thread pattern on your bike pedals is key to removing them properly. Pedals usually have different thread directions, so knowing which side has which helps prevent damage.
Most road bike pedals have a standard right-hand thread for the right pedal and a left-hand thread for the left pedal. To figure out the pattern:
Check the pedal’s markings or manufacturer’s instructions.
Look at the thread direction—tighten clockwise on the right side and counterclockwise on the left.
You can also use a visual guide, like a mirror or a photo, to compare thread angles or markings.
Apply Penetrating Oil to Stuck Pedals
Choose a penetrating oil suitable for bike components, like WD-40 or a bike-specific lubricant. Spray it generously onto the pedal threads, making sure to cover all contact points.
Let the oil sit for several minutes to loosen any rust or debris before attempting to remove the pedals.
Choosing Appropriate Oil
When dealing with stubborn bike pedals, applying the right type of oil can make all the difference. You want an oil that penetrates well and loosens rust or grime.
Look for penetrating oils specifically designed for bike maintenance or metal parts. These oils are formulated to seep into tight spaces and break down corrosion quickly. Here’s what to take into account:
- Choose a lightweight, fast-absorbing oil for quick penetration without excess buildup.
- Opt for a product with rust-dissolving properties if corrosion is a problem.
- Avoid thick, sticky oils that can attract dirt or cause further buildup over time.
Selecting the appropriate oil guarantees a smoother removal process and helps prevent damage to your pedals or crank arms.
Applying and Letting Sit
Start by applying a generous amount of penetrating oil directly onto the threads of the stuck pedals. Make sure you cover the entire area where the pedal meets the crank arm. Use a brush or nozzle to get the oil deep into the threads.
Once applied, let the oil sit for at least 15-30 minutes. This gives it time to seep in and loosen any rust or debris that’s causing the pedal to stick. If the pedals are really stubborn, you might want to reapply the oil after the initial wait.
Patience is key—forcing the pedals too soon can damage the threads. During this time, avoid turning the pedals, as this can push the oil away or make things worse. Letting the oil sit is crucial for making removal easier later.
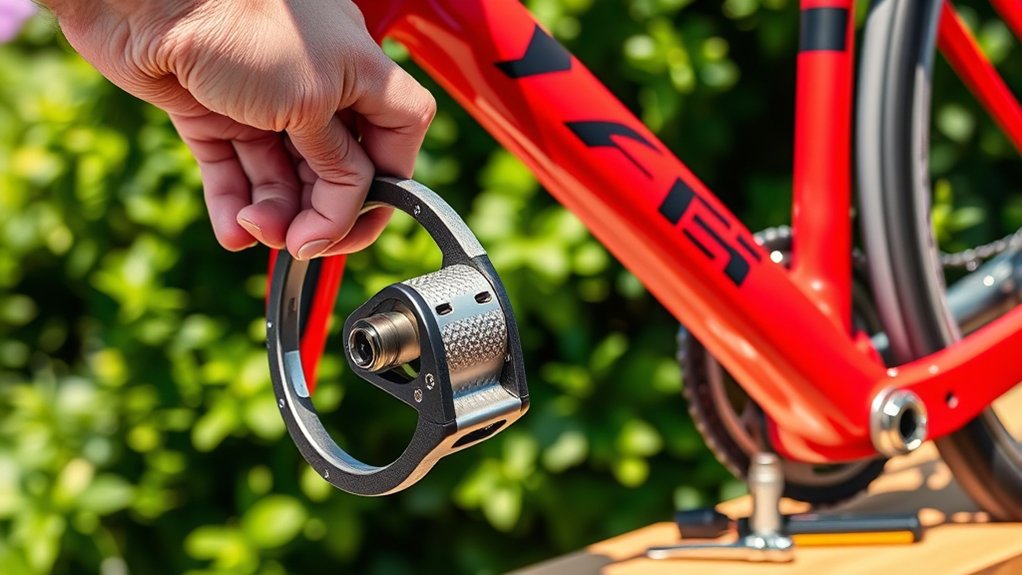
Use the Correct Tools to Remove Pedals Safely
Using the correct tools is essential for removing bike pedals safely and efficiently. Without the right tools, you risk damaging the pedals or crank arms.
First, verify you have a pedal wrench or a 15mm Allen wrench, depending on your pedal type. Second, use a degreaser or penetrating oil to loosen stubborn pedals, making the removal easier.
Third, wear gloves to protect your hands from grease and potential injuries. Using the proper tools prevents stripping the pedal threads and minimizes effort.
Always check your pedal’s specifications to choose the right wrench size. Investing in quality tools makes the process smoother and safer.
Turn Pedals Counterclockwise to Remove Them
To remove the pedals, turn them counterclockwise. This is the standard direction for loosening most bike pedals. Turning them this way helps undo the threads holding them in place.
Remember, the right pedal loosens by turning counterclockwise, and the left pedal also turns counterclockwise but has reverse threading. Use a pedal wrench or Allen key to make the job easier.
To guarantee success, consider these factors:
| Pedal Side | Thread Direction | Tool Needed |
|---|---|---|
| Right | Standard | Pedal wrench/Allen |
| Left | Reverse | Pedal wrench/Allen |
| Both | Turn counterclockwise | Suitable wrench |
Knowing this, turning pedals counterclockwise is your first step to removing them smoothly.
Troubleshoot Common Issues When Pedals Won’t Budge
Even when you turn pedals counterclockwise as instructed, they might still refuse to budge. This can be frustrating, but several common issues could be causing the problem.
- Corrosion or Rust: Over time, moisture can cause the threads to seize. Applying penetrating oil around the pedal axle can help loosen rust and corrosion.
- Overtightening: Pedals that were installed too tightly may resist removal. Using a longer wrench or a pedal removal tool can give you extra leverage.
- Cross-Threading: If the pedal was cross-threaded during installation, it won’t turn smoothly. In this case, careful realignment or professional help might be necessary.
Addressing these issues step-by-step can save you time and prevent damage to your bike’s threads.
Inspect Pedals and Threads for Damage or Wear
Before trying to remove your pedals, take a close look at the threads and the pedals themselves to spot any damage or signs of wear. Check the crank arms for cracks, dents, or corrosion that might weaken them.
Next, examine the pedal threads carefully for stripped or flattened areas. These can make removal tricky or mean the pedals need replacing. Look out for rust or debris that could be causing resistance.
If you see significant wear like cross-threading or damage to the threads, it’s best to address these issues first. Damaged threads can strip further during removal, making future installation more difficult.
Making sure your pedals and threads are in good shape helps prevent problems and makes the removal process smoother. Taking this step now can save you headaches later.
Install New Pedals or Reassemble Your Bike
Once you’ve removed the old pedals, it’s time to install the new ones or reassemble your bike. Before you start, make sure the threads are clean and free of debris. Properly aligning the pedals with the crank arms helps prevent cross-threading and damage.
Ensure threads are clean and aligned properly to prevent damage when installing new pedals.
Follow these steps:
- Apply grease to the pedal threads to prevent seizing and make future removal easier.
- Thread the pedals clockwise on the right side and counterclockwise on the left. Tighten them securely with a pedal wrench.
- Check for proper tightness by spinning the pedals to ensure smooth rotation without wobbling.
Take your time to make sure everything is tight and correctly assembled. Proper installation guarantees a safe, efficient ride and helps extend the lifespan of your pedals.
Frequently Asked Questions
Can I Remove Bike Pedals Without Special Tools?
Yes, you can remove bike pedals without special tools, but it’s easier with a pedal wrench or Allen key.
If you don’t have those, try using adjustable pliers, but be careful not to damage the threads. Turn the pedal counterclockwise to loosen it.
Apply some penetrating oil if it’s stuck, and use steady pressure. Just remember, proper tools make the job smoother and help prevent damage.
How Do I Prevent Pedals From Getting Stuck in the Future?
To prevent pedals from getting stuck in the future, make sure to regularly clean and lubricate the pedal threads with bike-specific grease. This helps keep everything moving smoothly and prevents rust or debris from causing problems.
Always tighten your pedals securely, but don’t overdo it. Over-tightening can damage the threads and make removal difficult later on.
When installing new pedals, double-check that they are threaded correctly. The right pedal should turn clockwise, and the left pedal should turn counterclockwise. This helps avoid cross-threading and future issues.
Are There Specific Types of Penetrating Oil Best for Bike Pedals?
Yes, certain penetrating oils work best for bike pedals. Look for products like WD-40 Bike Penetrant or PB Blaster, which are designed to loosen rust and stuck parts.
Apply a generous amount to the pedal threads and let it sit for a few minutes. Then, use a pedal wrench to turn counterclockwise.
These oils penetrate effectively and make removal much easier, helping to prevent damage to your bike.
What Safety Precautions Should I Take During Pedal Removal?
You should wear gloves to protect your hands from grease and sharp edges, and goggles to shield your eyes from debris or accidental slips.
Make sure your bike is stable, preferably on a stand, to prevent it from falling.
Use the correct tools, like a pedal wrench, and apply penetrating oil if the pedals are stuck.
Work in a well-ventilated area, and stay patient to avoid accidents or damaging the components.
How Often Should Bike Pedals Be Checked or Replaced?
Ever wondered when to check or replace your bike pedals? You should inspect them every few hundred miles or at least once a season.
Look for signs of wear like looseness, cracks, or missing bearings. If you notice any of these issues, replace them promptly to guarantee safety and peak performance.
Regular maintenance keeps your ride smooth and helps prevent accidents caused by worn-out pedals.
Conclusion
And there you have it—your foolproof guide to removing those stubborn road bike pedals. Who knew that unscrewing a tiny part could feel like disarming a bomb?
With a little patience and a splash of oil, you’re now a pedal-pulling pro. So go ahead, impress your friends with your newfound expertise.
And remember, if all else fails, just blame it on the bike. Happy pedaling—and maybe invest in some stronger arm muscles!