How to Tighten Electric Bike Brakes in 8 Easy Steps
Many electric bike owners find themselves frustrated when their brakes don’t perform as smoothly as they should. You’re not alone—brake issues are a common challenge, but the good news is, fixing them is often simpler than you think.
To tighten your electric bike brakes, start by inspecting the brake pads and cables for any wear or damage. Loosen the calipers to access the components, then adjust the brake cables to create proper tension, ensuring the brake lever feels firm.
Next, realign and tighten the calipers for better contact. Test the brakes, and fine-tune the tension if needed.
If issues persist, understanding troubleshooting tips can help you keep your brakes in top shape.
Key Takeaways
- Check your brake pads to see if they’re worn down to less than 1mm thick. If they are, it’s best to replace them before making any adjustments.
- Next, loosen the caliper bolts. Support the caliper so it doesn’t hang and then move it so it’s centered over the rotor or rim.
- Use the barrel adjusters or cable tensioners to tighten the brake cables. This will give you a firmer brake lever feel.
- Once everything is aligned, re-tighten the caliper bolts evenly. This helps prevent misalignment and ensures the brake pads contact the rotor or rim evenly.
- Finally, test your brakes by squeezing the levers. Fine-tune the tension as needed for the best stopping power.
Signs You Need to Tighten Your Electric Bike Brakes
If your electric bike’s brakes aren’t responding as quickly or effectively as they used to, it’s a clear sign that they may need tightening. You might notice increased stopping distances or a spongy brake feel when you squeeze the lever.
If the brake lever pulls closer to the handlebar before the brakes engage, that’s another warning sign. You may also hear squeaking or grinding noises during braking, which indicates that the pads aren’t making proper contact.
Sometimes, the brake pads look loose or misaligned, and that can hurt performance too. These signs suggest that your brake cables or calipers need tightening to bring back proper braking power.
Addressing these issues early keeps you safe and helps ensure smooth, reliable stopping every time.
Gather Tools and Prepare Your Workspace
Before you start tightening your electric bike’s brakes, it’s important to gather all the tools you’ll need and set up a clean, organized space. You’ll want basic tools like Allen wrenches, screwdrivers, and maybe pliers or a brake cable tensioner. Check your bike’s manual to find out the exact sizes and types needed.
Gather your tools and organize your workspace for efficient, mistake-free brake adjustments.
Clear your work area of clutter so you don’t lose small parts or tools. Use a workbench or a stable surface where you can easily access the wheels and brake components. Good lighting helps you see small details clearly.
Having everything within reach makes the process smoother and saves you time. Taking a few minutes to prepare your workspace helps ensure a more efficient brake tightening, and reduces the chance of mistakes or damage.
Inspect Brake Pads and Cables for Wear and Damage
To keep your electric bike’s braking system safe and working well, it’s important to check the brake pads and cables for any signs of wear or damage.
Start by inspecting the brake pads’ thickness. If they’re less than a millimeter, it’s time to replace them. Look for cracks, glazing, or uneven wear on the surface.
For the cables, examine the outer housing for fraying, rust, or kinks. Make sure the cables aren’t stretched or frayed at the connection points.
Use the table below to spot common issues:
| Brake Pads | Cables |
|---|---|
| Worn down to the indicator line | Frayed or rusted exterior |
| Cracks or glazing on surface | Kinks or bends in cable |
| Uneven wear or thinning | Loose or disconnected cables |
| Excessive thinning or metal exposure | Stretched cables that don’t respond |
| Missing or damaged pads | Corrosion or rust on housing |
Address any problems promptly to keep your brakes reliable and safe.
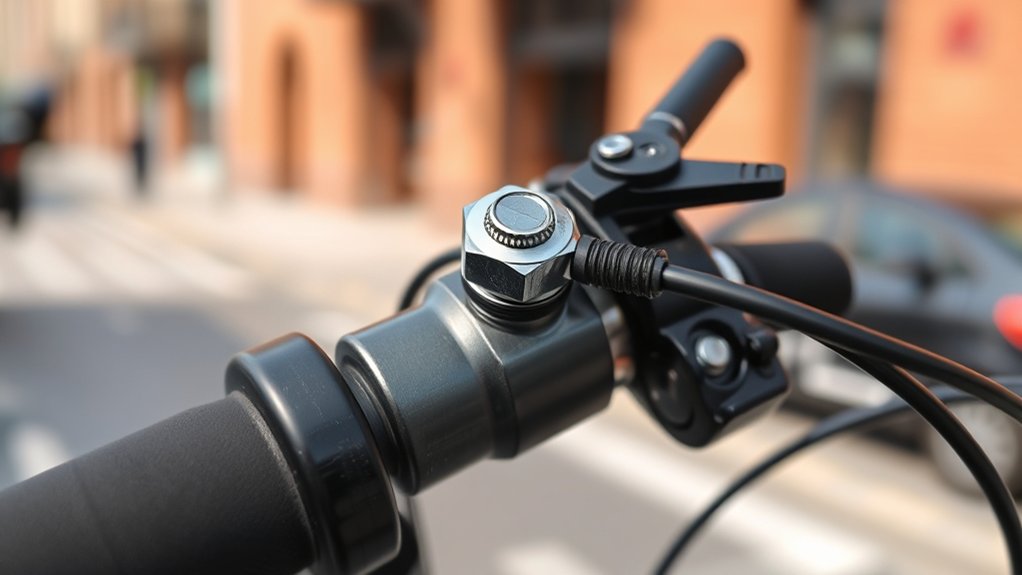
Loosen Calipers to Access Brake Components
Loosening the calipers gives you clear access to the brake components that need inspection or adjustment. First, locate the bolts that hold the caliper in place—usually on the side or top. Using an appropriate wrench or Allen key, carefully loosen these bolts a few turns.
This will free the caliper, making it easier to inspect the brake pads, rotors, and other parts. Keep in mind: don’t fully remove the bolts unless necessary. Keep track of washers or spacers and support the caliper so it doesn’t hang by the brake hose.
Use a cloth or rag to prevent dirt from entering the brake system. Once loosened, you can easily access the internal components for cleaning, inspection, or further adjustment.
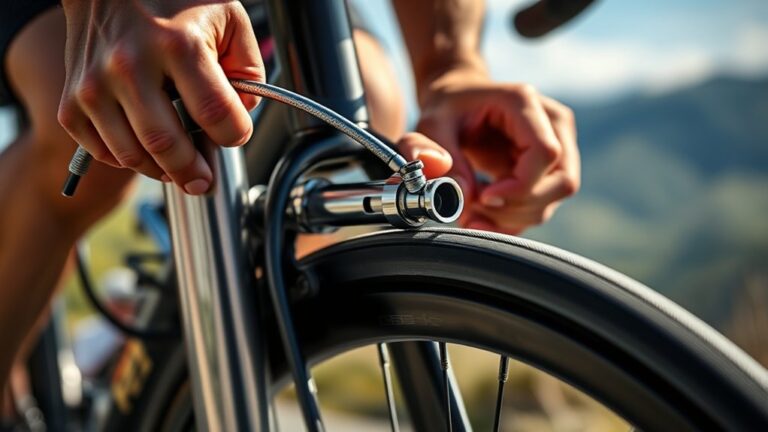
Adjust Brake Cables to Proper Tension
Start by checking the tension of your brake cables. They should feel firm but not too tight.
If needed, adjust the brake lever to ensure it engages smoothly without too much pull.
Getting the tension right will improve your braking response and prevent cable slack.
Check Cable Tension
Ensuring your brake cables have the proper tension is key for responsive and effective braking. To check this, squeeze your brake lever and see how much movement happens before the brake engages. If the lever feels too loose or too tight, it’s time to adjust the cable tension.
Look for these signs: the brake lever should engage firmly with minimal pull. There shouldn’t be much slack in the cable when the brake isn’t engaged. The brake pads should move close to the rim or rotor without rubbing. Also, the lever shouldn’t hit the handlebar before the brake fully engages.
If needed, you can adjust the tension by tightening or loosening the cable at the caliper or using the barrel adjuster, depending on your bike’s setup.
Adjust Brake Lever
To properly adjust your brake lever, you need to set the cable tension so that the lever pulls smoothly and engages the brakes at the right point.
Start by squeezing the brake lever to check its position. If it pulls too close to the handlebar before engaging, you’ll need to tighten the brake cable.
Locate the barrel adjuster near the lever or along the cable housing. Turn it clockwise to increase tension, which will make the lever engage earlier.
If the lever feels stiff or too loose, loosen the tension by turning the adjuster counterclockwise. Make small adjustments and test after each.
Your goal is a lever that feels firm but not overly tight, with brakes engaging promptly and smoothly when you pull.
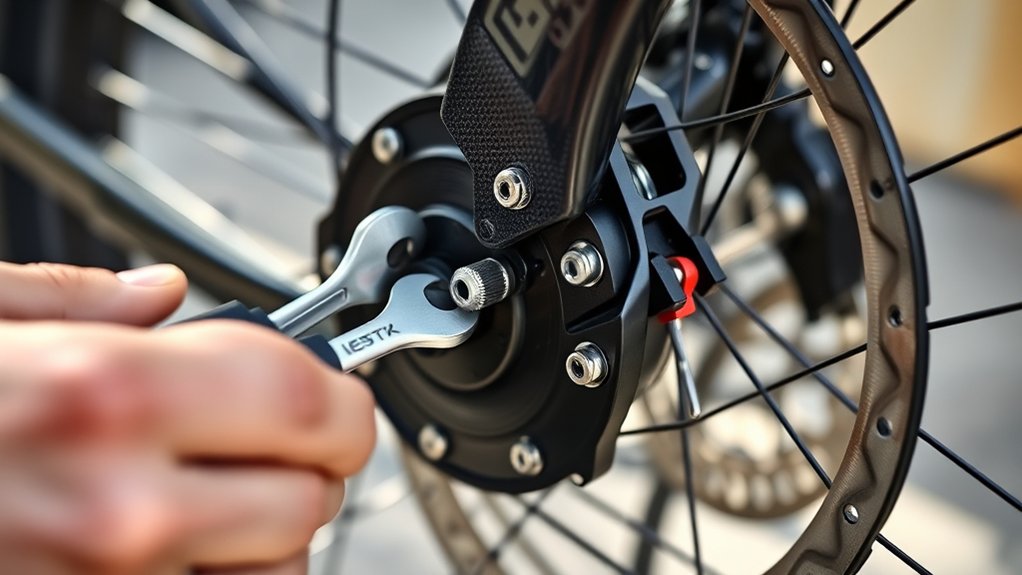
Align and Tighten Brake Calipers for Better Contact
Properly aligning and tightening your brake calipers guarantees they make even contact with the rim or rotor, which is essential for effective braking. First, loosen the mounting bolts slightly so you can shift the caliper freely.
Squeeze the brake lever to center the caliper automatically. While holding the lever, tighten the bolts gradually, making sure the caliper stays centered. Check that the pads hit the rim or rotor evenly without rubbing.
To make it easier, keep these tips in mind:
- Use an Allen wrench or the appropriate tool for tight, secure bolts
- Adjust the caliper position so the pads align perfectly with the braking surface
- Avoid overtightening, which can warp components
- Test by spinning the wheel and applying the brakes for even contact
Test Your Brakes and Fine-Tune the Tension
Now, you should test your brakes to see how they respond when you pull the levers.
If they feel too loose or too tight, adjust the tension until the braking feels smooth and reliable.
Proper tension guarantees safe and effective stopping every time.
Checking Brake Response
Have you ever wondered if your e-bike brakes respond quickly enough? To check, grab your bike and test your braking power in a safe area. Squeeze the brake levers firmly and see how fast the bike slows down.
If the response feels sluggish or delayed, it might be time to fine-tune the tension. Look for these signs:
- Does the brake engage immediately when you pull the lever?
- Is there any squeaking or grinding noise?
- Do the brakes feel soft or spongy?
- Are the brakes evenly engaging on both sides?
Doing these checks helps you figure out if your brakes need adjustment. If you notice any issues, fix them promptly to keep your stops safe and reliable during rides.
Adjusting Tension Properly
Before you start tweaking your brake tension, it’s important to test how your brakes are working right now. Squeeze the brake levers firmly and notice how much effort it takes to engage the brakes and how quickly they respond.
If the levers feel soft or travel too far before engaging, it’s time to tighten the tension. Loosen the locknut on the brake cable, then turn the barrel adjuster or cable adjuster to increase tension.
Make small adjustments and test again after each turn. Your goal is a firm brake lever with minimal travel, so the brakes engage smoothly without feeling too tight.
Once you’re happy with the feel, securely tighten the locknut to keep the tension in place.
Troubleshooting Common Brake Issues
When your electric bike brakes aren’t responding properly, it’s essential to find out what’s causing the issue quickly to stay safe while riding. Common problems include squeaking, less stopping power, or uneven braking.
Start by checking the brake pads for wear, as worn pads can make braking less effective. Then, look at the cables or hydraulic lines for any damage or leaks. If the brake lever feels too loose or too tight, it might need adjusting.
Finally, clean the brake parts to remove dirt and debris that can block performance. Keep an eye out for squeaking sounds, spongy or tight brake levers, reduced stopping power, or uneven braking responses, which all indicate different issues to address.
Frequently Asked Questions
Can I Tighten Electric Bike Brakes Without Professional Help?
Yes, you can tighten electric bike brakes without professional help. First, locate the brake calipers and check the brake pads’ alignment.
Use an Allen wrench or screwdriver to gently tighten the caliper bolts, making sure the pads are close to the rotor but not touching. Adjust the brake cable tension if needed.
Then, test the brakes by riding slowly. Always double-check your work for safety before riding at higher speeds.
How Often Should Brake Tension Be Checked?
You should check your brake tension at least once a month to keep your bike safe and performing well. Regular inspections help catch any looseness or wear early, so you can prevent accidents.
If you ride often or in rough conditions, it’s a good idea to check them even more frequently. Pay attention to how your brakes feel and respond—if they’re less responsive or squeaky, it’s time to tighten or adjust them.
Keeping up with maintenance like this makes sure your bike stays reliable and safe to ride.
Are There Safety Risks in Over-Tightening Brakes?
Over-tightening your brakes is like squeezing a delicate bird too tightly. You risk damaging components or causing sudden, unpredictable stops.
When you tighten brakes excessively, you might warp the brake disc or wear out brake pads faster. This can lead to reduced braking efficiency.
Always aim for a firm, responsive feel rather than extreme tightness. Proper adjustment guarantees safety, smooth stopping, and helps your electric bike last longer.
What Tools Are Best for Brake Adjustment?
You need a set of Allen wrenches or hex keys and a screwdriver to adjust your electric bike brakes effectively. Allen wrenches are best for tightening or loosening brake calipers and levers.
Screwdrivers help with adjusting the brake pad position. Always choose tools that fit snugly to avoid stripping screws or damaging components.
Having a quality multi-tool can make adjustments quicker and more precise. This helps ensure safe and reliable braking performance.
Can Brake Tightening Improve Stopping Distance Significantly?
A stitch in time saves nine, and tightening your brakes can make a real difference in stopping distance. When your brakes are properly adjusted, they respond faster and more effectively.
This means you can stop sooner, which is especially important on busy roads. Regular maintenance keeps your bike safe and reliable so you’re always ready to go.
Conclusion
Just like tending a garden requires patience and gentle care, maintaining your e-bike brakes keeps your ride smooth and safe. When you tighten your brakes, you’re building trust and confidence in your bike’s performance.
Remember, small adjustments can lead to big safety benefits. Keep an attentive eye on your brakes, and don’t hesitate to fine-tune them as needed.
With consistent care, your electric bike will serve you reliably, turning every journey into a smooth and enjoyable adventure. Properly tightening your e-bike brakes ensures a safer ride and better control every time.