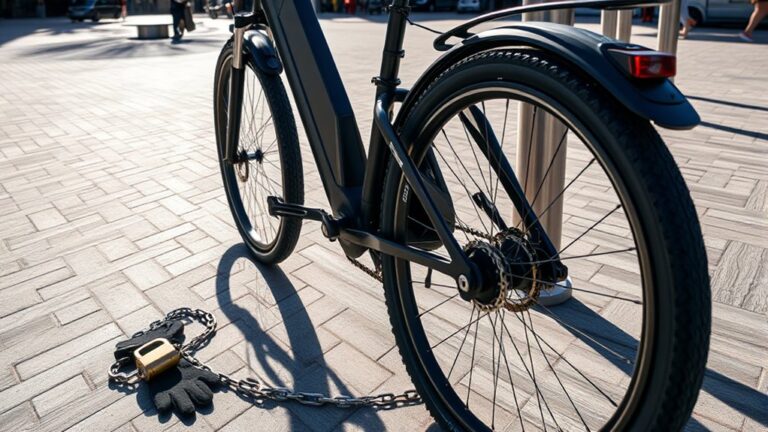
10 Steps to Remove a Crank Arm From Your Mountain Bike
Many mountain bikers know the frustration of dealing with a stubborn crank arm. Whether you’re upgrading, replacing a damaged part, or just doing routine maintenance, removing that crank arm can seem tricky or intimidating. You’re not alone—this is a common challenge, but with the right approach, it’s manageable.
To remove a crank arm from your mountain bike, start by identifying its type—square taper, splined, or carbon fiber—and gather the right tools like a crank puller, Allen wrenches, and possibly a torque wrench.
Prepare your workspace and guarantee safety gear is worn. Loosen the bolts evenly, then carefully extract the crank arm, applying lubricant if needed. Check for damage before installing a new one.
If you want to avoid common mistakes, keep going to learn more about each step.
Key Takeaways
– Identify your crank system type so you can choose the right tools and techniques.
Knowing whether you have a square taper, splined, or external bearing system is key.
– Secure your bike on a stand or a stable work surface.
This keeps everything steady and makes the job safer and easier.
– Remove any chain or accessories blocking access to the crank arm.
Clearing these out gives you better room to work comfortably.
– Grab the correct crank puller and wrench.
Carefully unscrew the crank arm using these tools.
– Before you start, spray some penetrating lubricant on rusted or stuck parts.
This helps loosen things up so you don’t damage the components.
Understand Your Mountain Bike’s Crank System
Understanding your mountain bike’s crank system is essential before trying to remove a crank arm. You need to figure out whether your bike has a square taper, splined, or carbon fiber crank.
Each system uses different attachment methods and tools. Square taper cranks have a simple square hole in the crank arm that fits onto a spindle, usually secured with a bolt. Splined cranks have multiple splines that lock onto a matching spindle and often need a special tool.
Carbon fiber cranks usually use a proprietary system with specific removal steps. Recognizing your crank type guides your approach and ensures you use the right technique. Knowing your bike’s crank system helps prevent damage and makes the removal process easier.
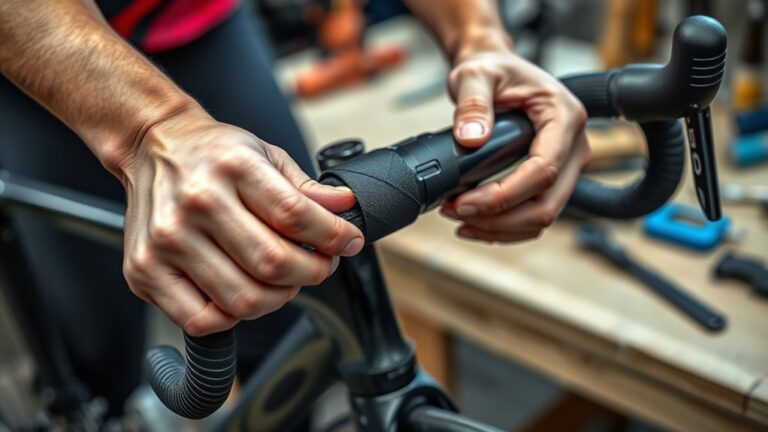
Gather the Right Tools for Removing Your Crank Arm
Before you start removing your crank arm, make sure you have the right tools. You’ll need a crank puller, Allen wrenches, and maybe a torque wrench depending on your bike’s setup.
Check your crank arm specifications first. This will help you confirm that your tools are compatible and ready to go for the job.
Essential Tools Needed
To successfully remove a crank arm from your mountain bike, you’ll need a few essential tools. First, a crank puller tool is vital; it threads into the crank arm and helps extract it without damage.
Next, an 8mm Allen wrench or hex key is necessary to loosen the crank bolt. If your bike has a removable bottom bracket, a bottom bracket tool might be required.
Some bikes also need a torque wrench to guarantee proper reinstallation. Moreover, having a clean rag helps keep the area tidy and prevents dirt from entering components.
Make sure your tools are in good condition to avoid stripping bolts. Gathering these tools beforehand guarantees a smooth removal process, saving you time and effort.
Tool Compatibility Tips
Making sure you have the right tools that are compatible with your bike’s components is essential for a smooth crank arm removal. Using incompatible tools can damage the crank or make the process harder.
Check your bike’s specifications to identify the correct tools, like a compatible Allen wrench or socket size. This helps prevent stripping bolts and damaging parts.
| Tool Type | Compatibility Tip |
|---|---|
| Allen Wrenches | Match the size precisely to avoid stripping bolts |
| Socket Wrenches | Use the correct size for crank bolts and bottom brackets |
| Extractors | Confirm they fit the crank arm for proper removal |
| Hammer or Rubber Mallet | Use gently if needed for stubborn parts |
Having the right tools minimizes damage and speeds up the job.
Prepare Your Bike and Safety Measures
Gather your tools and set up a clean, flat workspace to ensure safety and efficiency. Clear away any clutter so you have plenty of room to work comfortably.
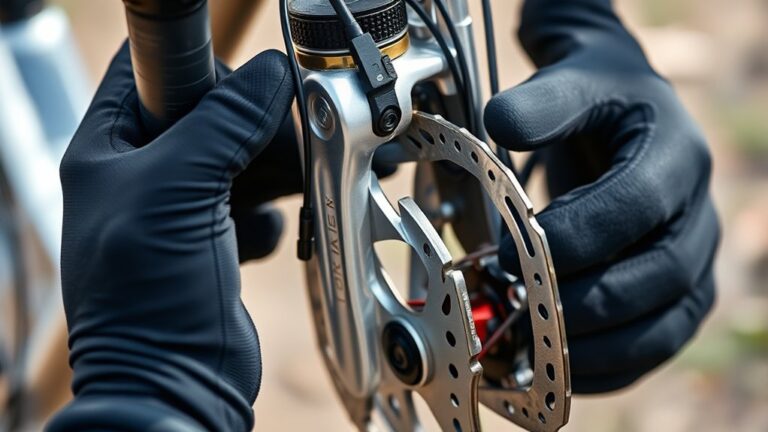
Use a stand or raise your bike to keep it stable and easy to access. Wear safety glasses and gloves to protect your eyes and skin from debris or sharp edges.
Make sure your work area is well-lit so you can see small parts clearly. Keep a container nearby for storing bolts and parts to prevent losing them.
Before you start, double-check that your tools are in good condition. These safety steps help minimize accidents and make the job smoother.
Working confidently and efficiently becomes easier when you take these precautions, avoiding damage to your bike or injury to yourself.
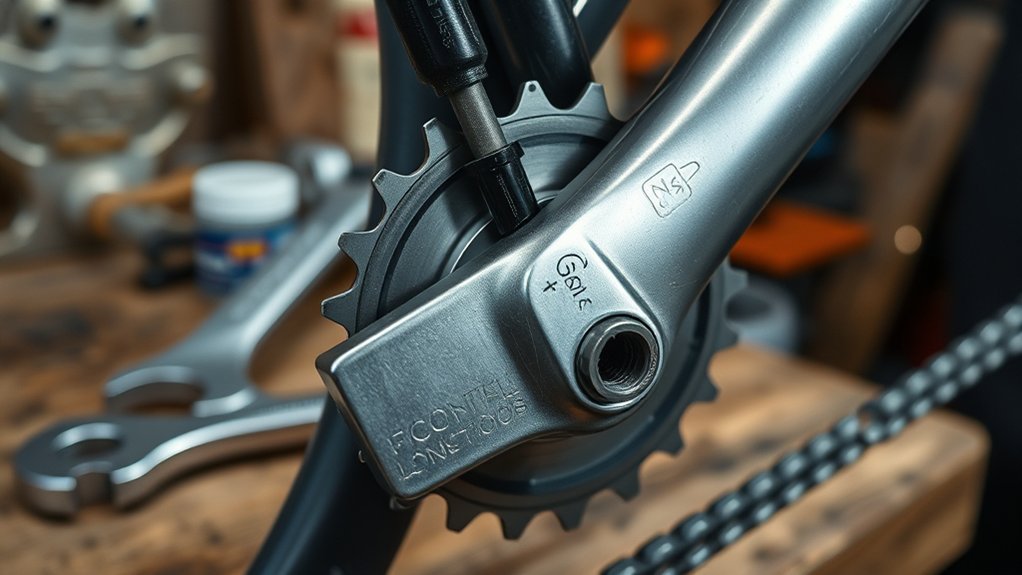
Identify Your Crank Arm Type and Bolts
Have you checked what type of crank arm and bolts your bike uses? Identifying your crank arm type is important before you start removing it.
Most mountain bikes have either square taper, spline, or external bearing crank arms. Square taper cranks have a tapered hole, spline types use a splined interface, and external bearing cranks attach differently.
Next, look at the bolts holding the crank arm in place. Some bikes have just a single bolt, while others use a bolt with a retaining ring or a preload cap.
Check if the bolts are Allen (hex), Torx, or standard bolts. Knowing your crank arm and bolt type helps you pick the right tools, avoid damage, and make the removal process smoother.
Loosen and Remove the Crank Arm Bolts Safely
Start by securing your bike to prevent movement. Then, select the right tool—like an Allen wrench, Torx driver, or socket wrench—based on your crank bolt type.
Insert the tool into the bolt head and turn counterclockwise to loosen. Apply steady pressure, and if the bolt feels tight, try using a longer handle for more leverage.
Avoid forcing or using too much force, which can strip the bolt or damage parts. Make sure you’re turning the bolt directly and keeping a firm grip on your tool.
Once the bolt is loose enough, unscrew it completely and set it aside in a safe place. Repeat the process for the other crank arm if needed.
Loosening the bolts carefully helps prevent damage and makes removal easier.
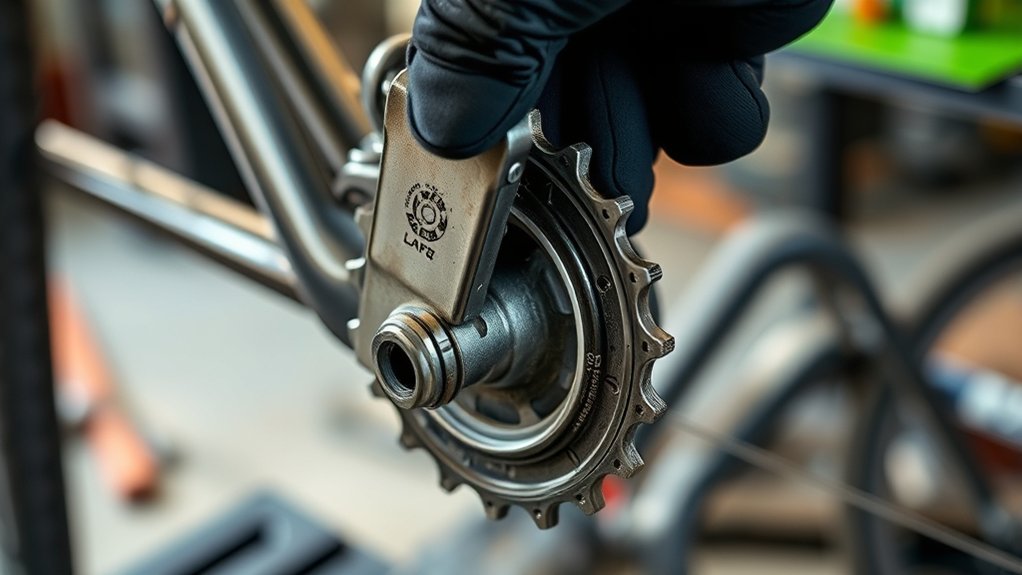
How to Handle Stuck or Seized Crank Arms?
When your crank arm is stuck, the first step is to figure out what caused it to seize—maybe corrosion, dirt, or wear.
Use the right tools, like a crank puller or impact wrench, to avoid damaging the parts.
Applying penetrating lubricant can help loosen stubborn components and make removal a lot easier.
Identify Cause of Seizure
A seized or stuck crank arm often happens because of corrosion, dirt buildup, or over-tightening. These issues can cause the crank to bind tightly to the spindle. To figure out what’s causing it, start by inspecting the crank arm and spindle closely.
Look for rust, corrosion, or debris around the connection point. If you notice rust or dirt, that’s likely the culprit. If the crank feels extremely tight even after cleaning, over-tightening could be the problem. Also, check for any visible damage or wear, which can contribute to seizure.
Knowing the cause helps you decide whether cleaning and lubrication will fix the problem or if you need more advanced removal techniques. Proper identification prevents applying unnecessary force and helps avoid damaging your crank or spindle.
Use Appropriate Tools
Handling a stuck or seized crank arm needs the right tools to avoid damage and make removal safe. You’ll want specific tools to grip, turn, and loosen the crank without harming your bike.
Common tools include a crank puller, Allen wrenches, and a hammer. Using the wrong tools can strip threads or damage parts. Here’s a quick guide:
| Tool | Purpose |
|---|---|
| Crank Puller | Extracts the crank arm |
| Allen Wrenches | Loosens crank bolts |
| Hammer | Provides gentle taps to loosen |
| Penetrating Oil | Loosens rusted parts (next step) |
Choosing the right tool makes the process safer and more effective. Proper tools really make all the difference when dealing with stubborn crank arms.
Apply Penetrating Lubricant
Applying penetrating lubricant is an important step when dealing with a stuck or seized crank arm. It helps loosen rust and corrosion that might be binding the parts together.
Spray or apply the lubricant directly onto the crank arm’s interface, focusing on where it connects to the spindle or bolt. Let it sit for several minutes, sometimes longer if the corrosion is severe, so it can penetrate deep into the threads and rust.
This process reduces friction and makes it easier to remove the crank arm. Be patient and avoid forcing it prematurely, as that can cause damage.
Reapplying lubricant periodically can improve its effectiveness. This way, the seized parts are more likely to loosen when you try to remove the crank arm later.
Inspect Your Crank and Bottom Bracket for Wear or Damage
Start by closely examining your crank and bottom bracket for signs of wear or damage. Look for cracks, dents, or bent parts on the crank arms, which could mean impact damage.
Check the crank spindle for corrosion or excessive wear, especially where it connects to the bottom bracket.
Spin the crank to feel for any wobbling or grinding, which suggests worn bearings or a loose bottom bracket.
Listen for unusual noises when turning the crank, as these can indicate internal issues.
If you notice looseness, play, or visible damage, it’s a sign that components may need replacement or repair.
Identifying these problems early helps prevent further damage and ensures safe, smooth riding after removing the crank arm.
Install a New or Repaired Crank Arm Correctly
Once you’ve removed the old or damaged crank arm, it’s time to install the new or repaired one correctly. First, align the crank arm with the bottom bracket spindle, making sure the holes match up properly.
Tighten the crank bolt or preload cap to the manufacturer’s specified torque using a torque wrench. Be careful—over-tightening can damage components, while under-tightening might cause it to loosen.
Double-check that the crank arm spins smoothly without wobbling or resistance. To ensure everything’s set correctly, keep these tips in mind:
Ensure the crank arm rotates smoothly without wobbling for safe, efficient riding.
- Use fresh thread locker if the manufacturer recommends it
- Verify the crank arm’s orientation before tightening
- Be careful when threading bolts to avoid cross-threading
- Recheck the torque after your first ride to confirm it’s secure
Proper installation guarantees safe, efficient riding and helps your components last longer.
Common Mistakes to Avoid When Removing a Crank Arm
Removing a crank arm might seem straightforward, but there are some common mistakes that can make things more complicated or even cause damage. First, don’t forget to use the right tools. Using the wrong size or type can strip bolts or damage parts.
Avoid applying too much force. Pushing too hard can break components or strip threads. Make sure to loosen the crank arm bolts evenly; uneven pressure can bend or damage the crank or spindle.
Don’t skip cleaning and inspecting the parts before you start. Dirt or corrosion can make removal harder and increase the risk of damaging threads. Lastly, don’t rush the process. Take your time, follow the steps carefully, and double-check your work to avoid costly mistakes and ensure a smooth removal.
When to Seek Professional Help for Crank Arm Issues?
If you’re having trouble removing the crank arm despite trying multiple times, it’s probably time to get some professional help.
Also, if you notice any cracks, dents, or other signs of damage, a mechanic can help prevent bigger issues down the line.
Don’t risk damaging your bike or hurting yourself—reach out to an expert if problems keep happening or look suspicious.
Persistent Removal Difficulties
When you keep struggling to remove a crank arm, it’s probably time to get professional help. If you’re applying a lot of force, facing stubborn resistance, or tools keep slipping, don’t push yourself further alone. Pushing too hard might damage the crank or crankset.
Consider seeking help if the crank won’t move even when you’re applying the right pressure. Also, watch out for unusual resistance or grinding sounds. Visible damage or corrosion around the crank arm is another sign.
If your tools keep slipping or slipping repeatedly, that’s a red flag. It could lead to injury or damage your bike. Persistent problems often hide underlying issues like seized parts or corrosion that need an expert’s touch.
A professional mechanic has the right tools and experience to remove stubborn crank arms safely. Knowing when to ask for help keeps your bike safe and prevents injury.
Unusual Crank Damage Signs
Unusual damage to your crank or crank arm is a clear sign that you should get professional help. If you see cracks, dents, or bending, don’t try to force it off. These signs point to underlying stress or fatigue.
Warping or corrosion can weaken the crank’s strength, increasing the chance of breaking during removal or riding. Also, if the crank feels loose or wobbly even after tightening, it’s a sign that internal damage or worn parts are involved.
Ignoring these issues can lead to more damage or even accidents. When you notice any of these signs, it’s best to consult a professional mechanic. They can diagnose the problem properly, prevent further damage, and keep your bike safe and performing well.
Frequently Asked Questions
Can I Remove a Crank Arm Without Removing the Chainring?
Yes, you can remove a crank arm without removing the chainring, but it depends on your bike’s setup. If your crank arm uses a bolt-on system, you can usually loosen and detach it without taking off the chainring.
However, if it’s a tight fit or part of a larger assembly, you might need to remove the chainring first for easier access. Always check your crankset type before proceeding.
What Are Signs That My Crank Arm Needs Replacement?
Your crank arm showing signs of wear? It’s like a ticking time bomb waiting to fail! You should replace it if you notice excessive play or looseness when pedaling, creaking sounds, or visible cracks and rust.
Also, if you feel uneven pedaling or difficulty turning the crank, it’s a clear sign it’s on its last legs. Addressing these issues promptly keeps your ride smooth and safe.
How Do I Prevent Stripping the Crank Arm Bolts?
To prevent stripping the crank arm bolts, always use the correct size Allen wrench or socket. This helps ensure a snug fit and avoids damaging the bolt head.
When tightening, apply steady, even pressure. Avoid over-tightening, as that can damage the threads and make future removal tricky.
Keep the bolts clean and dry before installation. You might also consider adding a small amount of grease or anti-seize compound to help prevent corrosion and make removal easier later on.
Regularly check the bolts for wear or damage. If you notice any issues, replace them to keep everything secure and prevent stripping.
Is It Necessary to Apply Lubrication During Reinstallation?
A stitch in time saves nine, and in reinstallation, lubrication is essential. You should definitely apply grease or anti-seize compound to the crank arm bolt and spindle threads. This prevents rust, makes future removal easier, and guarantees a smooth fit.
Skipping lubrication might save a moment now, but it could cause more trouble later. Keep your bike in top shape by always lubricating during reassembly.
How Often Should I Check My Crank Arms for Damage?
You should check your crank arms for damage every few rides, especially if you’re riding on rough terrain.
Look for cracks, bends, or any looseness that might show signs of wear or stress.
Regular checks help prevent failures that could lead to accidents.
Make it a habit to inspect them before and after every ride, and tighten or replace parts as needed.
This way, your bike stays safe and runs smoothly.
Conclusion
Now that you’ve mastered the art of removing a crank arm, you’re practically a bike mechanic wizard! With patience and the right tools, you can tackle this task faster than a superhero on a mission.
Just remember, rushing can turn a simple fix into a disaster of epic proportions. So take your time, follow each step carefully, and soon your mountain bike will be rolling smoother than a rocket blasting through the stratosphere!
Removing a crank arm might seem tricky at first, but with these tips, you’ll be done in no time. And once you get the hang of it, you’ll feel more confident fixing your bike on your own.
So go ahead, give it a shot. Your mountain bike will thank you, and you’ll be back on the trail before you know it.