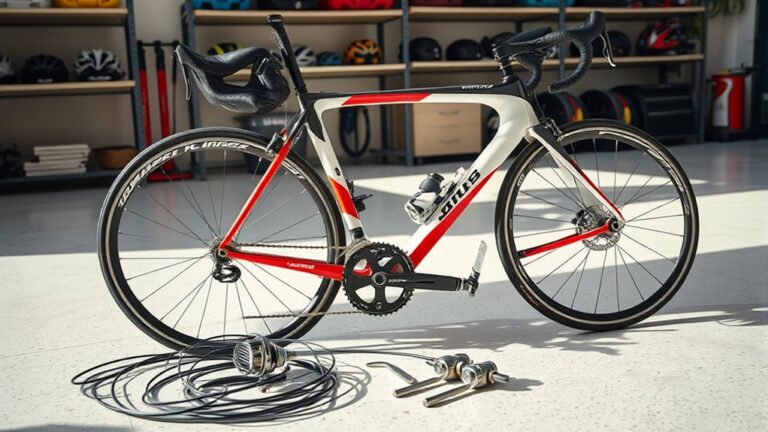
7 Easy Steps to Adjust Hydraulic Brakes on Your Electric Bike
Many e-bike riders find themselves frustrated when their hydraulic brakes aren’t performing as smoothly as they should. You’re not alone—brake issues are a common challenge, especially for those new to electric bikes.
Luckily, adjusting hydraulic brakes on your e-bike is easier than you might think.
To adjust hydraulic brakes on your e-bike, start by ensuring your bike is stable and the wheels spin freely. Check for wear and top off or replace brake fluid as needed.
Fine-tune the brake lever reach for comfortable control, then align the brake pads with the rotor for even contact.
If the brake feeling soft or spongy, bleed the system to remove air bubbles.
For detailed steps to get your brakes functioning smoothly, keep going.
Key Takeaways
- Secure the bike and make sure the wheels spin freely. Take some time to clean the brake components and check the pads for any signs of wear.
- Next, check the brake fluid level and top it off if needed. Make sure the reservoir is filled to the proper level so everything stays in good working order.
- Adjust the brake lever reach for your comfort. Use the screw near the lever pivot to make it just right for your grip.
- Loosen the caliper bolts a bit, then align the brake pads with the rotor. Once aligned, tighten the bolts evenly to keep everything secure.
- Finally, test the brakes by squeezing the lever. Make sure the response is firm and smooth before you head out for a ride.
Understanding How Hydraulic Brakes Work on Your E-Bike
Have you ever wondered how hydraulic brakes on your e-bike actually work? When you squeeze the brake lever, it pushes fluid through a sealed system of hoses and cylinders.
This fluid transmits force efficiently from the lever to the brake calipers. The calipers then press brake pads against the rotor, creating friction that slows down your bike.
Hydraulic systems are self-adjusting, which means they maintain consistent braking performance over time. Unlike mechanical brakes, they don’t rely on cables, which can stretch or fray.
Hydraulic brakes stay reliable over time, unlike mechanical ones that can stretch or fray.
Instead, the pressurized fluid provides smooth, powerful stopping power. You also get better modulation, making it easier to control your braking force precisely.
Understanding this helps you appreciate how hydraulic brakes deliver reliable, effective stopping power on your e-bike.
Identify Common Brake Problems and When to Fix Them
If your brakes feel less responsive or require more effort, you might be experiencing brake fade. This is a sign that it’s time to check your system.
A spongy or soft brake lever also points to air in the lines or other issues that need fixing. Catching these signs early helps keep your e-bike safe and reliable.
Recognizing Brake Fade
Brake fade is a common issue that can affect your safety and riding experience, especially during long or hard braking.
It happens when the hydraulic fluid gets too hot, making it less effective at transferring pressure. You might notice your brake lever feeling softer or moving closer to the handlebar without stopping as well.
Sometimes, the brake response feels sluggish, or you have to squeeze harder to slow down. Brake fade usually occurs after steep descents or intense braking sessions.
If you notice this, it’s best to stop riding and let the brakes cool down. Ignoring brake fade can reduce control and lead to accidents.
Recognizing these signs early helps you stay safe and ensures your brakes work properly when you need them most.
Identifying Spongy Feel
A spongy brake feel is a common sign that something’s not right with your hydraulic system. When your brake lever feels soft or sinks farther than usual, it usually means there’s air or contamination in the brake lines.
This sponginess can reduce your braking response and even compromise safety. You might notice it takes longer to stop or that braking power is uneven.
Often, this issue happens after bleeding the brakes or if there’s a leak or dirt inside the system. If you feel the spongy sensation, it’s a good idea to check for air bubbles or leaks.
Consider bleeding the brakes again or replacing damaged parts. Fixing this quickly helps restore proper braking and keeps you safe while riding.
Get Your Bike Ready for Brake Adjustments
Are you ready to fine-tune your hydraulic brakes? Before making any adjustments, make sure your bike is stable and safe. Place it on a stand or lean it securely against a wall.
Check that the wheels spin freely without any brake interference. Remove dirt or debris from the brake system, especially around the calipers and rotors.
Inspect the brake pads for wear and replace them if they’re too thin. Confirm that the brake fluid reservoir is filled to the right level and look for leaks.
Having a clean, stable bike setup will prevent unnecessary problems during adjustments. Once everything is checked and in order, you’re ready to fine-tune your hydraulic brakes for peak performance.
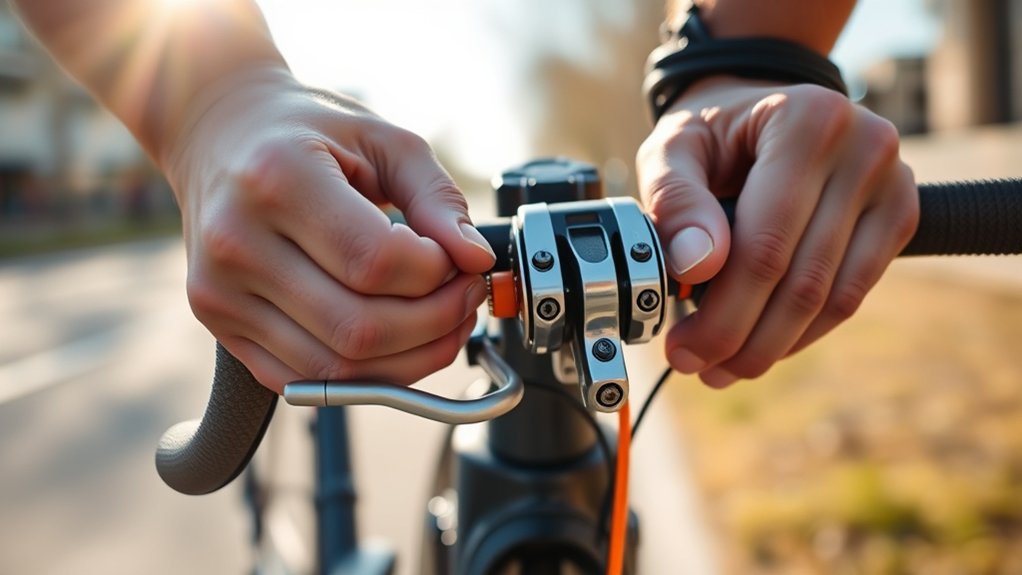
Adjust Brake Lever Reach for Better Control
To improve your control and comfort, adjusting the brake lever reach ensures the levers feel just right in your hands.
Start by locating the reach adjustment screw, usually near the lever pivot. Use an Allen wrench or screwdriver, depending on your bike’s model.
Turn the screw clockwise to bring the lever closer to your handlebar or counterclockwise to move it farther away. Test the feel by squeezing the lever; it should be comfortable without overextending your fingers.
Make small adjustments and check again until you find the perfect position. Proper reach adjustment helps you apply braking force quickly and precisely.
It also reduces hand fatigue and improves overall control. This simple tweak can make a noticeable difference in your riding experience.
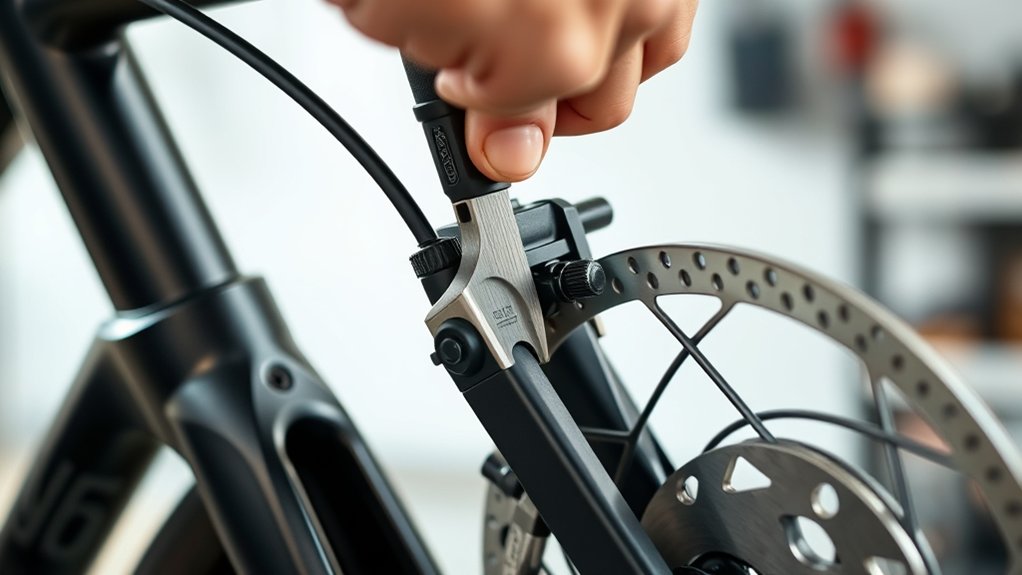
Align Brake Pads for Optimal Contact
Ensuring your brake pads are properly aligned is key for effective stopping and smooth braking. Misaligned pads can wear unevenly, cause noise, and reduce braking power.
Properly aligned brake pads ensure smooth stopping, reduce noise, and extend pad lifespan.
To align them, start by loosening the brake caliper bolts just enough so the pads can move freely. Squeeze the brake lever gently to center the pads against the rotor.
Next, carefully reposition the caliper so the pads sit evenly on both sides of the rotor. Tighten the caliper bolts securely while keeping the pads in proper contact.
Double-check that the pads are close to the rotor but not rubbing excessively. Proper alignment helps with better contact, improves braking, and makes your pads last longer.
How to Bleed Hydraulic Brakes and Remove Air Bubbles
When your brakes feel spongy or unresponsive, air bubbles might be trapped in the system. To fix this, you need to identify the bubbles, use the proper bleeding technique, and keep the brake fluid at the right level.
Mastering these steps guarantees your brakes perform reliably and safely.
Identifying Air Bubbles
How can you tell if your hydraulic brakes have air bubbles? You’ll notice a spongy or soft brake lever that doesn’t feel firm when you pull it. Sometimes, the brake lever may sink further than usual before engaging. To confirm, look for these signs:
- Brake lever feels inconsistent or sinks too easily.
- Reduced braking power or longer stopping distances.
- Visual air pockets or bubbles in the brake fluid reservoir.
- A soft, spongy brake lever that doesn’t firm up under pressure.
If you see or feel any of these, air bubbles are likely trapped in the system. Spotting these signs early helps prevent compromised braking performance and keeps your ride safe.
Proper Bleeding Technique
To effectively remove air bubbles from your hydraulic brake system, you’ll need to carefully bleed the brakes using the proper technique. Start by assembling your tools: a bleed kit, wrench, and rags.
Attach the reservoir cap, then open the bleed port on the brake caliper. Slowly squeeze the brake lever, allowing fluid and air to escape. Keep an eye on the brake fluid level and top it off as needed.
Use the table below to visualize the process:
| Step | Action | Result |
|---|---|---|
| Prepare | Gather tools, open bleed port | Access to system for bleeding |
| Bleeding | Squeeze lever, release slowly | Air bubbles escape |
| Top Off & Seal | Add fluid, close port | System sealed, air removed |
Repeat these steps until the brake lever feels firm without sponginess.
Maintaining Brake Fluid
Keeping your brake fluid fresh and properly maintained is key to making sure your hydraulic brakes work reliably. If your brakes feel spongy or don’t stop as well as they should, it’s probably time to bleed the system and get rid of any air bubbles.
Here’s how to do it: First, gather your supplies—like a syringe, the brake fluid recommended by your manufacturer, and a clean cloth. Open the bleed port on the brake caliper and attach the syringe filled with fluid.
Slowly push the fluid through the system by gently squeezing the brake lever to force out any air. Keep an eye out for bubbles and repeat the process if needed until the fluid runs clear and bubble-free.
Regularly maintaining your brake fluid helps prevent air from messing with your braking performance and keeps your ride safe.
Test Your Brakes and Keep Them Performing Smoothly
After you’ve adjusted your hydraulic brakes, it’s important to test them thoroughly to make sure they work safely and effectively. Squeeze the brake levers firmly and see if the brakes engage smoothly without any delay.
The levers should feel firm and responsive, not spongy or too loose. Check that the brake pads make even contact with the rims or rotors to provide strong stopping power.
Test your brakes at low speeds first, then gradually pick up your pace to make sure they perform consistently. Listen for any unusual noises or vibrations.
Regular testing helps you catch issues early, like air in the lines or worn pads. Keep your brakes in top shape by doing this test periodically, especially before long rides or after making adjustments.
Frequently Asked Questions
How Often Should I Check My Hydraulic Brake Fluid Levels?
You should check your hydraulic brake fluid levels every 2 to 4 months, or more often if you ride a lot or in wet conditions. Regular checks help keep your brakes responsive and safe.
Keep an eye out for a drop in brake lever feel or any fluid leaks. These signs mean you might need to top up the fluid. Always use the brake fluid recommended by the manufacturer and follow their instructions for proper maintenance.
Can I Upgrade to Higher-Performance Hydraulic Brake Components?
Absolutely, you can upgrade to higher-performance hydraulic brake components—think of it as turbocharging your stopping power! Just make sure they’re compatible with your bike’s frame and existing system.
Research top brands, check rider reviews, and consider professional installation if needed. Upgrading can dramatically improve your braking response, making your ride safer and more exhilarating.
With the right parts, you’ll feel like you’re controlling a race car, not just an e-bike!
What Safety Precautions Should I Take During Brake Adjustments?
You should wear safety glasses to protect your eyes from brake fluid or debris, and gloves to avoid skin contact with brake fluid, which can be irritating.
Make sure your bike is stable on a stand or securely supported to prevent falls.
Work in a well-ventilated area, especially when handling brake fluid, and keep a clean workspace to avoid accidents or contamination.
Always follow the manufacturer’s safety instructions.
Are There Specific Tools Needed for Hydraulic Brake Maintenance?
Yes, you’ll need specific tools for hydraulic brake maintenance. You’ll want a set of Allen wrenches to loosen and tighten bolts, a bleed kit to remove air bubbles and restore brake fluid, a syringe or brake fluid pump for refilling, and a clean cloth to wipe away spills.
These tools help you maintain safe, effective brakes, making sure your ride stays smooth and responsive. Proper tools make the job easier and safer.
How Do Temperature Changes Affect Hydraulic Brake Performance?
Temperature changes can really impact how your hydraulic brakes perform. When it’s cold, the brake fluid gets thicker, which can make your brakes less responsive and increase your stopping distances.
On the flip side, hot weather can cause the fluid to overheat, leading to brake fade and a loss of braking power. To keep things working smoothly, check your brake fluid regularly and avoid braking too long on steep descents.
It’s also a good idea to let your brakes cool down after heavy use. Proper maintenance helps ensure your brakes stay reliable no matter what the weather’s like.
Conclusion
Now that you know how to adjust your hydraulic brakes, you’ll feel more in control on your e-bike — like a captain steering a ship through calm waters. Regular maintenance keeps your brakes responsive and safe, so don’t hesitate to revisit these steps whenever needed.
With a little practice, adjusting your hydraulic brakes becomes second nature. It makes every ride smoother and more enjoyable. Keep your brakes in top shape and enjoy the ride ahead!