How to Measure a Mountain Bike in 7 Essential Steps
Many mountain bike enthusiasts struggle with finding the perfect fit, which can make rides uncomfortable and even unsafe. You’re not alone—getting your bike properly measured is key to enjoying smooth, confident rides.
Luckily, there’s a simple process to help you dial in your fit and ride comfortably.
To measure your mountain bike in 7 essential steps, start by finding your inseam length to determine the ideal frame height. Next, check the top tube length to guarantee a comfortable reach with a slight arm bend.
Assess the standover height, aiming for 1-2 inches of clearance. Then, pick the right wheel size based on your terrain and style.
Adjust your seat and handlebars, then test ride to confirm a perfect fit. Keep going, and you’ll uncover more ways to fine-tune your ride.
Key Takeaways
– Measure your inseam length by standing straight and placing a book from the floor to your crotch.
Then, multiply that number by 0.67 to find your ideal frame height.
– Check the top tube length by measuring from the head tube to the seat tube.
This helps ensure you have a comfortable reach, with a slight bend in your arms.
– Assess your standover height by standing over the bike.
Aim for about 1-2 inches of clearance between the top tube and your crotch.
– Choose your wheel size based on your terrain and riding style—options are 26″, 27.5″, or 29″.
This choice impacts handling and stability, so pick what suits your needs best.
– Confirm the bike size you select reduces strain on your joints.
It should also promote efficient pedaling and better control on trails.
Why Getting Your Mountain Bike Size Right Matters
Although it might seem minor, choosing the right mountain bike size directly impacts your comfort and control on the trail. When your bike fits well, you can ride longer without feeling uncomfortable, which helps reduce strain on your back, knees, and wrists.
A properly sized bike also gives you better handling, making it easier to navigate tricky terrain and stay balanced. On the flip side, a bike that’s too small or too big can cause fatigue and even lead to injuries, cutting your ride short.
Getting the right size also boosts your pedaling efficiency, so you can put more power into each push with less effort. Focusing on finding the perfect fit early on sets you up for safer, more enjoyable rides.
The right bike size enhances pedaling power and effort, ensuring safer and more enjoyable rides.
Don’t overlook this step. It’s key to riding confidently and having fun every time you hit the trail.
Measure Your Inseam to Find the Perfect Frame Height
To find the perfect frame height, start by measuring your inseam accurately.
Stand straight with your feet about six inches apart and measure from the floor to your crotch.
This inseam length helps you choose a frame that fits your body for better control and comfort.
Inseam Measurement Technique
Your inseam measurement is key to finding the right mountain bike frame height. To get an accurate measurement, just follow these simple steps:
- Stand barefoot with your back against a wall, feet about 6-8 inches apart. Place a book or flat object between your legs, pressing it firmly up to your crotch to mimic the bike seat.
- Mark the top edge of the book on the wall. Make sure the book is level and pressed firmly against you.
- Measure the distance from the floor to the mark using a tape measure. This is your inseam length, usually in centimeters or inches.
With this precise inseam measurement, you can confidently pick a mountain bike frame that fits well and makes riding more comfortable.
Frame Height Correlation
Knowing your inseam measurement gives you a solid starting point for choosing the right mountain bike frame height. Your inseam directly correlates with the frame size that will offer comfort, control, and efficient pedaling.
Typically, multiply your inseam length in centimeters by 0.67 to estimate the ideal frame height. For example, if your inseam is 80 cm, a frame around 54 cm suits you well.
This method guarantees you won’t struggle with a frame that’s too tall or short, preventing discomfort and potential injury. Remember, a properly sized frame lets you stand over the bike with a couple of inches of clearance, allowing safe, confident rides every time.
Use your inseam as a reliable guide to find a mountain bike that fits perfectly.
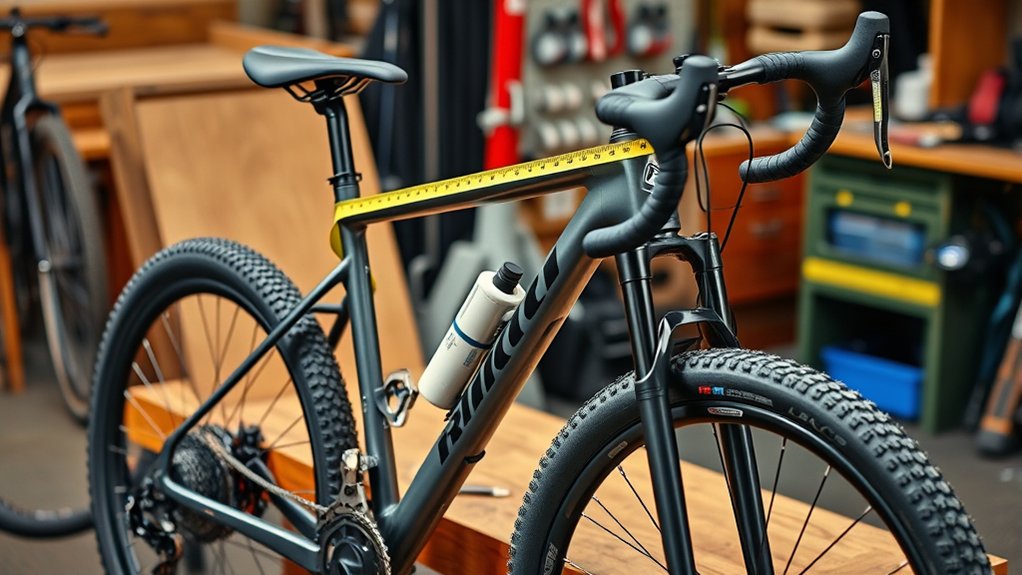
Check the Top Tube Length for Comfortable Reach
One key measurement for a comfortable mountain bike fit is the top tube length. It shows how far you’ll reach when holding the handlebars and affects your comfort and control.
To check the top tube length, measure from the center of the head tube (where the front fork attaches) to the center of the seat tube (where the seat post goes).
Compare this measurement to your torso and arm length. This helps ensure you won’t feel cramped or overstretched while riding.
Finally, sit on the saddle and hold the handlebars. Your arms should have a slight bend, not be fully extended or locked.
Checking this length helps you avoid discomfort and makes handling easier on rough trails.
Assess the Standover Height for Safe Mountain Bike Fit
After checking the top tube length to ensure a comfortable reach, it’s also important to assess the standover height for safety. Stand over the bike with your feet flat on the ground. Measure the distance between the top tube and your crotch.
Ideally, you want about 1 to 2 inches of clearance. This helps prevent injury if you need to stop suddenly or dismount quickly. Too little clearance means the frame is too tall, while too much might mean it’s too small and affects control.
Make sure you’re wearing your usual riding shoes during this check to get an accurate fit. A proper standover height lets you confidently maneuver your mountain bike without risking discomfort or injury on rough trails.
Choose the Right Wheel Size for Your Mountain Bike Fit
While selecting a mountain bike, you’ll need to evaluate the wheel size carefully, as it directly affects handling, comfort, and fit. Choosing the right size guarantees you ride efficiently and enjoyably. Here’s what you should consider:
- 26-inch wheels offer nimble handling and are great for technical trails, but they’re less common on newer bikes.
- 27.5-inch wheels strike a balance between agility and stability, fitting most riders comfortably and adapting well to varied terrain.
- 29-inch wheels roll over obstacles smoothly and maintain speed, making them ideal if you want better traction and a more comfortable ride over long distances.
Pick a wheel size that matches your riding style, terrain, and body size to maximize your mountain biking experience.
Adjust Seat and Handlebars to Perfect Your Mountain Bike Fit
Fine-tuning your seat and handlebars can truly change your ride, making it more comfortable and in control. Start by adjusting the seat height so your leg is almost fully extended at the pedal’s lowest point.
Next, set the seat angle to keep your pelvis stable without causing pressure. Then, align your handlebars to match your riding style—higher for comfort, lower for speed.
| Adjustment Area | Key Tip | Benefit |
|---|---|---|
| Seat Height | Leg nearly straight | Efficient pedaling |
| Seat Angle | Level or slight tilt | Pelvic stability |
| Handlebar Height | Match your riding style | Better control |
| Handlebar Reach | Comfortable stretch | Less arm fatigue |
These simple tweaks help you ride longer with less strain.
Test Ride to Check Your Mountain Bike Fit
Once you’ve adjusted your seat and handlebars, it’s time to take your bike for a test ride to see how those changes feel in action. Pay close attention to comfort, control, and efficiency during your ride. Here’s what to focus on:
- Comfort: Notice if your knees bend properly without strain, and if your back feels natural. Discomfort means you need further adjustment.
- Control: Make sure you can easily reach the brakes and shifters without stretching or slipping. Good control boosts your confidence on trails.
- Efficiency: Check if your pedaling feels smooth and powerful. If you’re struggling or feeling cramped, tweak your fit.
Repeat adjustments and test rides until your bike feels just right, ensuring an enjoyable, safe ride every time.
Frequently Asked Questions
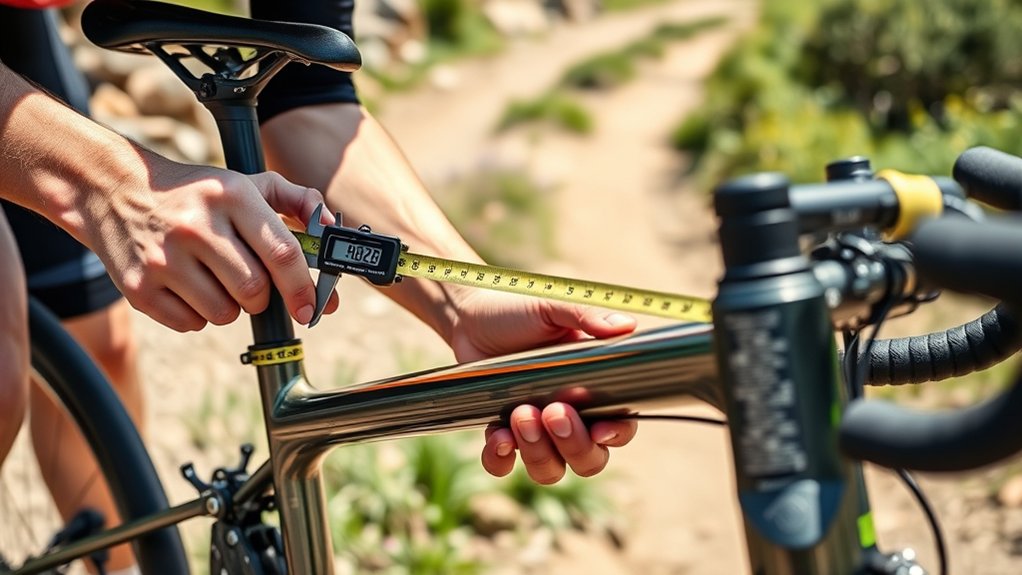
What Tools Do I Need to Measure My Mountain Bike Accurately?
You’ll need a tape measure or a ruler to get accurate measurements of your mountain bike.
A level can help ensure you measure straight lines, especially for frame angles.
A digital caliper is great for precise measurements of smaller parts like the seat post diameter.
Having a notebook or app handy lets you record your findings easily.
With these tools, you’ll confidently measure your bike’s frame, wheels, and components accurately.
How Often Should I Recheck My Mountain Bike Fit?
Think of your mountain bike fit like a well-tuned musical instrument. If you don’t check it regularly, the harmony falters.
You should recheck your fit every few months or after any big ride changes, like new terrain or gear adjustments.
If you start feeling discomfort or pain, don’t wait—get it checked.
Regular check-ins keep you riding smoothly, prevent injuries, and boost your performance.
Make it part of your bike care routine so your ride stays comfortable and efficient.
Can I Use the Same Measurements for Road and Mountain Bikes?
You can’t use the exact same measurements for road and mountain bikes because they have different frame geometries and riding styles. Mountain bikes usually have a more upright position and shorter top tubes, while road bikes favor a stretched-out posture.
However, your inseam and torso length still help guide your sizing. Always test ride and adjust each bike’s fit individually to guarantee comfort and control for the terrain you’ll ride.
Does Frame Material Affect the Sizing of a Mountain Bike?
Yes, frame material does affect the sizing of a mountain bike, but not always in obvious ways. You might think heavier steel frames feel bigger, while lighter carbon frames seem smaller, right?
But the reality is, materials influence stiffness and how the bike feels more than the actual size. So, when choosing your bike, focus on fit and comfort first. Frame material comes second, shaping your ride experience rather than the exact frame dimensions.
How Do Tire Width and Tread Affect Mountain Bike Handling?
Tire width and tread directly impact how your mountain bike handles. Wider tires give you more grip and stability, especially on loose or uneven terrain. Narrower tires roll faster on hard-packed trails.
Tread patterns affect traction. Aggressive, knobby treads dig into mud and rocks for better control. Smoother treads provide less rolling resistance on smoother surfaces.
You’ll want to pick the right combo based on where and how you ride.
Conclusion
Getting your mountain bike size right isn’t just important. It’s like finding the perfect pair of jeans that fit so well, you feel unstoppable. Measure your inseam, check that top tube, and don’t forget the standover height. It’s your safety net!
Pick the right wheels, tweak your seat and handlebars, then take it for a spin. Nail these steps, and you’ll conquer trails like a mountain biking superhero. Trust me, your bike and knees will thank you!
Remember, choosing the correct mountain bike size makes all the difference. It’s the key to comfort, control, and confidence on every ride.